90 - Get the Most out of a Plunge Router, страница 46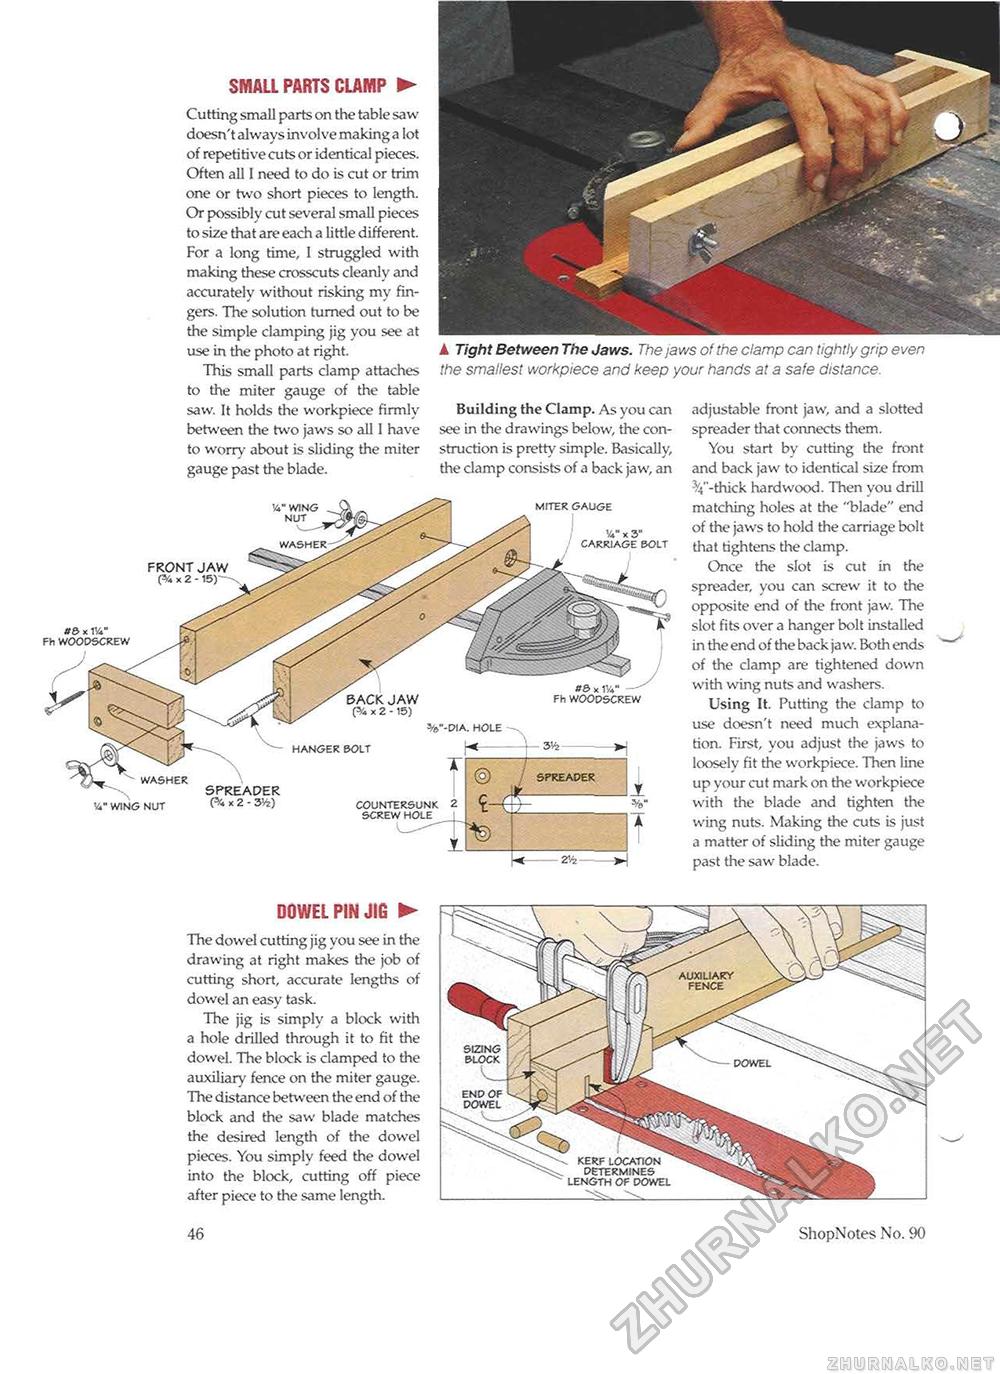
SMALL PARTS CLAMP ► tt& x IVi" Fh WOODSCREW Cutting small parts on the table saw doesn't always involve making a lot of repetitive cuts or identical pieces. Often all I need to do is cut or trim one or two short pieces to length. Or possibly cut several small pieces to size that are each a little different. For a long time, I struggled with making these crosscuts cleanly and accurately without risking my fingers. The solution turned out to be the simple clamping jig you see at use in the photo at right. This small parts clamp attaches to the miter gauge of the table saw. It holds the workpiece firmly between the two jaws so all 1 have to worry about is sliding the miter gauge past the blade. !4" WING NUT ▲ Tight Between The Jaws. The jaws of the clamp can tightly grip even the smallest workpiece and keep your hands at a safe distance. Building the Clamp. As you can see in the drawings below, the construction is pretty simple. Basically, the clamp consists of a back jaw, an MITER GAUGE V x 3" CARRIAGE BOLT FRONT JAW ('/« x 2 -15) -'»"-DIA. HOLE HANGER BOLT SPREADER COUNTERSUNK SCREW HOLE adjustable front jaw, and a slotted spreader that connects them. You start bv cutting the front and back jaw to identical size from V-thick hardwood. Then you drill matching holes at the "blade" end of the jaws to hold the carriage bolt that tightens the clamp. Once the slot is cut in the spreader, you can screw it to the opposite end of the front jaw. The slot fits over a hanger bolt installed in the end of the back jaw. Both ends of the clamp are tightened down with wing nuts and washers. Using It. Putting the clamp to use doesn't need much explanation. First, you adjust the jaws to loosely fit the workpiece. Then line up your cut mark on the workpiece with the blade and tighten the wing nuts. Making the cuts is just a matter of sliding the miter gauge past the saw blade. DOWEL PIN JIG ► The dowel cutting jig you see in the drawing at right makes the job of cutting short, accurate lengths of dowel an easy task. The jig is simply a block with a hole drilled through it to fit the dowel. The block is clamped to the auxiliary fence on the miter gauge. The distance between the end of the block and the saw blade matches the desired length of the dowel pieces. You simply feed the dowel into the block, cutting off piece after piece to the same length. AUXILIARY FENCE DOWEL END OF DOWEL KERF LOCATION DETERMINES LENGTH OF DOWEL 46 ShopNotes No. 90 |


