92, страница 14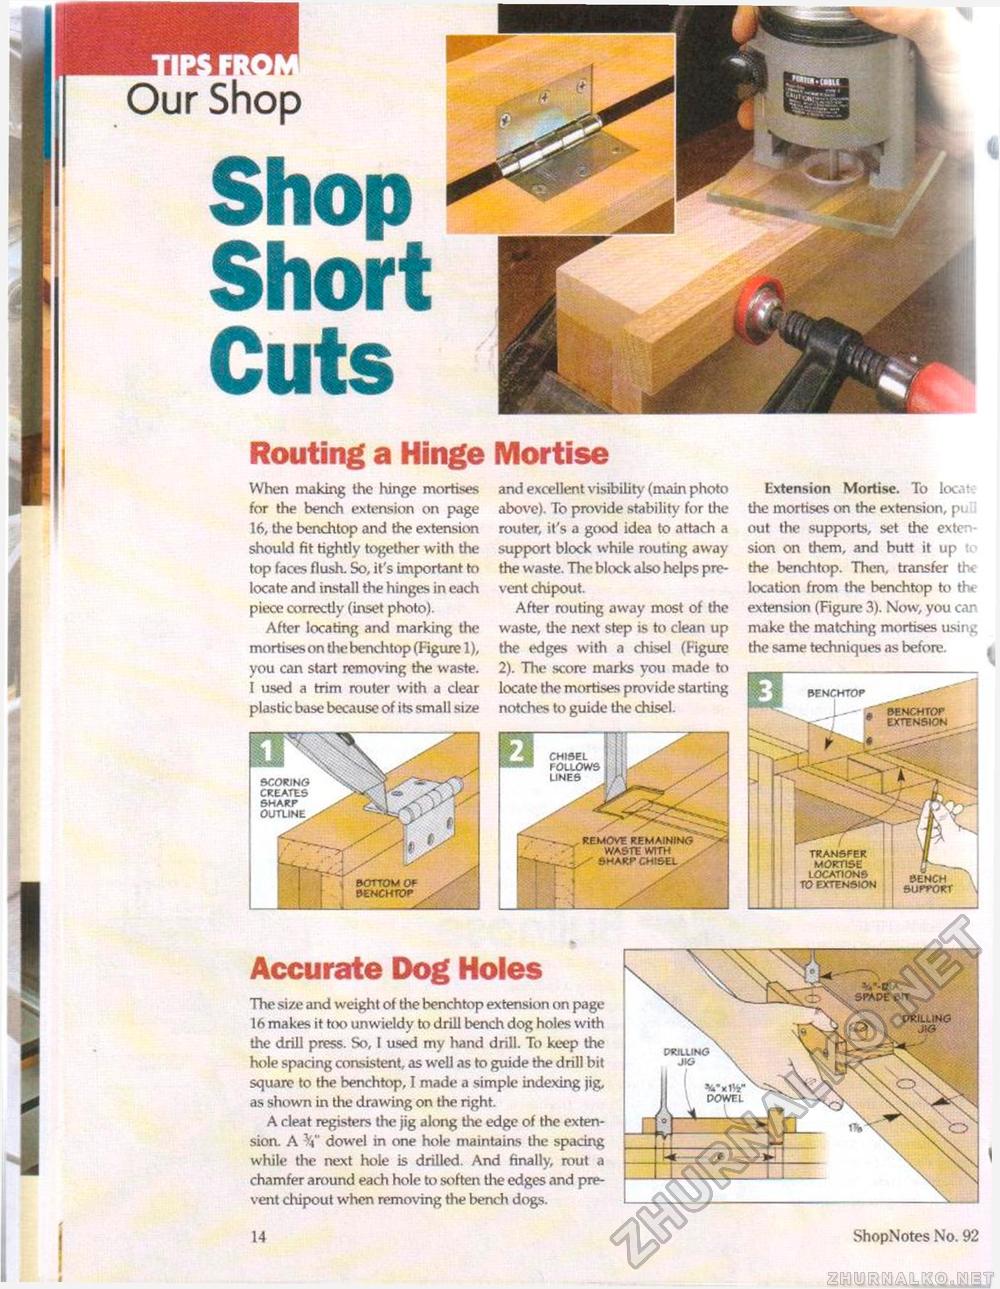
Shop ShortCutsRouting a Hinge Mortise When making the hinge mortises and excellent visibility (main photo for the bench extension on page above). To provide stability for the 16, the benchtop and the extension router, it's a good idea to attach a should fit tightly together with the support block while routing away top faces flush. So, it's important to the waste. The block also helps pre- locate and install the hinges in each vent chipout. piece correctly (inset photo). After routing away most of the After locating and marking the waste, the next step is to clean up mortises on the benchtop (Figure 1), the edges with a chisel (Figure you can start removing the waste. 2). Hie score marks you made to I used a trim router with a clear locate the mortises provide starting plastic base because of its small size notches to guide the chisel. Extension Mortise. To locat the mortises on the extension, pi. out the supports, set the extension on them, and butt it up the benchtop. Then, transfer the location from the benchtop to th< extension (Figure 3). Now, you can make the matching mortises using the same techniques as before. benchtop benchtop extension chisel follows lines scoring creates sharp outline remove remaining waste with sharp chisel transfer mortise locations to extension bottom OF benchtop Accurate Dog Holes The size and weight of the benchtop extension on page 16 makes it too unwieldy to drill bench dog holes with the drill press. So, I used my hand drill. To keep the hole spacing consistent, as well as to guide the drill bit square to the benchtop, I made a simple indexing jig, as shown in the drawing on the right. A cleat registers the jig along the edge of the extension. A dowel in one hole maintains the spacing while the next hole is drilled. And finally, rout a chamfer around each hole to soften the edges and prevent chipout when removing the bench dogs. prilling JIG prilling jig dowel 14 ShopNotes No. 1)2 % |


