92, страница 15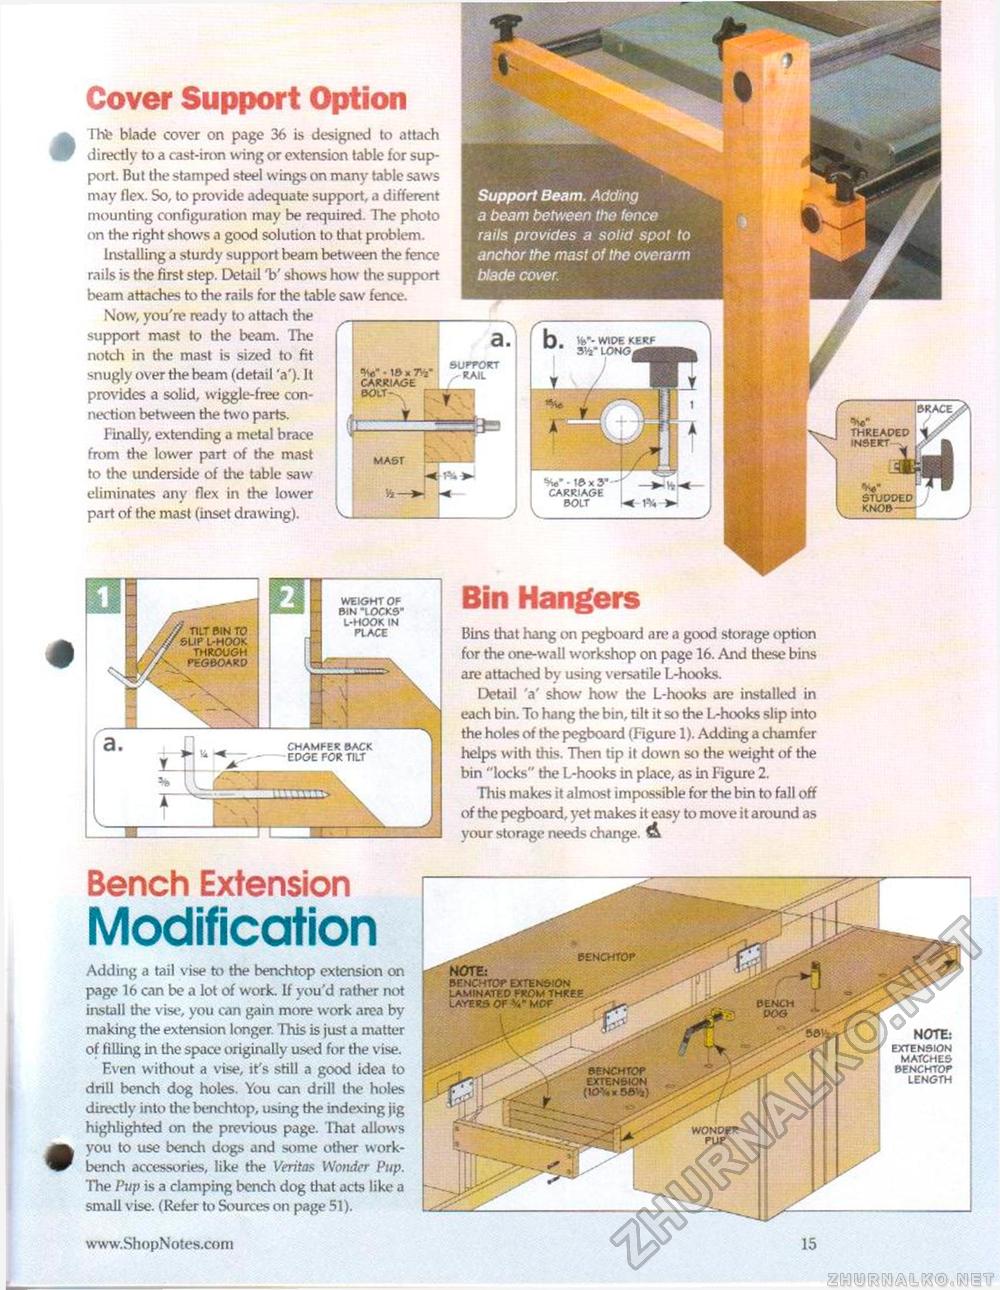
Cover Support Option Thfe blade cover on page 36 is designed to attach directly to a cast-iron wing or extension table tor support. But the stamped steel wings on many table saws may flex. So, to provide adequate support, a different mounting configuration may be required. The photo on the right shows a good solution to that problem Installing a sturdy support beam between the fence rails is the first step. Detail 'b' shows how the support beam attaches to the rails for the table saw fence. Now, you're ready to attach the support mast to the beam. The notch in the mast is sized to fit snugly over the beam (detail 'a'). It provides a solid, wiggle-free connection between the two parts. Finally, extending a metal brace from the lower part of the mast to the underside of the table saw eliminates any flex in the lower part of the mast (inset drawing). Support Beam. Adding a beam between the fence rails provides a solid spot to anchor the mast of the overarm blade cover. a. %f • ib x w carriage mast fc- support ^ rail I Bin Hangers Bins that hang on pegboard are a good storage option for the one-wall workshop on page 16. And these bins are attached by using versatile L-hooks. Detail 'a' show how the L-hooks are installed in each bin. To hang the bin, tilt it so the L-hooks slip into the holes of the pegboard (Figure 1). Adding a chamfer helps with this. Then tip it down so the weight of the bin "locks" the L-hooks in place, as in Figure 2. This makes it almost impossible for the bin to fall off of the pegboard, yet makes it easy to move it around as your storage needs change. A |bracex> / J? threaped """iij studded j knob--y Bench Extension Modification Adding a tail vise to the benchtop extension on page 16 can be a lot of work. If you'd rather not iastall the vise, you can gain more work area by making the extension longer. This is just a matter of filling in the space originally used for the vise. Even without a vise, it's still a good idea to drill bench dog holes. You can drill the holes directly into the benchtop, using the indexing jig highlighted on the previous page. That allows you to use bench dogs and some other workbench accessories, like the Veritas Wonder Pup. The Pup is a clamping bench dog that acts like a small vise. (Refer to Sources on page 51). 15 |


