92, страница 20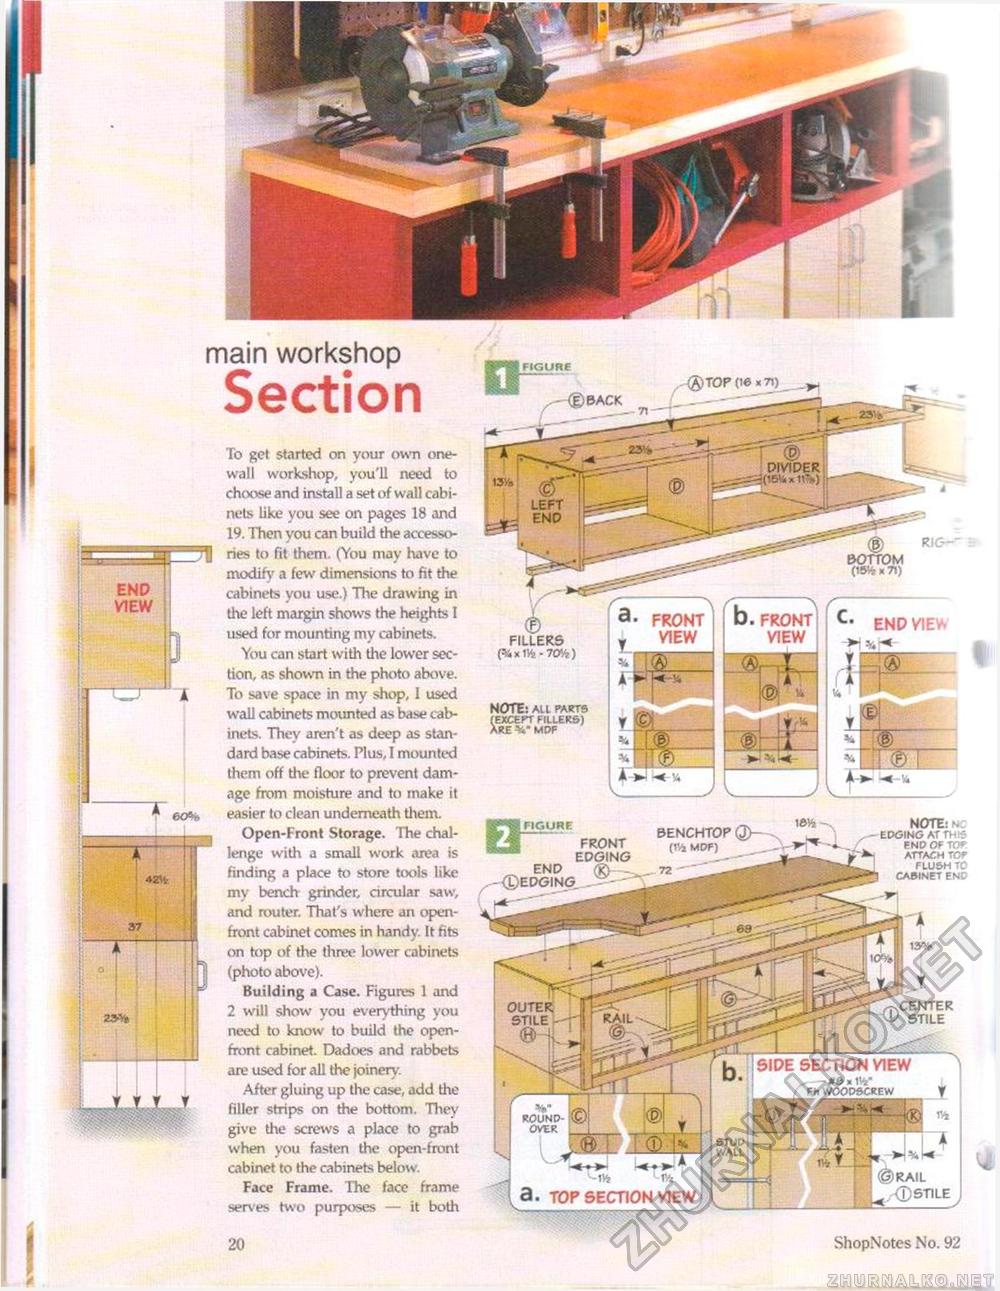
20 ShopNotes No. 1)2 main workshop Section FIGURE (g)BACK To get started on your own one-wall workshop, you'll need to choose and install a set of wall cabinets like you see on pages 18 and 19. Then you can build the accessories to fit them. (You may have to modify a few dimensions to fit the cabinets you use.) The drawing in the left margin shows the heights I used for mounting my cabinets. You can start with the lower section, as shown in the photo above. To save space in my shop, 1 used wall cabinets mounted as base cabinets. They aren't as deep as standard base cabinets. Plus, I mounted them off the floor to prevent damage from moisture and to make it easier to clean underneath them. Open-Front Storage. The challenge with a small work area is finding a place to store tools like my bench grinder, circular saw, and router. That's where an open-front cabinet comes in handy. It fits on top of the three lower cabinets (photo above). Building a Case. Figures 1 and 2 will show you everything you need to know to build the open-front cabinet. Dadoes and rabbets are used for all the joinery. After gluing up the case, add the filler strips on the bottom. They give the screws a place to grab when you fasten the open-front cabinet to the cabinets below. Face Frame. The face frame serves two purposes — it both DIVIDER BOTTOM (15^ x 71) FRONT VIEW FRONT VIEW FILLERS note: ALL PARTS (EXCEPT FILLERS) ARE %s" MDF note: NO EDGING AT TH if END OF TO^ ATTACH TCf FLUSH TO CABINET END FIGURE benchtop q)~ (t'4 MDF) front edging end <£)edging outer stile SIDE SECTION VIEW ^ -#6x114" (_ FhWCODSCREW ROUND-OVER StUD WALL ©rail XD stile 3. TOP SECTION VIEW |


