93, страница 43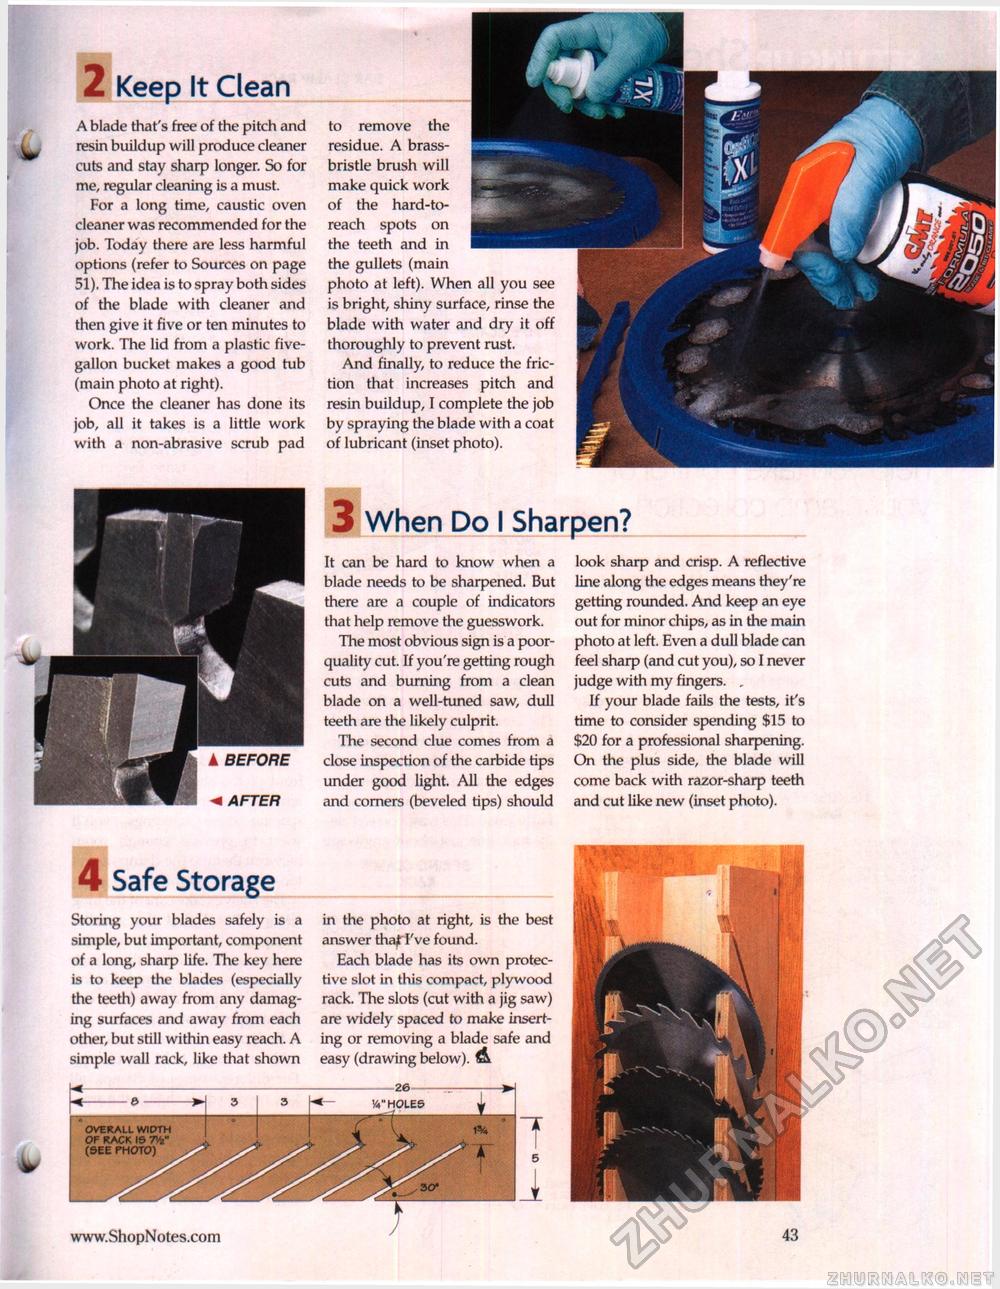
2 Keep It Clean A blade that's free of the pitch and resin buildup will produce cleaner cuts and stay sharp longer. So for me, regular cleaning is a must. For a long time, caustic oven cleaner was recommended for the job. Today there are less harmful options (refer to Sources on page 51). The idea is to spray both sides of the blade with cleaner and then give it five or ten minutes to work. The lid from a plastic five-gallon bucket makes a good tub (main photo at right). Once the cleaner has done its job, all it takes is a little work with a non-abrasive scrub pad to remove the residue. A brass-bristle brush will make quick work of the hard-to-reach spots on the teeth and in the gullets (main photo at left). When all you see is bright, shiny surface, rinse the blade with water and dry it off thoroughly to prevent rust. And finally, to reduce the friction that increases pitch and resin buildup, I complete the job by spraying the blade with a coat of lubricant (inset photo). 3 When Do I Sharpen? ▲ BEFORE M AFTER It can be hard to know when a blade needs to be sharpened. But there are a couple of indicators that help remove the guesswork. The most obvious sign is a poor-quality cut. If you're getting rough cuts and burning from a clean blade on a well-tuned saw, dull teeth are the likely culprit. The second clue comes from a close inspection of the carbide tips under good light. All the edges and corners (beveled tips) should look sharp and crisp. A reflective line along the edges means they're getting rounded. And keep an eye out for minor chips, as in the main photo at left. Even a dull blade can feel sharp (and cut you), so I never judge with my fingers. , If your blade fails the tests, it's time to consider spending $15 to $20 for a professional sharpening. On the plus side, the blade will come back with razor-sharp teeth and cut like new (inset photo). 4 Safe Storage Storing your blades safely is a simple, but important, component of a long, sharp life. The key here is to keep the blades (especially the teeth) away from any damaging surfaces and away from each other, but still within easy reach. A simple wall rack, like that shown in the photo at right, is the best answer tha^ I've found. Each blade has its own protective slot in this compact, plywood rack. The slots (cut with a jig saw) are widely spaced to make inserting or removing a blade safe and easy (drawing below). OVERALL WIDTH OF RACK \e 7V (SEE photo) 30* |


