94, страница 31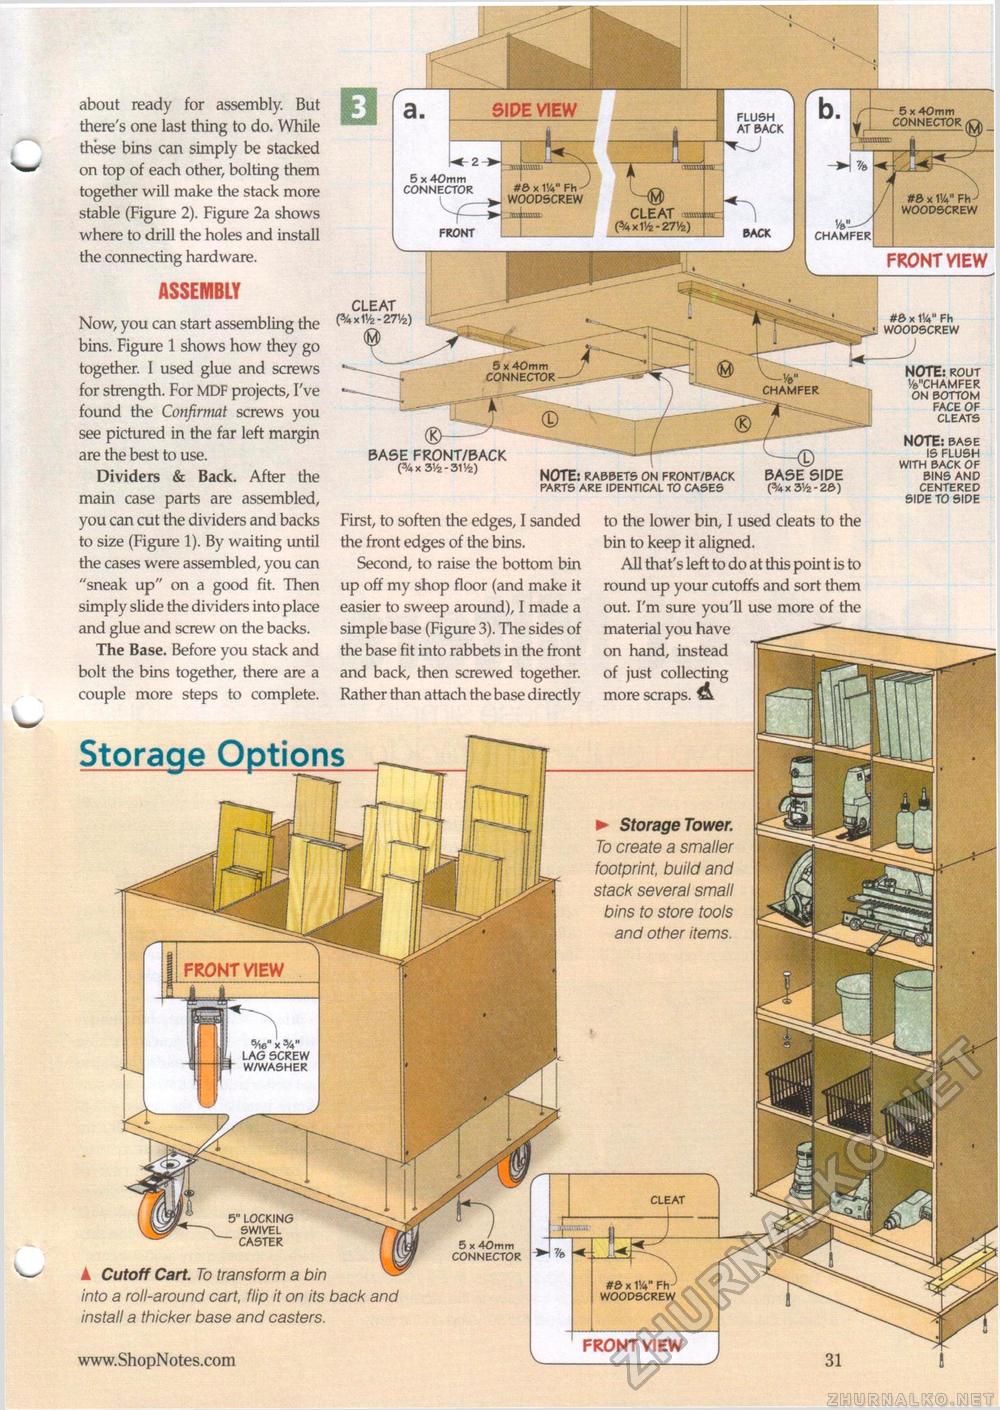
about ready for assembly. But there's one last thing to do. While these bins can simply be stacked on top of each other, bolting them together will make the stack more stable (Figure 2). Figure 2a shows where to drill the holes and install the connecting hardware. ASSEMBLY Now, you can start assembling the bins. Figure 1 shows how they go together. I used glue and screws for strength. For MDF projects, I've found the Confirmat screws you see pictured in the far left margin are the best to use. Dividers & Back. After the main case parts are assembled, you can cut the dividers and backs to size (Figure 1). By waiting until the cases were assembled, you can "sneak up" on a good fit. Then simply slide the dividers into place and glue and screw on the backs. The Base. Before you stack and bolt the bins together, there are a couple more steps to complete. BASE FRONT/SACK (3/4X3'/2-31 Vfe) NOTE: rabbets on front/back parts are identical to cases BASE SIDE (3/4x3V2-20) NOTE: rout va"chamfer on bottom face of cleats NOTE: base is flush with back of bins and centered side to side First, to soften the edges, I sanded the front edges of the bins. Second, to raise the bottom bin up off my shop floor (and make it easier to sweep around), I made a simple base (Figure 3). The sides of the base fit into rabbets in the front and back, then screwed together. Rather than attach the base directly to the lower bin, I used cleats to the bin to keep it aligned. All that's left to do at this point is to round up your cutoffs and sort them out. I'm sure you'll use more of the material you have on hand, instead of just collecting more scraps. ^ Storage Options ► Storage Tower. To create a smaller footprint, build and stack several small bins to store tools and other items. ▲ Cutoff Cart. To transform a bin into a roll-around cart, flip it on its back and install a thicker base and casters. www.ShopNotes.com • 31 FRONT VIEW |


