94, страница 34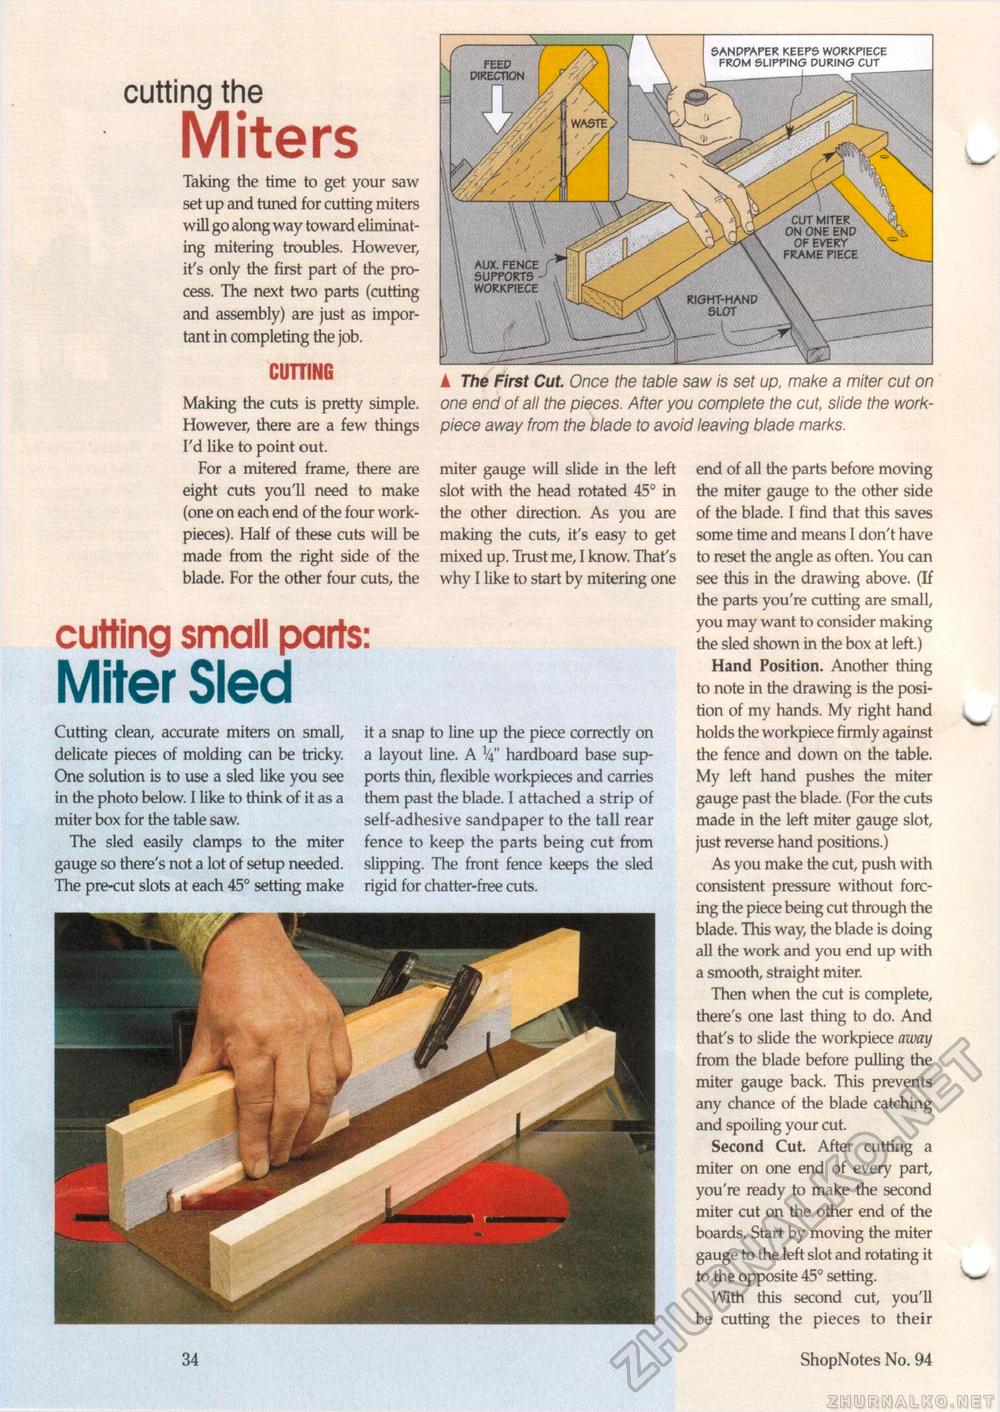
cutting the Miters Taking the time to get your saw set up and tuned for cutting miters will go along way toward eliminating mitering troubles. However, it's only the first part of the process. The next two parts (cutting and assembly) are just as important in completing the job. CUTTING feed direction CUT MITER ON ONE END OF EVERY FRAME PIECE AUX. FENCE SUPPORTS -WORKPIECE RIGHT-HAND SLOT Making the cuts is pretty simple. However, there are a few things I'd like to point out. For a mitered frame, there are eight cuts you'll need to make (one on each end of the four work-pieces). Half of these cuts will be made from the right side of the blade. For the other four cuts, the ▲ The First Cut. Once the table saw is set up, make a miter cut on one end of all the pieces. After you complete the cut, slide the work-piece away from the blade to avoid leaving blade marks. miter gauge will slide in the left slot with the head rotated 45° in the other direction. As you are making the cuts, it's easy to get mixed up. Trust me, I know. That's why I like to start by mitering one cutting small parts: Miter Sled Cutting clean, accurate miters on small, delicate pieces of molding can be tricky. One solution is to use a sled like you see in the photo below. I like to think of it as a miter box for the table saw. The sled easily clamps to the miter gauge so there's not a lot of setup needed. The pre-cut slots at each 45° setting make it a snap to line up the piece correctly on a layout line. A V4" hardboard base supports thin, flexible workpieces and carries them past the blade. I attached a strip of self-adhesive sandpaper to the tall rear fence to keep the parts being cut from slipping. The front fence keeps the sled rigid for chatter-free cuts. end of all the parts before moving the miter gauge to the other side of the blade. I find that this saves some time and means I don't have to reset the angle as often. You can see this in the drawing above. (If the parts you're cutting are small, you may want to consider making the sled shown in the box at left.) Hand Position. Another thing to note in the drawing is the position of my hands. My right hand holds the workpiece firmly against the fence and down on the table. My left hand pushes the miter gauge past the blade. (For the cuts made in the left miter gauge slot, just reverse hand positions.) As you make the cut, push with consistent pressure without forcing the piece being cut through the blade. This way, the blade is doing all the work and you end up with a smooth, straight miter. Then when the cut is complete, there's one last thing to do. And that's to slide the workpiece away from the blade before pulling the miter gauge back. This prevents any chance of the blade catching and spoiling your cut. Second Cut. After cutting a miter on one end of every part, you're ready to make the second miter cut on the other end of the boards. Start by moving the miter gauge to the left slot and rotating it to the opposite 45° setting. With this second cut, you'll be cutting the pieces to their sandpaper keeps workpiece from slipping during cut 34 ShopNotes No. 94 |


