94, страница 33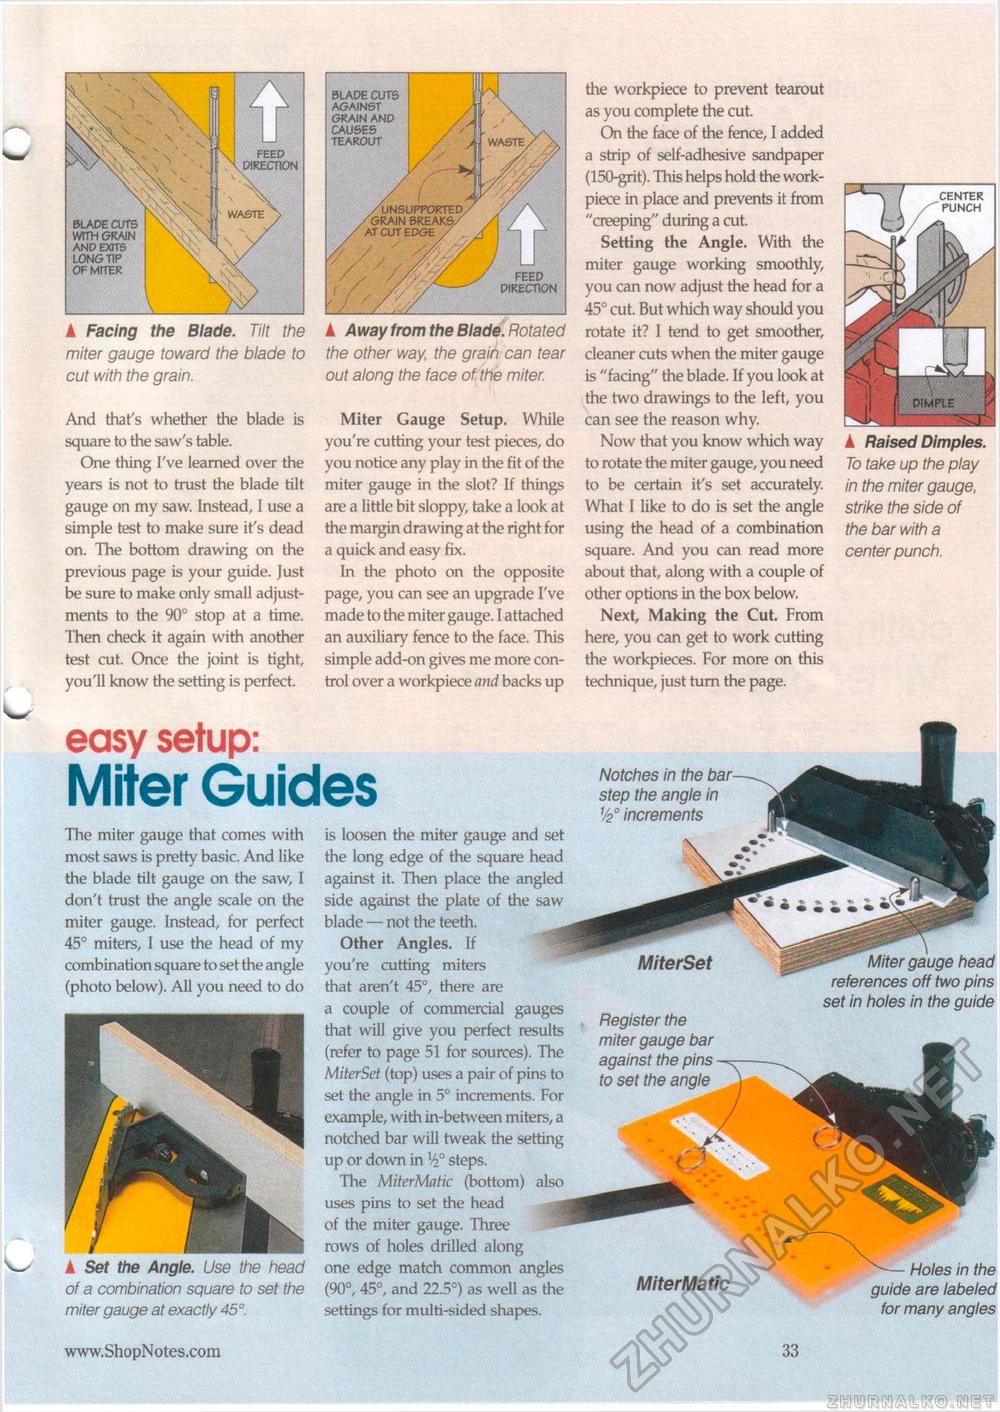
A Facing the Blade. Tilt the miter gauge toward the blade to cut with the grain. And that's whether the blade is square to the saw's table. One thing I've learned over the years is not to trust the blade tilt gauge on my saw. Instead, I use a simple test to make sure it's dead on. The bottom drawing on the previous page is your guide. Just be sure to make only small adjustments to the 90° stop at a time. Then check it again with another test cut. Once the joint is tight, you'll know the setting is perfect. easy setup: Miter Guides A Away from the Blade. Rotated the other way, the grain can tear out along the face of the miter. Miter Gauge Setup. While you're cutting your test pieces, do you notice any play in the fit of the miter gauge in the slot? If things are a little bit sloppy, take a look at the margin drawing at the right for a quick and easy fix. In the photo on the opposite page, you can see an upgrade I've made to the miter gauge. I attached an auxiliary fence to the face. This simple add-on gives me more control over a workpiece and backs up The miter gauge that comes with most saws is pretty basic. And like the blade tilt gauge on the saw, I don't trust the angle scale on the miter gauge. Instead, for perfect 45° miters, I use the head of my combination square to set the angle (photo below). All you need to do A Set the Angle. Use the head of a combination square to set the miter gauge at exactly 45°. is loosen the miter gauge and set the long edge of the square head against it. Then place the angled side against the plate of the saw blade — not the teeth. Other Angles. If you're cutting miters that aren't 45°, there are a couple of commercial gauges that will give you perfect results (refer to page 51 for sources). The Miter Set (top) uses a pair of pins to set the angle in 5° increments. For example, with in-between miters, a notched bar will tweak the setting up or down in steps. The MiterMatic (bottom) also uses pins to set the head of the miter gauge. Three rows of holes drilled along one edge match common angles (90°, 45°, and 22.5°) as well as the settings for multi-sided shapes. the workpiece to prevent tearout as you complete the cut. On the face of the fence, I added a strip of self-adhesive sandpaper (150-grit). This helps hold the work-piece in place and prevents it from "creeping" during a cut. Setting the Angle. With the miter gauge working smoothly, you can now adjust the head for a 45° cut. But which way should you rotate it? I tend to get smoother, cleaner cuts when the miter gauge is "facing" the blade. If you look at the two drawings to the left, you can see the reason why. Now that you know which way to rotate the miter gauge, you need to be certain it's set accurately. What I like to do is set the angle using the head of a combination square. And you can read more about that, along with a couple of other options in the box below. Next, Making the Cut. From here, you can get to work cutting the workpieces. For more on this technique, just turn the page. Notches in the bar step the angle in V20 increments A Raised Dimples. To take up the play in the miter gauge, strike the side of the bar with a center punch. Register the miter gauge bar against the pins to set the angle Miter gauge head references off two pins set in holes in the guide MiterMatic Holes in the guide are labeled for many angles • 33 |


