95, страница 28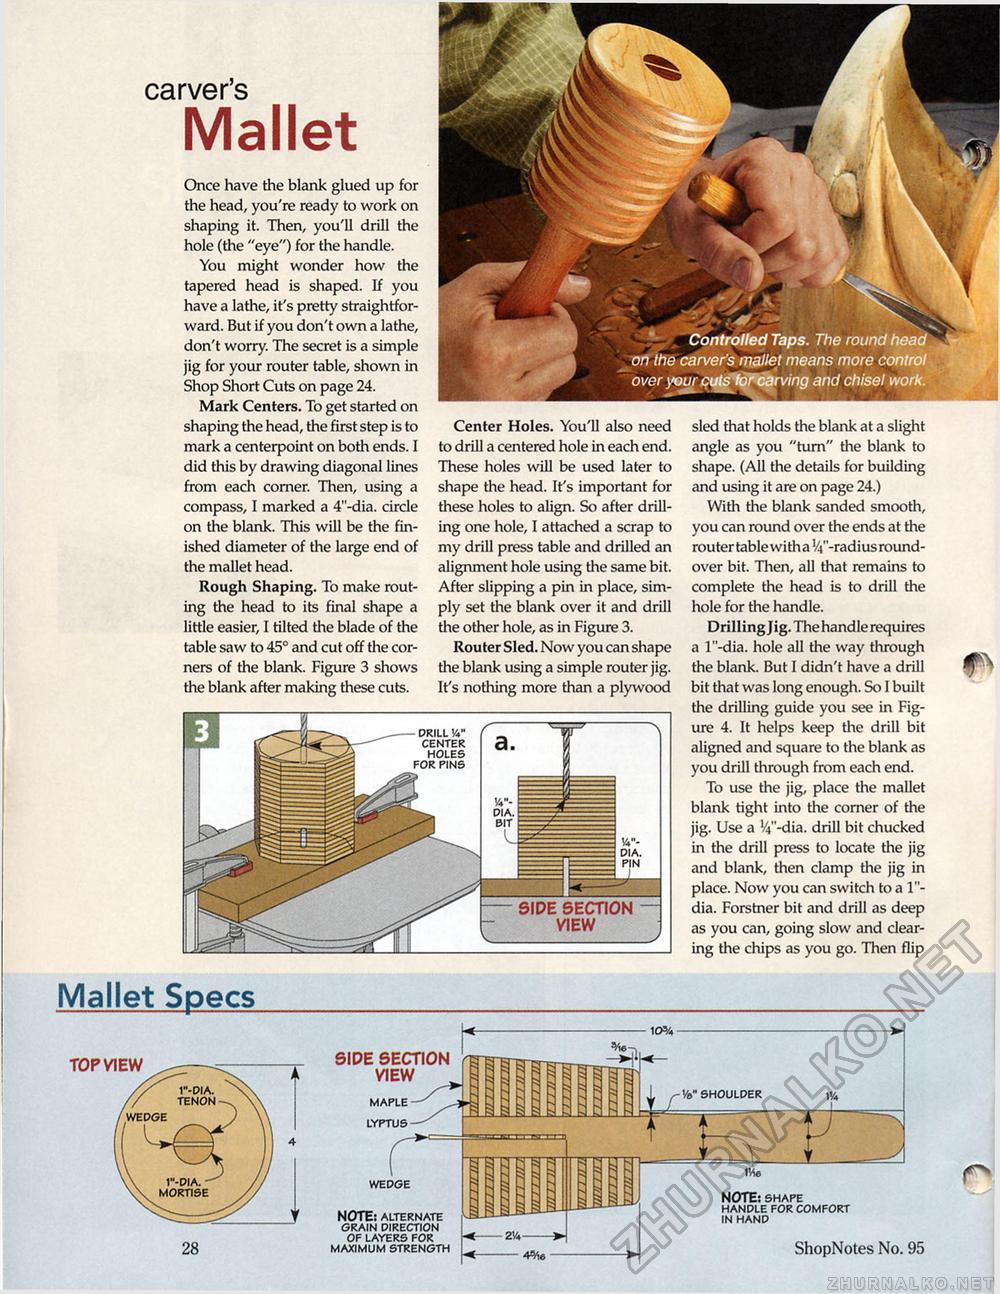
Illl V carver's Mallet Once have the blank glued up for the head, you're ready to work on shaping it. Then, you'll drill the hole (the "eye") for the handle. You might wonder how the tapered head is shaped. If you have a lathe, it's pretty straightforward. But if you don't own a lathe, don't worry. The secret is a simple jig for your router table, shown in Shop Short Cuts on page 24. Mark Centers. To get started on shaping the head, the first step is to mark a centerpoint on both ends. I did this by drawing diagonal lines from each corner. Then, using a compass, I marked a 4"-dia. circle on the blank. This will be the finished diameter of the large end of the mallet head. Rough Shaping. To make routing the head to its final shape a little easier, I tilted the blade of the table saw to 45° and cut off the corners of the blank. Figure 3 shows the blank after making these cuts. Center Holes. You'll also need to drill a centered hole in each end. These holes will be used later to shape the head. It's important for these holes to align. So after drilling one hole, I attached a scrap to my drill press table and drilled an alignment hole using the same bit. After slipping a pin in place, simply set the blank over it and drill the other hole, as in Figure 3. Router Sled. Now you can shape the blank using a simple router jig. It's nothing more than a plywood sled that holds the blank at a slight angle as you "turn" the blank to shape. (All the details for building and using it are on page 24.) With the blank sanded smooth, you can round over the ends at the routertablewithal4"-radius round-over bit. Then, all that remains to complete the head is to drill the hole for the handle. Drilling Jig. The handle requires a l"-dia. hole all the way through the blank. But I didn't have a drill bit that was long enough. So I built the drilling guide you see in Figure 4. It helps keep the drill bit aligned and square to the blank as you drill through from each end. To use the jig, place the mallet blank tight into the corner of the jig. Use a V^'-dia. drill bit chucked in the drill press to locate the jig and blank, then clamp the jig in place. Now you can switch to a 1"-dia. Forstner bit and drill as deep as you can, going slow and clearing the chips as you go. Then flip Mallet Specs SIDE SECTION VIEW maple lyptus NOTE: shape handle for comfort in hand 28 ShopNotes No. 95 wedge NOTE: alternate grain direction of layers for maximum strength Vb" shoulder TOP VIEW |


