95, страница 30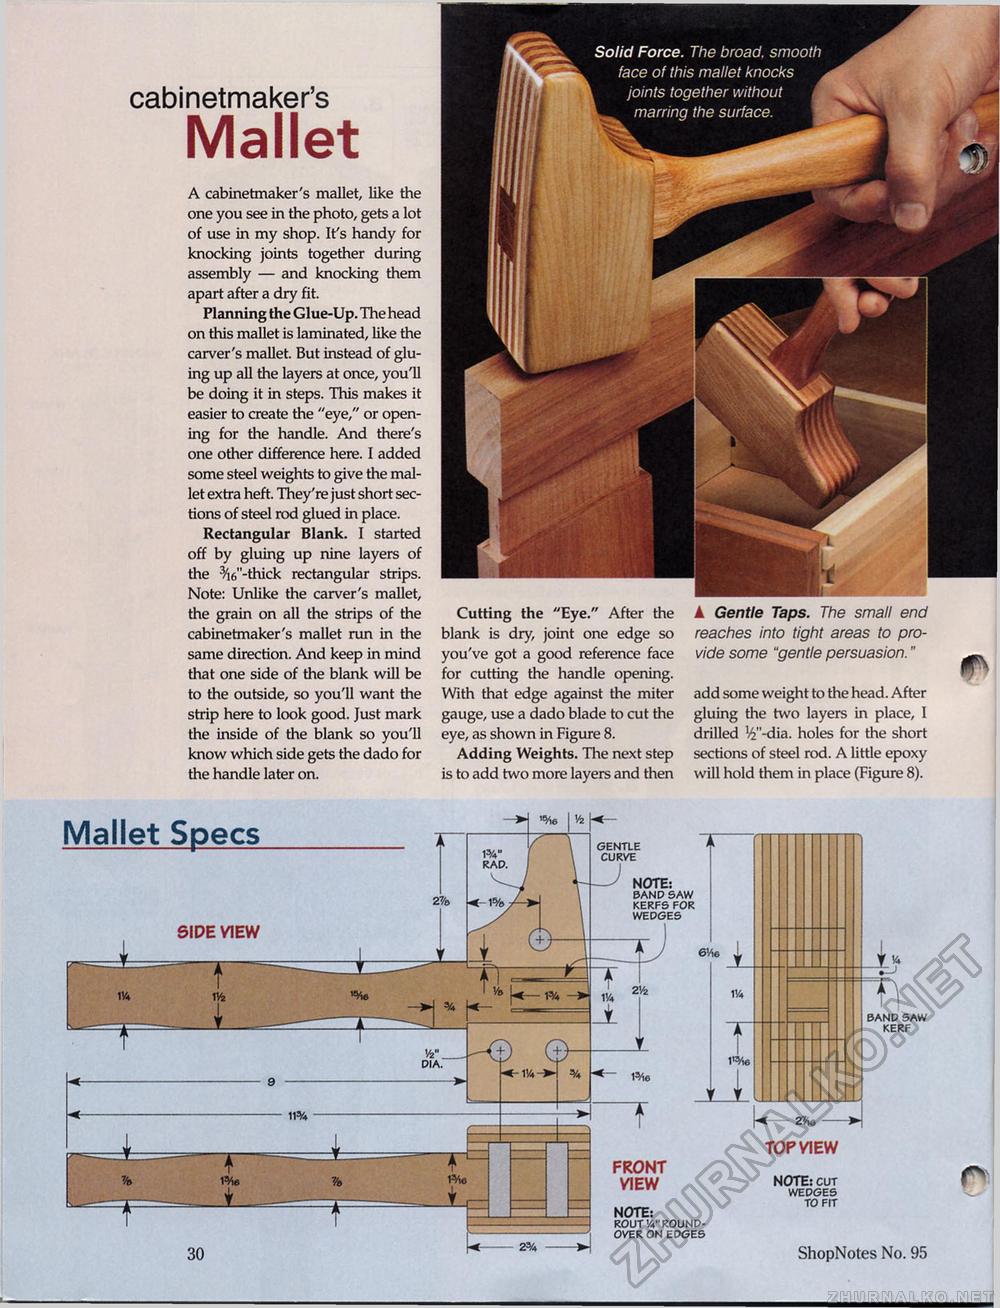
cabinetmaker's Mallet A cabinetmaker's mallet, like the one you see in the photo, gets a lot of use in my shop. It's handy for knocking joints together during assembly — and knocking them apart after a dry fit. Planning the Glue-Up. The head on this mallet is laminated, like the carver's mallet. But instead of gluing up all the layers at once, you'll be doing it in steps. This makes it easier to create the "eye," or opening for the handle. And there's one other difference here. I added some steel weights to give the mallet extra heft. They're just short sections of steel rod glued in place. Rectangular Blank. I started off by gluing up nine layers of the ^"-thick rectangular strips. Note: Unlike the carver's mallet, the grain on all the strips of the cabinetmaker's mallet run in the same direction. And keep in mind that one side of the blank will be to the outside, so you'll want the strip here to look good. Just mark the inside of the blank so you'll know which side gets the dado for the handle later on. Cutting the "Eye." After the blank is dry, joint one edge so you've got a good reference face for cutting the handle opening. With that edge against the miter gauge, use a dado blade to cut the eye, as shown in Figure 8. Adding Weights. The next step is to add two more layers and then ▲ Gentle Taps. The small end reaches into tight areas to provide some "gentle persuasion." add some weight to the head. After gluing the two layers in place, I drilled V-dia. holes for the short sections of steel rod. A little epoxy will hold them in place (Figure 8). Mallet Specs NOTE: band saw kerfs for wedges 6V>6 114 I'We FRONT VIEW NOTE: rout Va" round-over on edges [<- Z7Ae - TOP VIEW NOTE: cut wedges to fit T\ band saw kerf 30 ShopNotes No. 95 |


