95, страница 34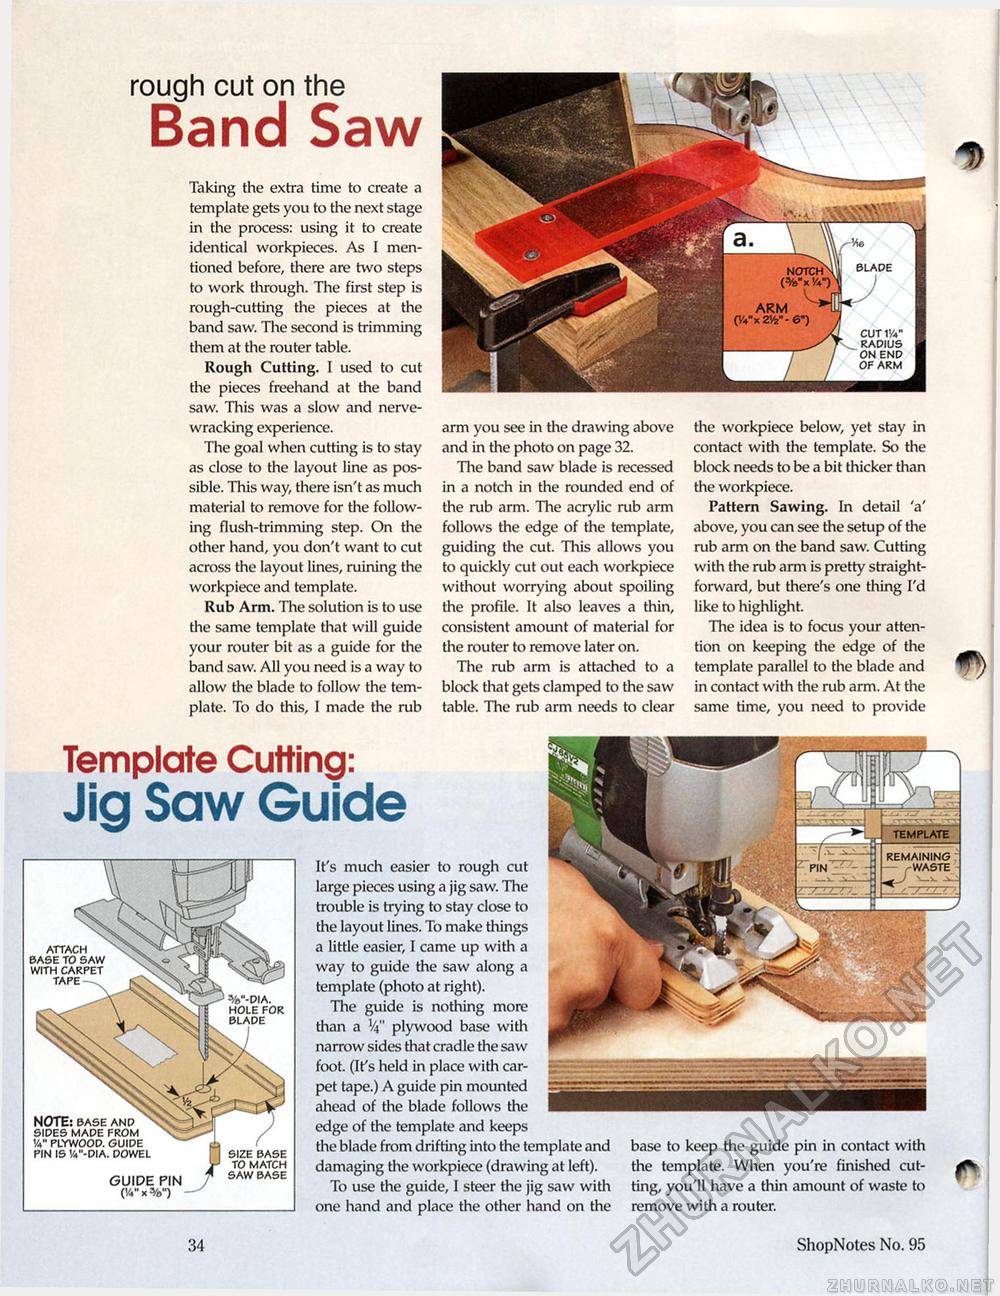
rough cut on the Band Saw Taking the extra time to create a template gets you to the next stage in the process: using it to create identical workpieces. As I mentioned before, there are two steps to work through. The first step is rough-cutting the pieces at the band saw. The second is trimming them at the router table. Rough Cutting. I used to cut the pieces freehand at the band saw. This was a slow and nerve-wracking experience. The goal when cutting is to stay as close to the layout line as possible. This way, there isn't as much material to remove for the following flush-trimming step. On the other hand, you don't want to cut across the layout lines, ruining the workpiece and template. Rub Arm. The solution is to use the same template that will guide your router bit as a guide for the band saw. All you need is a way to allow the blade to follow the template. To do this, I made the rub arm you see in the drawing above and in the photo on page 32. The band saw blade is recessed in a notch in the rounded end of the rub arm. The acrylic rub arm follows the edge of the template, guiding the cut. This allows you to quickly cut out each workpiece without worrying about spoiling the profile. It also leaves a thin, consistent amount of material for the router to remove later on. The rub arm is attached to a block that gets clamped to the saw table. The rub arm needs to clear D the workpiece below, yet stay in contact with the template. So the block needs to be a bit thicker than the workpiece. Pattern Sawing. In detail 'a' above, you can see the setup of the rub arm on the band saw. Cutting with the rub arm is pretty straightforward, but there's one thing I'd like to highlight. The idea is to focus your attention on keeping the edge of the ^^ template parallel to the blade and Wy in contact with the rub arm. At the same time, you need to provide BLADE notch > (%"x V) ARM (VVx 2V4"-6") CUT iy«" RADIUS ON END OF ARM Template Cutting: Jig Saw Guide ATTACH BASE TO SAW WITH CARPET TAPE It's much easier to rough cut large pieces using a jig saw. The trouble is trying to stay close to the layout lines. To make things a little easier, I came up with a way to guide the saw along a template (photo at right). The guide is nothing more than a !4" plywood base with narrow sides that cradle the saw foot. (It's held in place with carpet tape.) A guide pin mounted ahead of the blade follows the edge of the template and keeps the blade from drifting into the template and damaging the workpiece (drawing at left). To use the guide, I steer the jig saw with one hand and place the other hand on the base to keep the guide pin in contact with the template. When you're finished cutting, you'll have a thin amount of waste to remove with a router. NOTE: BASE AND SIDES MADE FROM V»" PLYWOOD. GUIDE PIN IS V4"-DIA. DOWEL GUIDE PIN ('/V x %") 34 ShopNotes No. 95 |


