95, страница 35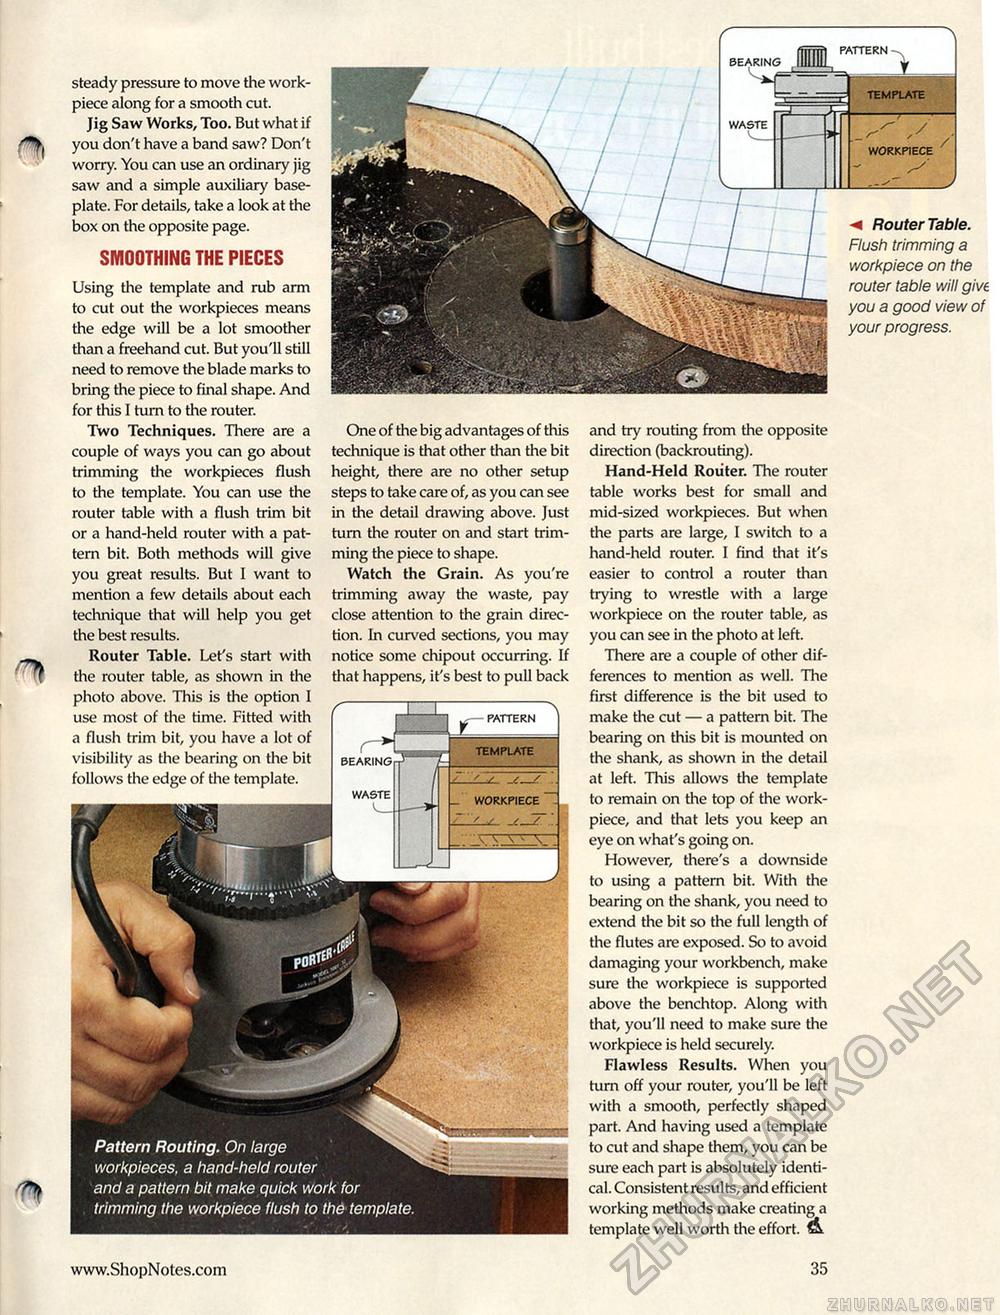
steady pressure to move the work-piece along for a smooth cut. Jig Saw Works, Too. But what if you don't have a band saw? Don't worry. You can use an ordinary jig saw and a simple auxiliary baseplate. For details, take a look at the box on the opposite page. SMOOTHING THE PIECES < Router Table. Flush trimming a workpiece on the router table will give you a good view of your progress. WORKPIECE y __/ Pattern Routing. On large workpieces, a hand-held router and a pattern bit make quick work for trimming the workpiece flush to the template. PATTERN TEMPLATE WASTE One of the big advantages of this technique is that other than the bit height, there are no other setup steps to take care of, as you can see in the detail drawing above. Just turn the router on and start trimming the piece to shape. Watch the Grain. As you're trimming away the waste, pay close attention to the grain direction. In curved sections, you may notice some chipout occurring. If that happens, it's best to pull back Using the template and rub arm to cut out the workpieces means the edge will be a lot smoother than a freehand cut. But you'll still need to remove the blade marks to bring the piece to final shape. And for this I turn to the router. Two Techniques. There are a couple of ways you can go about trimming the workpieces flush to the template. You can use the router table with a flush trim bit or a hand-held router with a pattern bit. Both methods will give you great results. But I want to mention a few details about each technique that will help you get the best results. Router Table. Let's start with the router table, as shown in the photo above. This is the option I use most of the time. Fitted with a flush trim bit, you have a lot of visibility as the bearing on the bit follows the edge of the template. WORKPIECE and try routing from the opposite direction (backrouting). Hand-Held Router. The router table works best for small and mid-sized workpieces. But when the parts are large, I switch to a hand-held router. I find that it's easier to control a router than trying to wrestle with a large workpiece on the router table, as you can see in the photo at left. There are a couple of other differences to mention as well. The first difference is the bit used to make the cut — a pattern bit. The bearing on this bit is mounted on the shank, as shown in the detail at left. This allows the template to remain on the top of the work-piece, and that lets you keep an eye on what's going on. However, there's a downside to using a pattern bit. With the bearing on the shank, you need to extend the bit so the full length of the flutes are exposed. So to avoid damaging your workbench, make sure the workpiece is supported above the benchtop. Along with that, you'll need to make sure the workpiece is held securely. Flawless Results. When you turn off your router, you'll be left with a smooth, perfectly shaped part. And having used a template to cut and shape them, you can be sure each part is absolutely identical. Consistent results, and efficient working methods make creating a template well worth the effort. A 35 |


