95, страница 49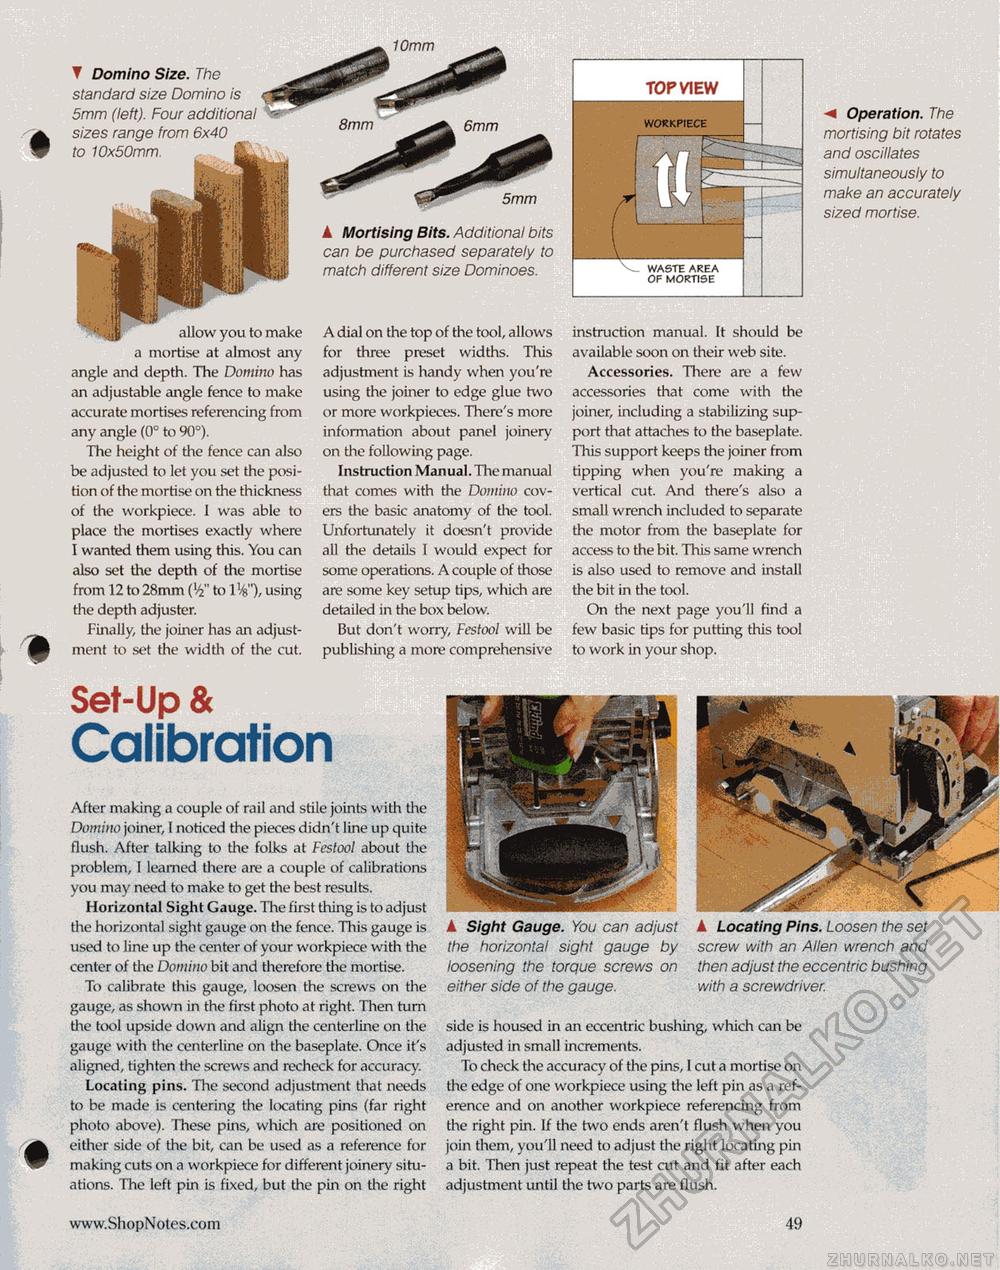
1 nmm ▼ Domino Size. The standard size Domino is 5mm (left). Four additional sizes range from 6x40 to 10x50mm. allow you to make a mortise at almost any angle and depth. The Domino has an adjustable angle fence to make accurate mortises referencing from any angle (0° to 90°). The height of the fence can also be adjusted to let you set the position of the mortise on the thickness of the workpiece. I was able to place the mortises exactly where I wanted them using this. You can also set the depth of the mortise from 12 to 28mm ('£' to 1V), using the depth adjuster. Finally, the joiner has an adjustment to set the width of the cut. A Mortising Bits. Additional bits can be purchased separately to match different size Dominoes. A dial on the top of the tool, allows for three preset widths. This adjustment is handy when you're using the joiner to edge glue two or more workpieces. There's more information about panel joinery on the following page. Instruction Man ual. The manual that comes with the Domino covers the basic anatomy of the tool. Unfortunately it doesn't provide all the details 1 would expect for some operations. A couple of those are some key setup tips, which are detailed in the box below. But don't worry, Festool will be publishing a more comprehensive M Operation. The mortising bit rotates and oscillates simultaneously to make an accurately sized mortise. instruction manual. It should be available soon on their web site. Accessories. There are a few accessories that come with the joiner, including a stabilizing support that attaches to the baseplate. This support keeps the joiner from tipping when you're making a vertical cut. And there's also a small wrench included to separate the motor from the baseplate for access to the bit. This same wrench is also used to remove and install the bit in the tool. On the next page you'll find a few basic tips for putting this tool to work in your shop. Set-Up & Calibration After making a couple of rail and stile joints with the Domino joiner, I noticed the pieces didn't line up quite flush. After talking to the folks at Festool about the problem, 1 learned there are a couple of calibrations you may need to make to get the best results. Horizontal Sight Gauge. The first tiling is to adjust the horizontal sight gauge on the fence. This gauge is used to line up the center of your workpiece with the center of the Domino bit and therefore the mortise. To calibrate this gauge, loosen the screws on the gauge, as shown in the first photo at right. Then turn the tool upside down and align the centerline on the gauge with the centerline on the baseplate. Once it's aligned, tighten the screws and recheck for accuracy. Locating pins. The second adjustment that needs to be made is centering the locating pins (far right photo above). These pins, which are positioned on either side of the bit, can be used as a reference for making cuts on a workpiece for different joinery situations. The left pin is fixed, but the pin on the right ▲ Sight Gauge. You can adjust the horizontal sight gauge by loosening the torque screws on either side of the gauge. A Locating Pins. Loosen the set screw with an Allen wrench and then adjust the eccentric bushing with a screwdriver. side is housed in an eccentric bushing, which can be adjusted in small increments. To check the accuracy of the pins, I cut a mortise on the edge of one workpiece using the left pin as a reference and on another workpiece referencing from the right pin. If the two ends aren't flush when you join them, you'll need to adjust the right locating pin a bit. Then just repeat the test cut and fit after each adjustment until the two parts are flush. 49 |


