Woodworker's Journal 101-Projects-for-Woodworkers, страница 10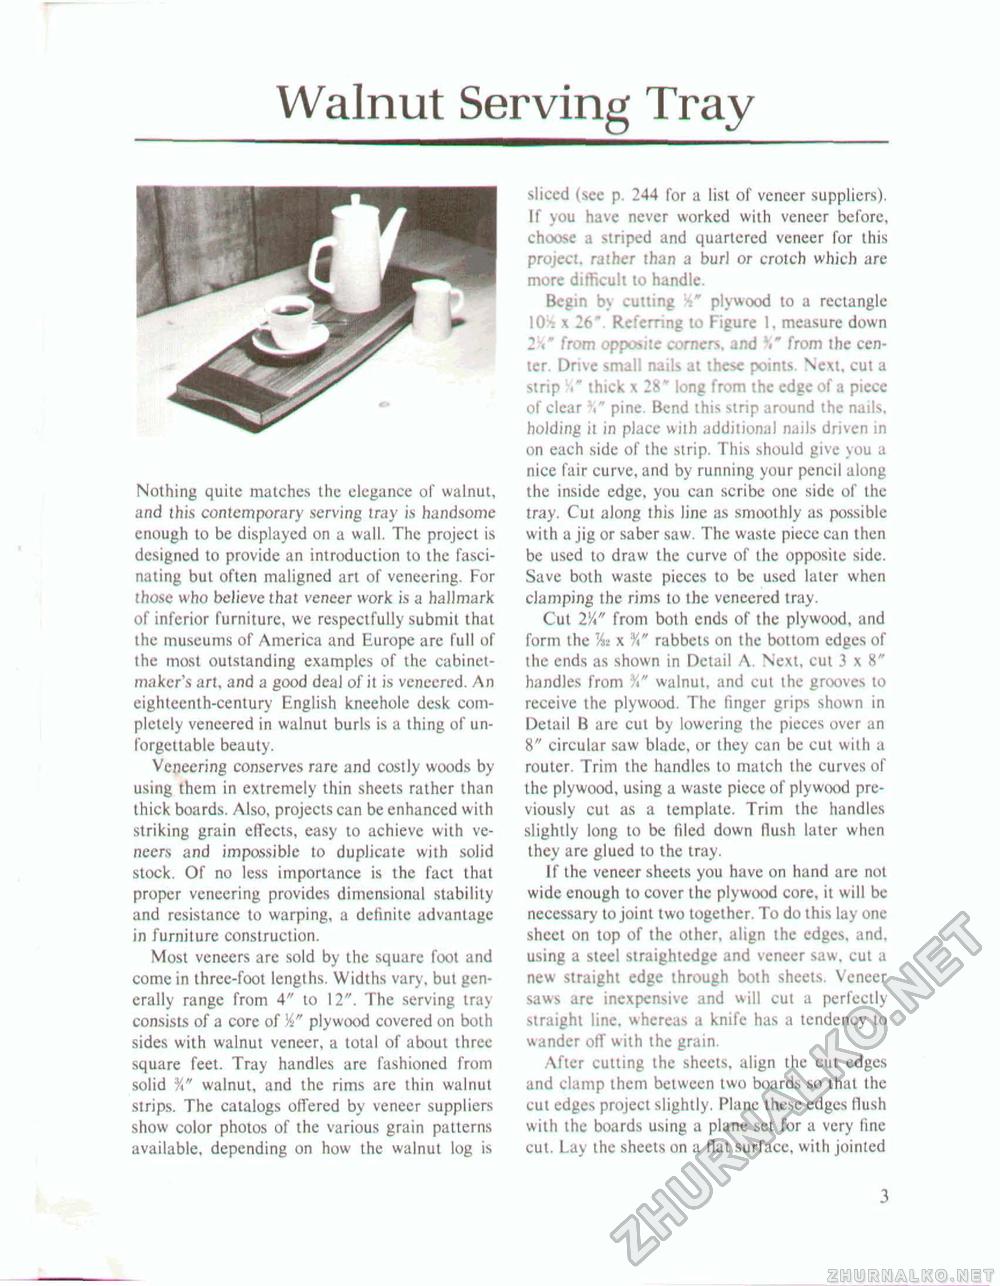
Walnut Serving TrayNothing quite matches the elegance of walnut, and (his contemporary serving tray is handsome enough to be displayed on a wall. The project is designed to provide an introduction to the fascinating but often maligned art of veneering. For those who believe that veneer work is a hallmark of inferior furniture, we respectfully submit that the museums of America and Europe arc full of the most outstanding examples of the cabinetmaker's art, and a good deal of it is veneered. An eighteenth-century English kneehole desk completely veneered in walnut burls is a thing of unforgettable beauty. Veneering conserves rare and costly woods by using them in extremely thin sheets rather than thick boards. Also, projects can be enhanced with striking grain effects, easy to achieve with veneers and impossible to duplicate with solid stock. Of no less importance is the fact that proper veneering provides dimensional stability and resistance to warping, a definite advantage in furniture construction. Most veneers are sold by the square foot and come in three-foot lengths. Widths vary, but generally range from 4" to 12". The serving tray consists of a core of W plywood covered on both sides with walnut veneer, a total of about three square feet. Tray handles are fashioned from solid walnut, and the rims are thin walnut strips. The catalogs offered by veneer suppliers show color photos of the various grain patterns available, depending on how the walnut log is sliced (see p. 244 for a list of veneer suppliers). If you have never worked with veneer before, choo>e a striped and quartered veneer for this project, rather than a burl or crotch which are more difficult to handle. Begin b\ cutting plywood to a rectangle 10. x 26* Referring to Figure 1, measure down 2 ." from opposite corners, and from the center. Drive small nails at these points. Next, cut a strip »* thick x 28" long from the edge of a piece of clear %" pine. Bend this strip around the nails, holding it in place with additional nails driven in on each side of the strip. This should give you a nice fair curve, and by running your pencil along the inside edge, you can scribe one side of the tray. Cut along ihis line as smoothly as possible with a jig or saber saw. The waste piece can then be used to draw the curve of the opposite side. Save both waste pieces to be used later when clamping the rims to the veneered tray. Cut 2Vt" from both ends of the plywood, and form the Ks x rabbets on the bottom edges of the ends as shown in Detail A. Next, cut 3 x 8" handles from %" walnut, and cut the grooves to receive the plywood. The linger grips shown in Detail B are cut by lowering the pieces over an 8" circular saw blade, or they can be cut with a router. Trim the handles to match the curves of the plywood, using a waste piece of plywood previously cut as a template. Trim the handles slightly long to be filed down flush later when they are glued to the tray. if the veneer sheets you have on hand are not wide enough to cover the plywood core, it will be necessary to joint two together. To do this lay one sheet on top of the other, align the edges, and, using a steel straightedge and veneer saw. cut a new straight edge through both sheets. Veneer saws arc inexpensive and will cut a perfectly straight line, whereas a knife has a tendency to wander off with the grain. After cutting the sheets, align the cut edges and clamp them between two boards so that the cut edges project slightly. Plane these edges flush with the boards using a plane sel for a very fine cut. Lay the sheets on a flat surface, with jointed 3 |


