Woodworker's Journal 101-Projects-for-Woodworkers, страница 148
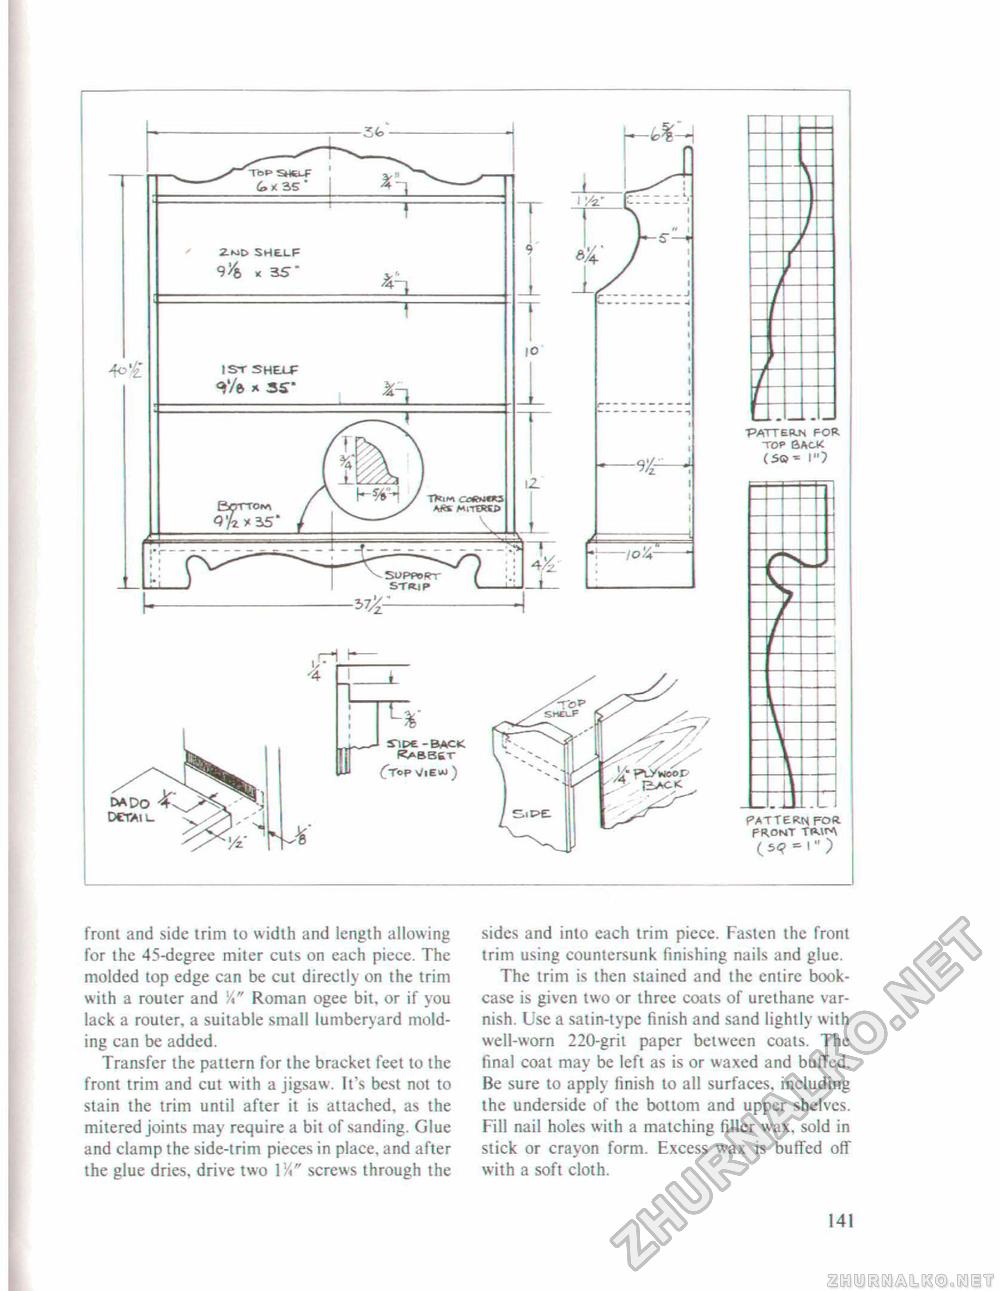
r/k' c-r: J 1/ s—f1 qado dctaii- r "PATTER* FOR TOP tlAOK (so * I"? % r s"lpc - back RABBCT (frop viEko )
pattern for. front thw pattern for. front thw (5<? « I" ) from and side trim to width and length allowing for the 4>-degree miter cuts on each piece. The molded top edge can be cut directly on the trim with a router and Roman ogee bit. or if you lack a router, a suitable small lumberyard molding can be added. Transfer the pattern for the bracket feet to the front trim and cut with a jigsaw. It's best not to stain the trim until after it is attached, as the mitered joints may require a bit of sanding. Glue and clamp the side-trim pieces in place, and after the glue dries, drive two V/" screws through the sides and into each trim piece. Fasten the front trim using countersunk finishing nails and glue. The trim is then stained and the entire bookcase is given two or three coals of urethane varnish. Use a satin-type finish and sand lightly with well-worn 220-gril paper between coats. The final coat may be left as is or waxed and buffed. Be sure to apply finish to all surfaces, including the underside of the bottom and upper shelvcs. Fill nail holes with a matching filler wax. sold in stick or crayon form. Excess wax is buffed off with a soft cloth. 141 |
||||||||||||||||||||||||||||||||||||||||||||||||||||||||||||||||||||||||||||


