Woodworker's Journal 101-Projects-for-Woodworkers, страница 217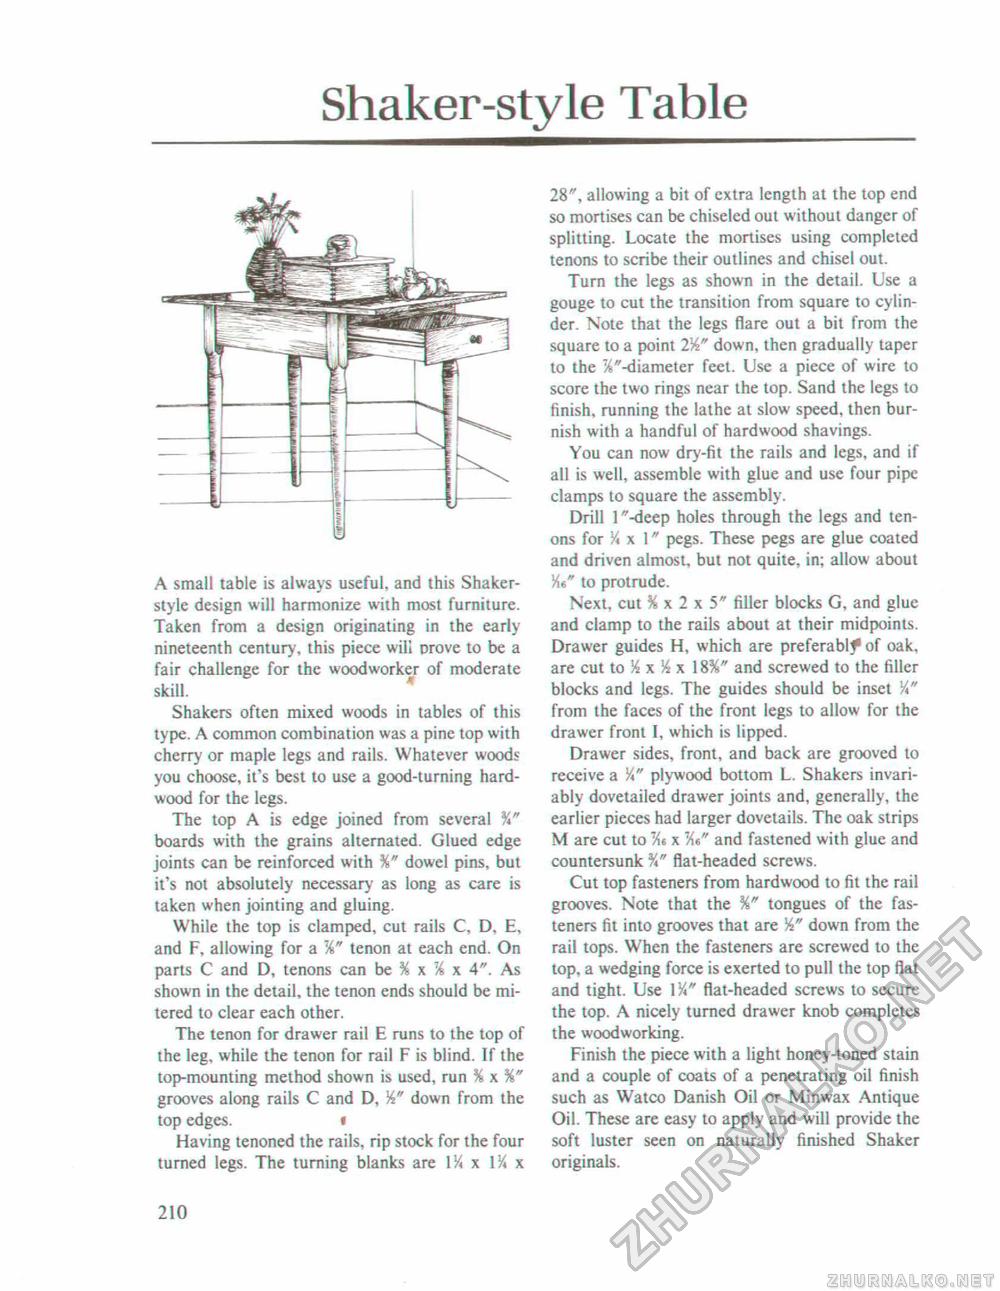
Shaker-style TableA small table is always useful, and this Shaker-style design will harmonize with most furniture. Taken from a design originating in the early nineteenth century, this piece will prove to be a fair challenge for the woodworker of moderate skill. Shakers often mixed woods in tables of this type. A common combination was a pine top with cherry or maple legs and rails. Whatever woods you choose, it's best to use a good-turning hardwood for the legs. The top A is edge joined from several %" boards with the grains alternated. Glued edge joints can be reinforced with X" dowel pins, but it's not absolutely necessary as long as care is taken when jointing and gluing. While the top is clamped, cut rails C, D. E, and F, allowing for a %" tenon at each end. On parts C and D, tenons can be % x % x 4". As shown in the detail, the tenon ends should be mitered to clear each other. The tenon for drawer rail E runs to the top of the leg. while the tenon for rail F is blind. If the top-mounting method shown is used, run grooves along rails C and D, X* down from the top edges. • Having tenoned the rails, rip stock for the four turned legs. The turning blanks are 1% x 134 x 28", allowing a bit of extra length at the top end so mortises can be chiseled out without danger of splitting. Locate the mortises using completed tenons to scribe their outlines and chisel out. Turn the legs as shown in the detail. Use a gouge to cut the transition from square to cylinder. Note that the legs flare out a bit from the square to a point 2X" down, then gradually taper to the ^"-diameter feet. Use a piece of wire to score the two rings near the top. Sand the legs to finish, running the lathe at slow speed, then burnish with a handful of hardwood shavings. You can now dry-fit the rails and legs, and if all is well, assemble with glue and use four pipe clamps to square the assembly. Drill l"-deep holes through the legs and tenons for X x 1" pegs. These pegs are glue coated and driven almost, but not quite, in; allow about X«" to protrude. Next, cut % x 2 x 5" filler blocks G, and glue and clamp to the rails about at their midpoints. Drawer guides H, which are preferably of oak, are cut to X x X x 18X" and screwed to the filler blocks and legs. The guides should be inset X" from the faces of the front legs to allow for the drawer front I, which is lipped. Drawer sides, front, and back are grooved to receive a X" plywood bottom L. Shakers invariably dovetailed drawer joints and, generally, the earlier pieces had larger dovetails. The oak strips M are cut to 7At x and fastened with glue and countersunk %" flat-headed screws. Cut top fasteners from hardwood to fit the rail grooves. Note that the %" tongues of the fasteners fit into grooves that are X" down from the rail tops. When the fasteners are screwed to the top, a wedging force is exerted to pull the top flat and tight. Use IX" flat-headed screws to secure the top. A nicely turned drawer knob completes the woodworking. Finish the piece with a light honey-toned stain and a couple of coats of a penetrating oil finish such as Watco Danish Oil or Minwax Antique Oil. These are easy to apply and will provide the soft luster seen on naturally finished Shaker originals. 210 |


