Woodworker's Journal 101-Projects-for-Woodworkers, страница 216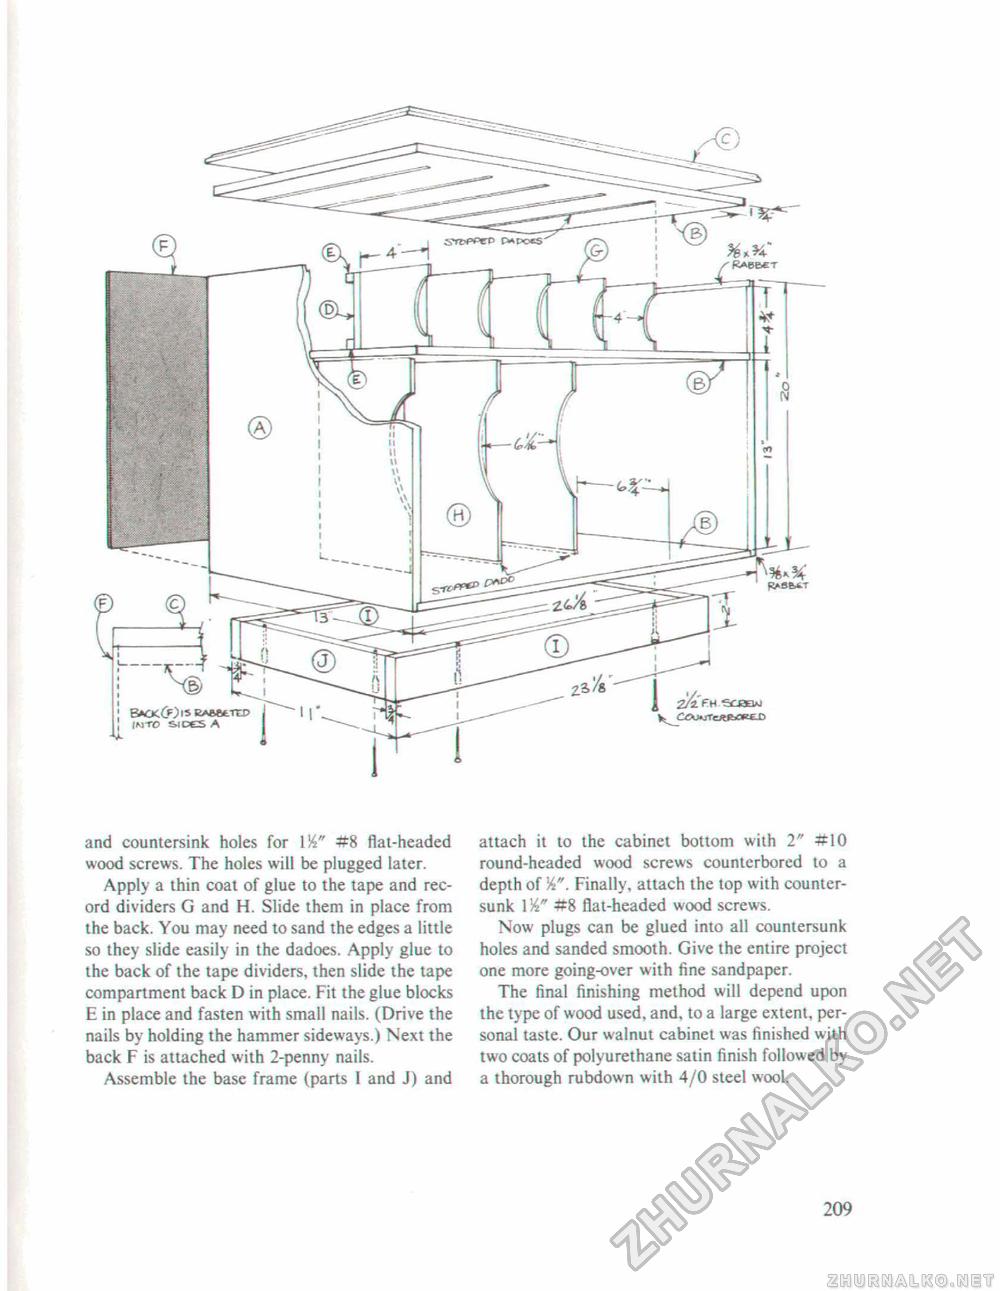
and countersink holes for #8 fiat-headed wood screws. The holes will be plugged later. Apply a thin coat of glue to the tape and record dividers G and H. Slide them in place from the back. You may need to sand the edges a little so they slide easily in the dadoes. Apply glue to the back of the tape dividers, then slide the tape compartment back D in place. Fit the glue blocks E in place and fasten with small nails. (Drive the nails by holding the hammer sideways.) Next the back F is attached with 2-penny nails. Assemble the base frame (parts I and J) and attach it to the cabinet bottom with 2" #10 round-headed wood screws counterbored to a depth of Finally, attach the top with countersunk 1#8 flat-headed wood screws. Now plugs can be glued into all countersunk holes and sanded smooth. Give the entire project one more going-over with fine sandpaper. The final finishing method will depend upon the type of wood used, and, to a large extent, personal taste. Our walnut cabinet was finished with two coats of polyurethane satin finish followed by a thorough rubdown with 4/0 steel wool. 209 |


