Woodworker's Journal 101-Projects-for-Woodworkers, страница 213
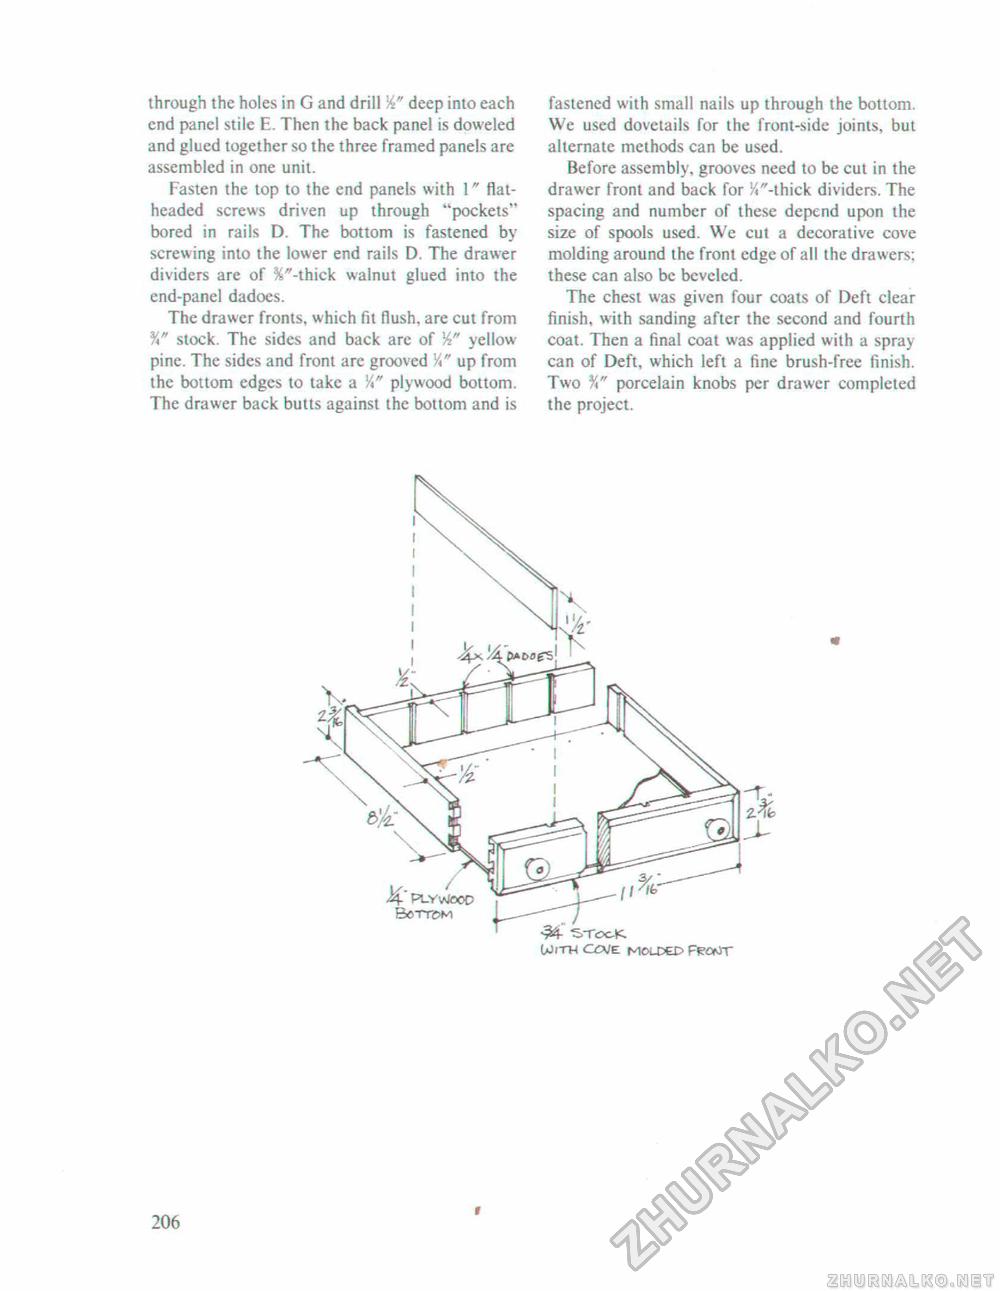
through the holes in G and drill J4" deep into each end panel stile E. Then the back panel is doweled and glued together so the three framed panels are assembled in one unit. Fasten the top to the end panels with 1" flat-headed screws driven up through "pockets" bored in rails D. The bottom is fastened by screwing into the lower end rails D. The drawer dividers are of %"-thick walnut glued into the end-panel dadoes. The drawer fronts, which fit flush, are cut from stock. The sides and back arc of W yellow pine. The sides and front are grooved V*" up from the bottom edges to take a plywood bottom. The drawer back butts against the bottom and is fastened with small nails up through the bottom. We used dovetails for the front-side joints, but alternate methods can be used. Before assembly, grooves need to be cut in the drawer front and back for ^"-thick dividers. The spacing and number of these depend upon the size of spools used. We cut a decorative cove molding around the front edge of all the drawers; these can also be beveled. The chest was given four coats of Deft clear finish, with sanding after the second and fourth coat. Then a final coat was applied with a spray can of Deft, which left a fine brush-free finish. Two porcelain knobs per drawer completed the project. 206 r |


