Woodworker's Journal 101-Projects-for-Woodworkers, страница 72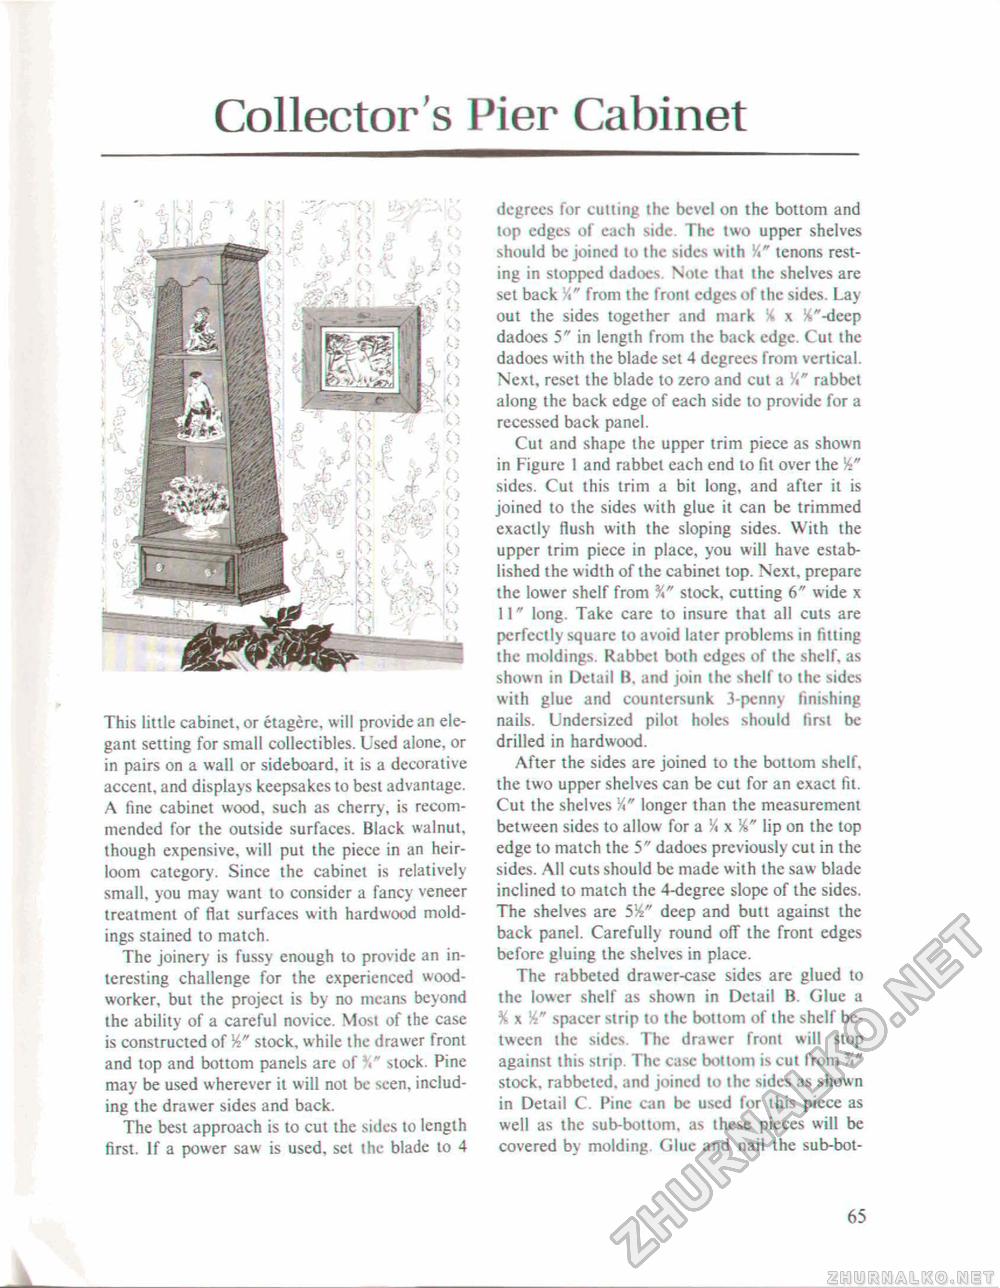
Collector's Pier CabinetThis little cabinet, or etagere, will provide an elegant setting for small collectibles. Used alone, or in pairs on a wall or sideboard, it is a decorative accent, and displays keepsakes to best advantage. A fine cabinet wood, such as cherry, is recommended for the outside surfaces. Black walnut, though expensive, will put the piece in an heirloom category. Since the cabinet is relatively small, you may want to consider a fancy veneer treatment of flat surfaces with hardwood moldings stained to match. The joinery is fussy enough to provide an interesting challenge for the experienced woodworker, but the project is by no means beyond the ability of a careful novice. Most of the case is constructed of stock, while the drawer front and top and bottom panels are of stock. Pine may be used wherever it will not be seen, including the drawer sides and back. The best approach is to cut the sides to length first. If a power saw is used, set the blade to 4 degrees for cutting the bevel on the bottom and top edges of each side. The two upper shelves should be joined lo the sides with i" tenons resting in stopped dadoes. Note that the shelves are set back VS from the front edges of the sides. Lay out the sides together and mark St x K*-deep dadoes 5" in length from the back edge. Cut the dadoes with the blade set 4 degrees from vertical. Next, reset the blade to zero and cut a rabbet along the back edge of each side to provide for a recessed back panel. Cut and shape the upper trim piece as shown in Figure 1 and rabbet each end lo fit over the sides. Cut this trim a bit long, and after it is joined to the sides with glue it can be trimmed exactly flush with the sloping sides. With the upper trim piece in place, you will have established the width of the cabinet top. Next, prepare the lower shelf from %" stock, cutting 6" wide x 11" long. Take care to insure that all cuts are perfectly square to avoid later problems in fitting the moldings. Rabbet both edges of the shelf, as shown in Detail B, and join the shelf to the sides with glue and countersunk 3-penny finishing nails. Undersized pilot holes should first be drilled in hardwood. After the sides are joined to the bottom shelf, the two upper shelves can be cut for an exact fit. Cut the shelves V longer than the measurement between sides to allow for a K x lA" lip on the top edge to match the 5" dadoes previously cut in the sides. All cuts should be made with the saw blade inclined to match the 4-degree slope of the sides. The shelves are 5A" deep and butt against the back panel. Carefully round ofT the front edges before gluing the shelves in place. The rabbeted drawer-case sides are glued to the lower shelf as shown in Detail B. Glue a X x 14* spacer strip to the bottom of the shelf between the sides. The drawer front will stop against this strip. The case bottom is cut from ft" stock, rabbeted, and joined to the sides as shown in Detail C. Pine can be used for this piece as well as the sub-bottom, as these pieces will be covered by molding Glue and nail the sub-bot- 65 |


