Woodworker's Journal 101-Projects-for-Woodworkers, страница 81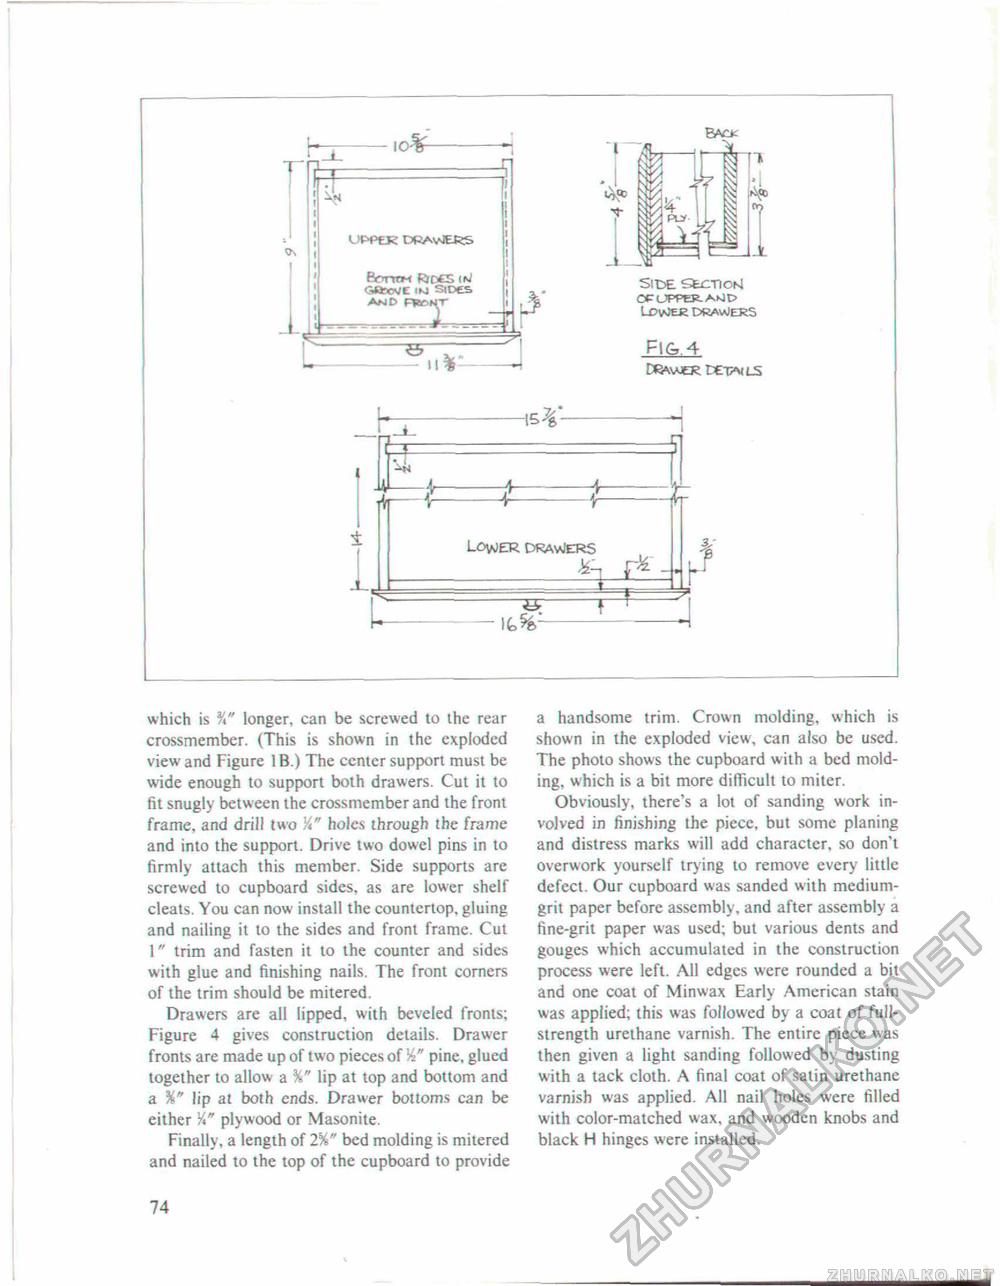
r io-%— EACK UPPER DRAVJEJ^S Borrew RrD£S <N/ fJtwt >M SIDES AND Fier i* X m5 xy '■ ) I % Site strnoM 0PUPPeR-AUt> ldwee drapers F1&.4 D^vjer det^LS t tf Lower dravjeks i which is longer, can be screwed to the rear crossmember. (This is shown in the exploded view and Figure 1B.) The center support must be wide enough to support both drawers. Cut it to fit snugly between the crossmember and the front frame, and drill two holes through the frame and into the support. Drive two dowel pins in to firmly attach this member. Side supports are screwed to cupboard sides, as are lower shelf cleats. You can now install the countertop, gluing and nailing it to the sides and front frame. Cut \" trim and fasten it to the counter and sides with glue and finishing nails. The front corncrs of the trim should be mitered. Drawers are all lipped, with beveled fronts: Figure 4 gives construction details. Drawer fronts are made up of two pieces of W pine, glued together to allow a %" lip at top and bottom and a %" lip at both ends. Drawer bottoms can be either Y" plywood or Masonite. Finally, a length of 2%" bed molding is mitered and nailed to the top of the cupboard to provide a handsome trim. Crown molding, which is shown in the exploded view, can also be used. The photo shows the cupboard with a bed molding, which is a bit more difficult to miter. Obviously, there's a lot of sanding work involved in finishing the piece, but some planing and distress marks will add character, so don't overwork yourself trying to remove every little defect. Our cupboard was sanded with medium-grit paper before assembly, and after assembly a fine-grit paper was used; but various dents and gouges which accumulated in the construction process were left. All edges were rounded a bit and one coat of Minwax Early American stain was applied; this was followed by a coat of full-strength urethane varnish. The entire piece was then given a light sanding followed by dusting with a tack cloth. A final coat of satin urethane varnish was applied. All nail holes were filled with color-matched wax, and wooden knobs and black H hinges were installed. 74 |


