Woodworker's Journal 1980-4-5, страница 23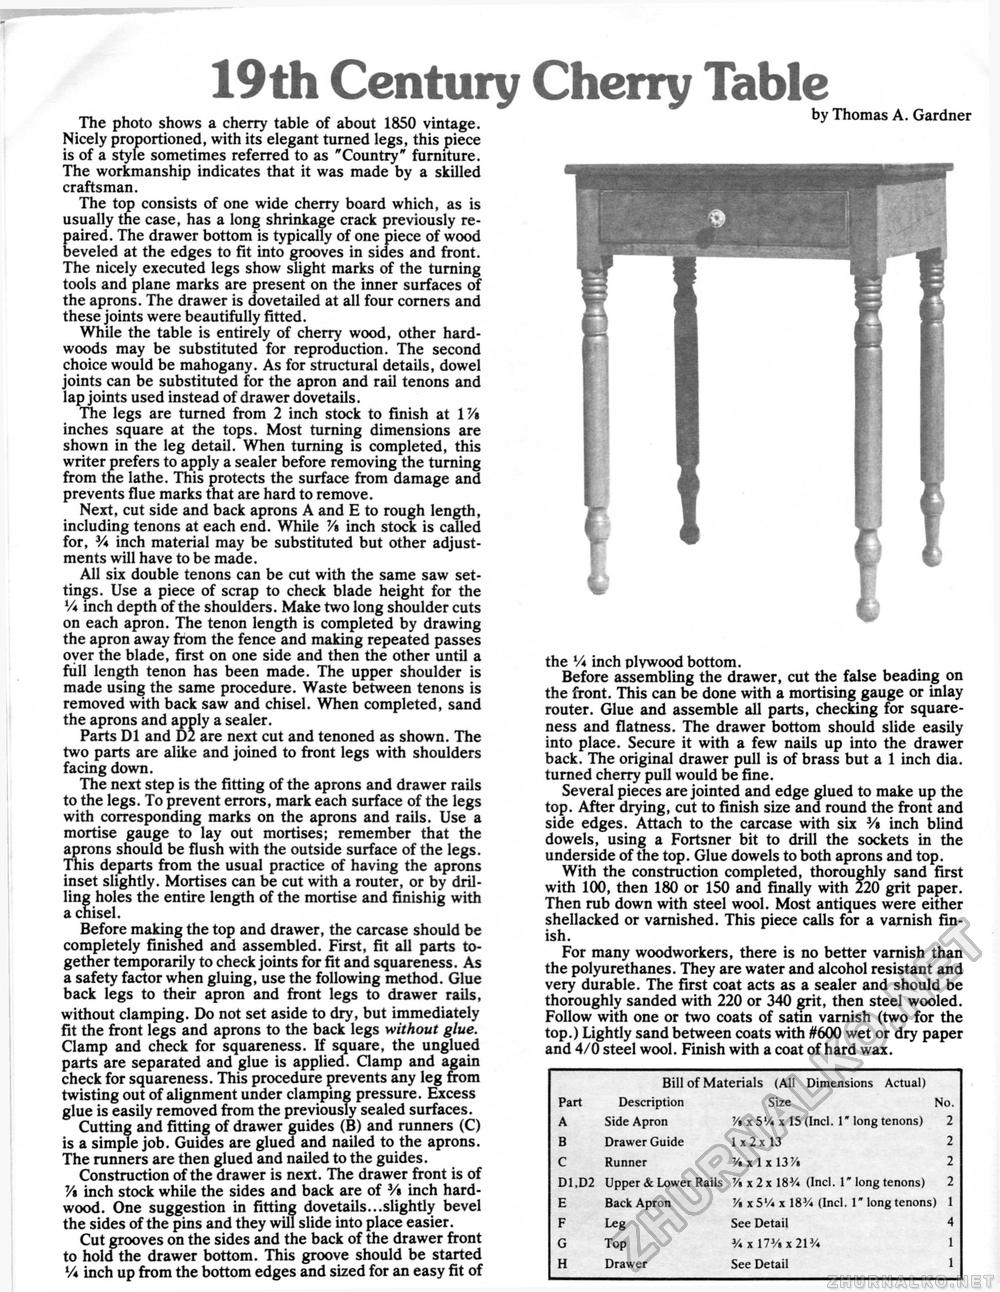
19th Century Cherry Table The photo shows a cherry table of about 1850 vintage. Nicely proportioned, with its elegant turned legs, this piece is of a style sometimes referred to as "Country" furniture. The workmanship indicates that it was made by a skilled craftsman. The top consists of one wide cherry board which, as is usually the case, has a long shrinkage crack previously repaired. The drawer bottom is typically of one piece of wood beveled at the edges to fit into grooves in sides and front. The nicely executed legs show slight marks of the turning tools and plane marks are present on the inner surfaces of the aprons. The drawer is dovetailed at all four corners and these joints were beautifully fitted. While the table is entirely of cherry wood, other hardwoods may be substituted for reproduction. The second choice would be mahogany. As for structural details, dowel joints can be substituted for the apron and rail tenons and lap joints used instead of drawer dovetails. The legs are turned from 2 inch stock to finish at 1V$ inches square at the tops. Most turning dimensions are shown in the leg detail. When turning is completed, this writer prefers to apply a sealer before removing the turning from the lathe. This protects the surface from damage and prevents flue marks that are hard to remove. Next, cut side and back aprons A and E to rough length, including tenons at each end. While 7A inch stock is called for, V* inch material may be substituted but other adjustments will have to be made. All six double tenons can be cut with the same saw settings. Use a piece of scrap to check blade height for the Vi inch depth of the shoulders. Make two long shoulder cuts on each apron. The tenon length is completed by drawing the apron away from the fence and making repeated passes oyer the blade, first on one side and then the other until a full length tenon has been made. The upper shoulder is made using the same procedure. Waste between tenons is removed with back saw and chisel. When completed, sand the aprons and apply a sealer. Parts D1 and D2 are next cut and tenoned as shown. The two parts are alike and joined to front legs with shoulders facing down. The next step is the fitting of the aprons and drawer rails to the legs. To prevent errors, mark each surface of the legs with corresponding marks on the aprons and rails. Use a mortise gauge to lay out mortises; remember that the aprons should be flush with the outside surface of the legs. Tnis departs from the usual practice of having the aprons inset slightly. Mortises can be cut with a router, or by drilling holes the entire length of the mortise and finishig with a chisel. Before making the top and drawer, the carcase should be completely finished and assembled. First, fit all parts together temporarily to check joints for fit and squareness. As a safety factor when gluing, use the following method. Glue back legs to their apron and front legs to drawer rails, without clamping. Do not set aside to dry, but immediately fit the front legs and aprons to the back legs without glue. Clamp and check for squareness. If square, the unglued parts are separated and glue is applied. Clamp and again check for squareness. This procedure prevents any leg from twisting out of alignment under clamping pressure. Excess glue is easily removed from the previously sealed surfaces. Cutting and fitting of drawer guides (B) and runners (C) is a simple job. Guides are glued and nailed to the aprons. The runners are then glued and nailed to the guides. Construction of the drawer is next. The drawer front is of Vi inch stock while the sides and back are of 3/» inch hardwood. One suggestion in fitting dovetails...slightly bevel the sides of the pins and they will slide into place easier. Cut grooves on the sides and the back of the drawer front to hold the drawer bottom. This groove should be started Vi inch up from the bottom edges and sized for an easy fit of by Thomas A. Gardner the Vi inch plvwood bottom. Before assembling the drawer, cut the false beading on the front. This can be done with a mortising gauge or inlay router. Glue and assemble all parts, checking for squareness and flatness. The drawer bottom should slide easily into place. Secure it with a few nails up into the drawer back. The original drawer pull is of brass but a 1 inch dia. turned cherry pull would be fine. Several pieces are jointed and edge glued to make up the top. After drying, cut to finish size and round the front and side edges. Attach to the carcase with six 3/« inch blind dowels, using a Fortsner bit to drill the sockets in the underside of the top. Glue dowels to both aprons and top. With the construction completed, thoroughly sand first with 100, then 180 or 150 and finally with 220 grit paper. Then rub down with steel wool. Most antiques were either shellacked or varnished. This piece calls for a varnish finish. For many woodworkers, there is no better varnish than the polyurethanes. They are water and alcohol resistant and very durable. The first coat acts as a sealer and should be thoroughly sanded with 220 or 340 grit, then steel wooled. Follow with one or two coats of satin varnish (two for the top.) Lightly sand between coats with #600 wet or dry paper and 4/0 steel wool. Finish with a coat of hard wax.
|
||||||||||||||||||||||||||||||


