Woodworker's Journal 1982-6-5, страница 25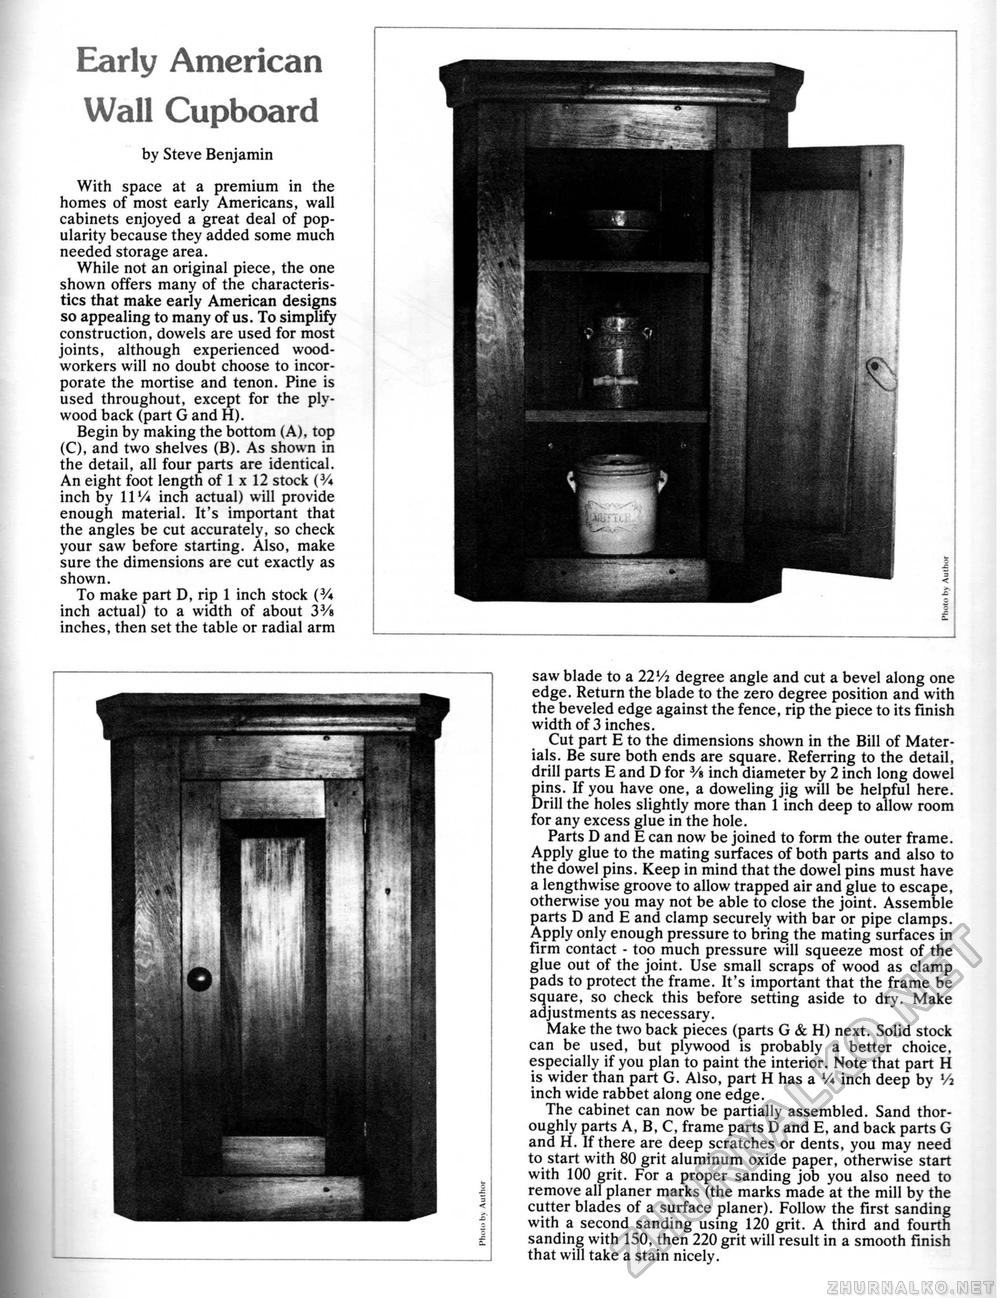
Early American Wall Cupboard by Steve Benjamin With space at a premium in the homes of most early Americans, wall cabinets enjoyed a great deal of popularity because they added some much needed storage area. While not an original piece, the one shown offers many of the characteristics that make early American designs so appealing to many of us. To simplify construction, dowels are used for most joints, although experienced woodworkers will no doubt choose to incorporate the mortise and tenon. Pine is used throughout, except for the plywood back (part G and H). Begin by making the bottom (A), top (C), and two shelves (B). As shown in the detail, all four parts are identical. An eight foot length of 1 x 12 stock (V* inch by 11Vi inch actual) will provide enough material. It's important that the angles be cut accurately, so check your saw before starting. Also, make sure the dimensions are cut exactly as shown. To make part D, rip 1 inch stock (3/i inch actual) to a width of about 33/« inches, then set the table or radial arm saw blade to a 22 Vi degree angle and cut a bevel along one edge. Return the blade to the zero degree position and with the beveled edge against the fence, rip the piece to its finish width of 3 inches. Cut part E to the dimensions shown in the Bill of Materials. Be sure both ends are square. Referring to the detail, drill parts E and D for Vs inch diameter by 2 inch long dowel pins. If you have one, a doweling jig will be helpful here. Drill the holes slightly more than 1 inch deep to allow room for any excess glue in the hole. Parts D and E can now be joined to form the outer frame. Apply glue to the mating surfaces of both parts and also to the dowel pins. Keep in mind that the dowel pins must have a lengthwise groove to allow trapped air and glue to escape, otherwise you may not be able to close the joint. Assemble parts D and E and clamp securely with bar or pipe clamps. Apply only enough pressure to bring the mating surfaces in firm contact - too much pressure will squeeze most of the glue out of the joint. Use small scraps of wood as clamp pads to protect the frame. It's important that the frame be square, so check this before setting aside to dry. Make adjustments as necessary. Make the two back pieces (parts G & H) next. Solid stock can be used, but plywood is probably a better choice, especially if you plan to paint the interior. Note that part H is wider than part G. Also, part H has a V* inch deep by Vi inch wide rabbet along one edge. The cabinet can now be partially assembled. Sand thoroughly parts A, B, C, frame parts D and E, and back parts G and H. If there are deep scratches or dents, you may need to start with 80 grit aluminum oxide paper, otherwise start with 100 grit. For a proper sanding job you also need to remove all planer marks (the marks made at the mill by the cutter blades of a surface planer). Follow the first sanding with a second sanding using 120 grit. A third and fourth sanding with 150, then 220 grit will result in a smooth finish that will take a stain nicely. |


