Woodworker's Journal 1982-6-5, страница 26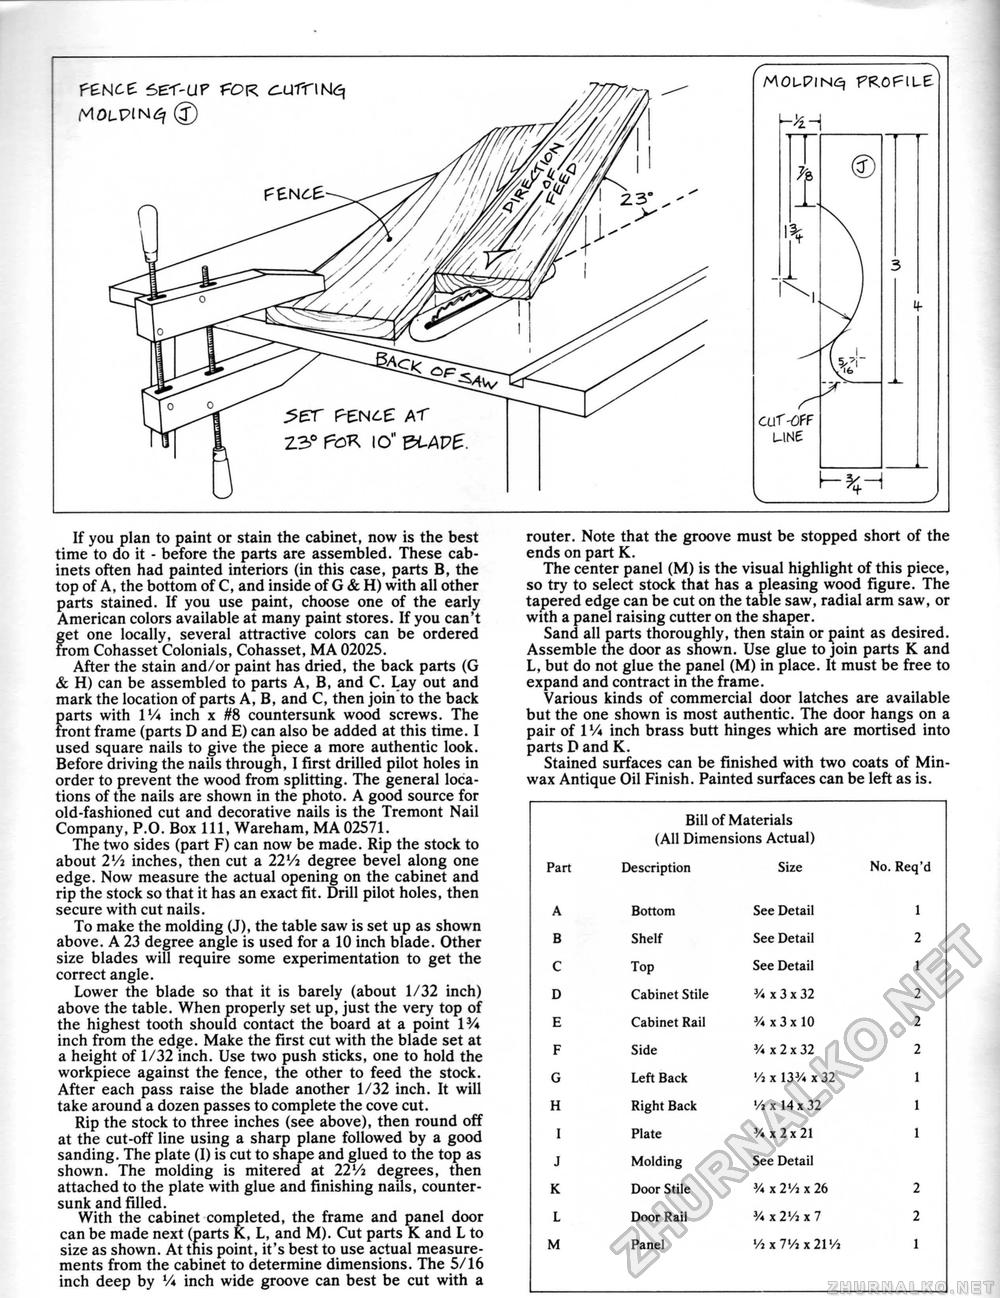
MOLPIN^ ® MOUPINC) PROF=lL-£ CUf-OPF LINE V_ K- If you plan to paint or stain the cabinet, now is the best time to do it - before the parts are assembled. These cabinets often had painted interiors (in this case, parts B, the top of A, the bottom of C, and inside of G & H) with all other parts stained. If you use paint, choose one of the early American colors available at many paint stores. If you can't get one locally, several attractive colors can be ordered from Cohasset Colonials, Cohasset, MA 02025. After the stain and/or paint has dried, the back parts (G & H) can be assembled to parts A, B, and C. Lay out and mark the location of parts A, B, and C, then join to the back parts with IV* inch x #8 countersunk wood screws. The front frame (parts D and E) can also be added at this time. I used square nails to give the piece a more authentic look. Before driving the nails through, I first drilled pilot holes in order to prevent the wood from splitting. The general locations of the nails are shown in the photo. A good source for old-fashioned cut and decorative nails is the Tremont Nail Company, P.O. Box 111, Wareham, MA02571. The two sides (part F) can now be made. Rip the stock to about 2Vi inches, then cut a 22Vi degree bevel along one edge. Now measure the actual opening on the cabinet and rip the stock so that it has an exact fit. Drill pilot holes, then secure with cut nails. To make the molding (J), the table saw is set up as shown above. A 23 degree angle is used for a 10 inch blade. Other size blades will require some experimentation to get the correct angle. Lower the blade so that it is barely (about 1/32 inch) above the table. When properly set up, just the very top of the highest tooth should contact the board at a point IV* inch from the edge. Make the first cut with the blade set at a height of 1/32 inch. Use two push sticks, one to hold the workpiece against the fence, the other to feed the stock. After each pass raise the blade another 1/32 inch. It will take around a dozen passes to complete the cove cut. Rip the stock to three inches (see above), then round off at the cut-off line using a sharp plane followed by a good sanding. The plate (I) is cut to shape and glued to the top as shown. The molding is mitered at 22'/j degrees, then attached to the plate with glue and finishing nails, countersunk and filled. With the cabinet completed, the frame and panel door can be made next (parts K, L, and M). Cut parts K and L to size as shown. At this point, it's best to use actual measurements from the cabinet to determine dimensions. The 5/16 inch deep by V* inch wide groove can best be cut with a router. Note that the groove must be stopped short of the ends on part K. The center panel (M) is the visual highlight of this piece, so try to select stock that has a pleasing wood figure. The tapered edge can be cut on the table saw, radial arm saw, or with a panel raising cutter on the shaper. Sand all parts thoroughly, then stain or paint as desired. Assemble the door as shown. Use glue to join parts K and L, but do not glue the panel (M) in place. It must be free to expand and contract in the frame. Various kinds of commercial door latches are available but the one shown is most authentic. The door hangs on a pair of 1V* inch brass butt hinges which are mortised into parts D and K. Stained surfaces can be finished with two coats of Min-wax Antique Oil Finish. Painted surfaces can be left as is.
|
||||||||||||||||||||||||||||||||||||||||||||||||||||||||||||


