Woodworker's Journal 1983-7-2, страница 24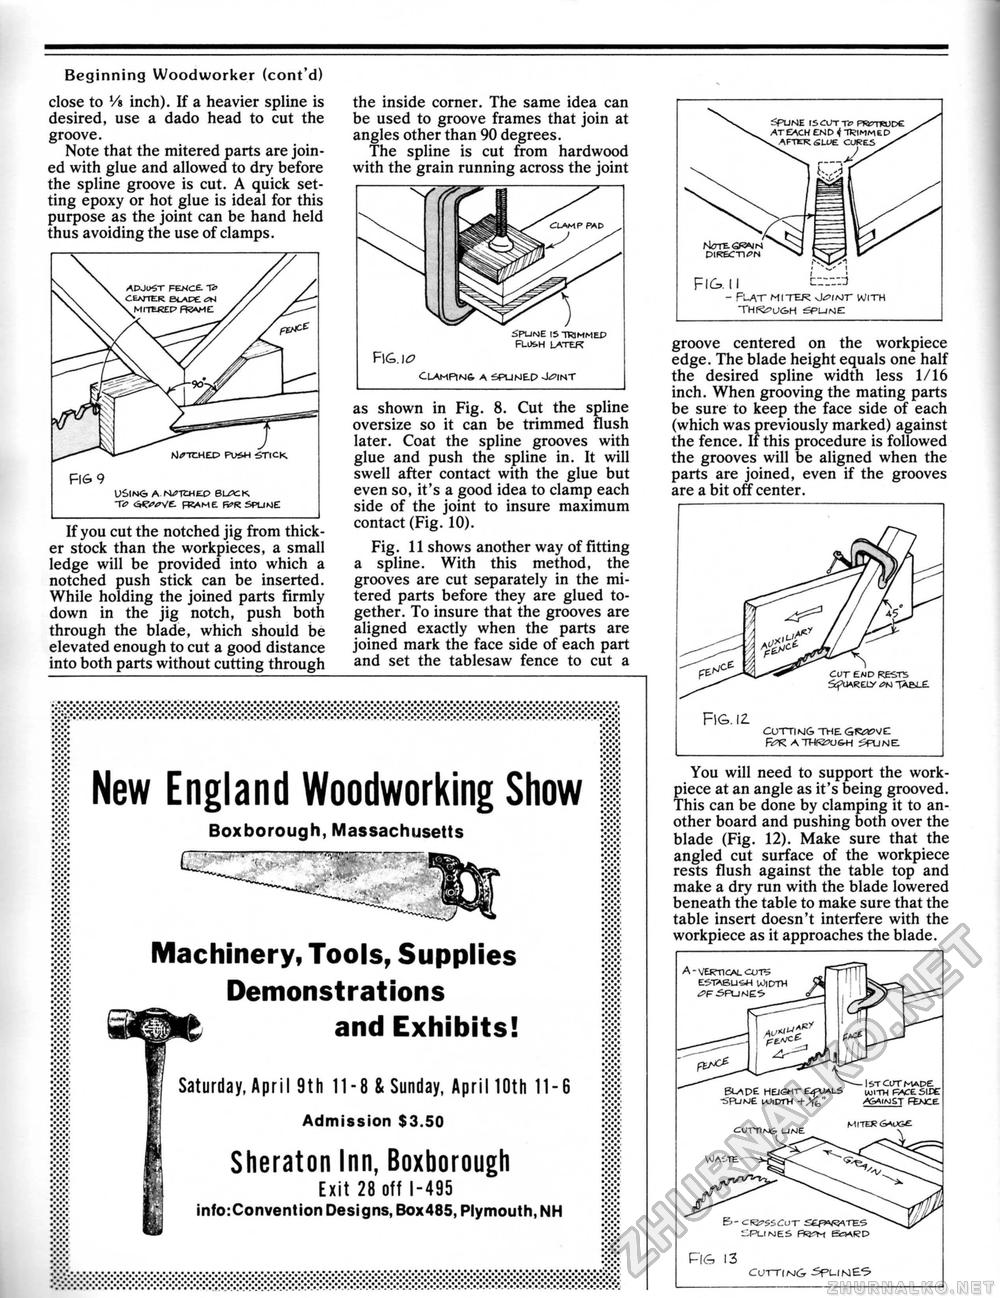
Beginning Woodworker (cont'd) Fig. 12. COTTIKJG THE B^K ATW32U&H ^FTJNE. groove centered on the workpiece edge. The blade height equals one half the desired spline width less 1/16 inch. When grooving the mating parts be sure to keep the face side of each (which was previously marked) against the fence. If this procedure is followed the grooves will be aligned when the parts are joined, even if the grooves are a bit off center. You will need to support the work-piece at an angle as it's being grooved. This can be done by clamping it to another board and pushing both over the blade (Fig. 12). Make sure that the angled cut surface of the workpiece rests flush against the table top and make a dry run with the blade lowered beneath the table to make sure that the table insert doesn't interfere with the workpiece as it approaches the blade. close to Vs inch). If a heavier spline is desired, use a dado head to cut the groove. Note that the mitered parts are joined with glue and allowed to dry before the spline groove is cut. A quick setting epoxy or hot glue is ideal for this purpose as the joint can be hand held thus avoiding the use of clamps. FI6 9 USlN<3 A NfWEO euacK. to <&e<w£ frame fi*r spume If you cut the notched jig from thicker stock than the workpieces, a small ledge will be provided into which a notched push stick can be inserted. While holding the joined parts firmly down in the jig notch, push both through the blade, which should be elevated enough to cut a good distance into both parts without cutting through the inside corner. The same idea can be used to groove frames that join at angles other than 90 degrees. The spline is cut from hardwood with the grain running across the joint spume is-nammep flu&h latek Fig. i o CLAMPIN& A SPUNEP J^INT as shown in Fig. 8. Cut the spline oversize so it can be trimmed flush later. Coat the spline grooves with glue and push the spline in. It will swell after contact with the glue but even so, it's a good idea to clamp each side of the joint to insure maximum contact (Fig. 10). Fig. 11 shows another way of fitting a spline. With this method, the grooves are cut separately in the mitered parts before they are glued together. To insure that the grooves are aligned exactly when the parts are joined mark the face side of each part and set the tablesaw fence to cut a Machinery, Tools, Supplies Demonstrations and Exhibits! Saturday, April 9th 11-8 & Sunday, April 10th 11-6 Admission $3.50 Sheraton Inn, Boxborough Boxborough, Massachusetts FIG. II ■ fuvt MITER j01 SIT WITH THfi&U&H spume estasu^-i width spumes Fig 13 CUTTING -SpUN&S |


