Woodworker's Journal 1983-7-3, страница 30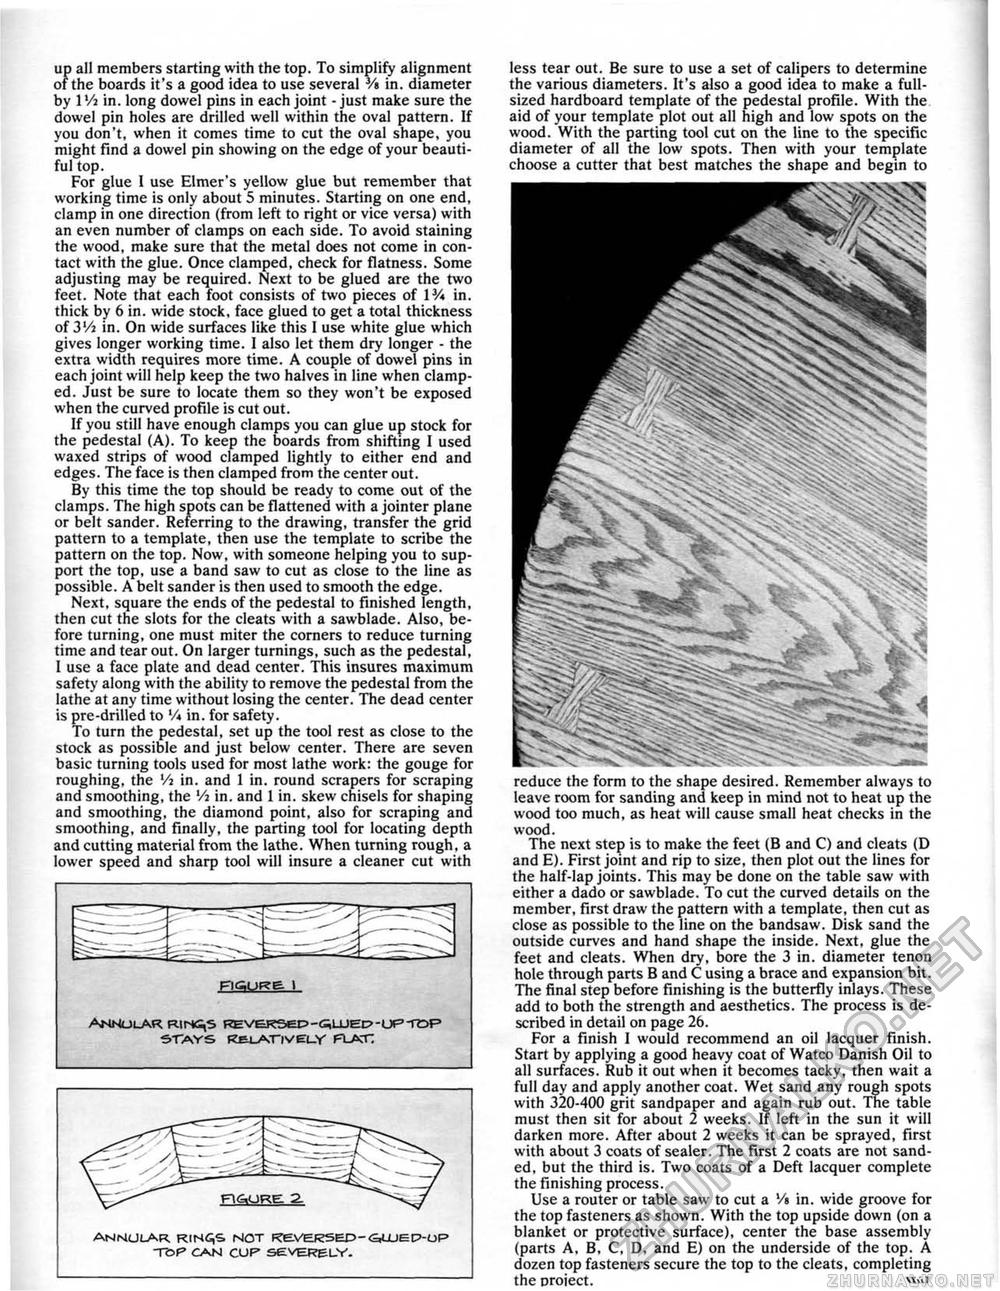
up al! members starting with the top. To simplify alignment of the boards it's a good idea to use several % in. diameter by 1 Vi in. long dowel pins in each joint • just make sure the dowel pin holes are drilled well within the oval pattern. If you don't, when it comes time to cut the oval shape, you might find a dowel pin showing on the edge of your beautiful top. For glue 1 use Elmer's yellow glue but remember that working time is only about 5 minutes. Starting on one end, clamp in one direction (from left to right or vice versa) with an even number of clamps on each side. To avoid staining the wood, make sure that the metal does not come in contact with the glue. Once clamped, check for flatness. Some adjusting may be required. Next to be glued are the two feet. Note that each foot consists of two pieces of IV* in. thick by 6 in. wide stock, face glued to get a total thickness of 3'/i in. On wide surfaces like this I use white glue which gives longer working time. I also let them dry longer - the extra width requires more time. A couple of dowel pins in each joint will help keep the two halves in line when clamped. Just be sure to locate them so they won't be exposed when the curved profile is cut out. If you still have enough clamps you can glue up stock for the pedestal (A). To keep the boards from shifting I used waxed strips of wood clamped lightly to either end and edges. The face is then clamped from the center out. By this time the top should be ready to come out of the clamps. The high spots can be flattened with a jointer plane or belt sander. Referring to the drawing, transfer the grid pattern to a template, then use the template to scribe the pattern on the top. Now, with someone helping you to support the top, use a band saw to cut as close to the line as possible. A belt sander is then used to smooth the edge. Next, square the ends of the pedestal to finished length, then cut the slots for the cleats with a sawblade. Also, before turning, one must miter the corners to reduce turning time and tear out. On larger turnings, such as the pedestal, I use a face plate and dead center. This insures maximum safety along with the ability to remove the pedestal from the lathe at any time without losing the center. The dead center is pre-drilled to V* in. for safety. To turn the pedestal, set up the tool rest as close to the stock as possible and just below center. There are seven basic turning tools used for most lathe work: the gouge for roughing, the Vi in. and 1 in. round scrapers for scraping and smoothing, the '/j in. and 1 in. skew chisels for shaping and smoothing, the diamond point, also for scraping and smoothing, and finally, the parting tool for locating depth and cutting material from the lathe. When turning rough, a lower speed and sharp tool will insure a cleaner cut with
nciuRe. \ nciuRe. \ ANNULAR R.IT-*S,S REVERSeC-G.LUec-OPTiDP' STAYS KBJ-A.TI V EL.Y FLAX; ANMULAR R<HG,S HOT t?eVEK5ED-&UJEP-OP TOP CAN CUP SEVERELY. less tear out. Be sure to use a set of calipers to determine the various diameters. It's also a good idea to make a fult-sized hardboard template of the pedestal profile. With the aid of your template plot out all high and low spots on the wood. With the parting tool cut on the line to the specific diameter of all the low spots. Then with your template choose a cutter that best matches the shape and begin to reduce the form to the shape desired. Remember always to leave room for sanding and keep in mind not to heat up the wood too much, as heat will cause small heat checks in the wood. The next step is to make the feet (B and C) and cleats (D and E). First joint and rip to size, then plot out the lines for the half-lap joints. This may be done on the table saw with either a dado or sawblade. To cut the curved details on the member, first draw the pattern with a template, then cut as close as possible to the line on the bandsaw. Disk sand the outside curves and hand shape the inside. Next, glue the feet and cleats. When dry, bore the 3 in, diameter tenon hole through parts B and C using a brace and expansion bit. The final step before finishing is the butterfly inlays. These add to both the strength and aesthetics. The process is described in detail on page 2b. For a finish I would recommend an oil lacquer finish. Start by applying a good heavy coat of Watco Danish Oil to all surfaces. Rub it out when it becomes tacky, then wait a full day and apply another coat. Wet sand any rough spots with 320-400 grit sandpaper and again rub out. The table must then sit for about 2 weeks. If left in the sun it will darken more. After about 2 weeks it can be sprayed, first with about 3 coats of sealer. The first 2 coats are not sanded, but the third is. Two coats of a Deft lacquer complete the finishing process. Use a router or table saw to cut a '/» in. wide groove for the top fasteners as shown. With the top upside down (on a blanket or protective surface), center the base assembly (parts A, B, C, D, and E) on the underside of the top. A dozen top fasteners secure the top to the cleats, completing the Droiect. |


