Woodworker's Journal 1983-7-4, страница 32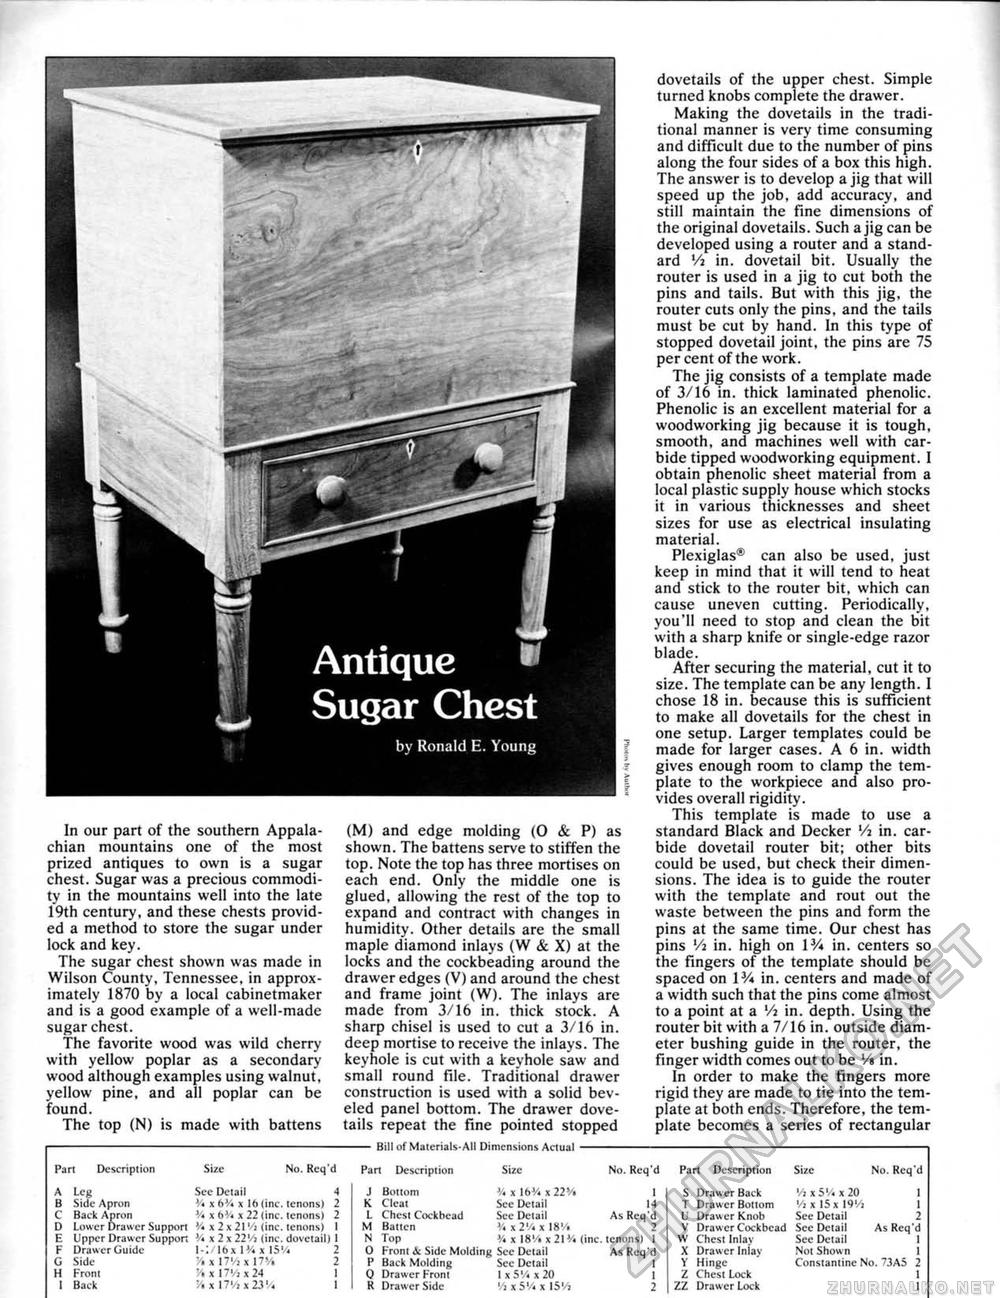
Antique ■ Sugar Chest by Ronald E. Young In our part of the southern Appalachian mountains one of the most prized antiques to own is a sugar chest. Sugar was a precious commodity in the mountains well into the late 19th century, and these chests provided a method to store the sugar under lock and key. The sugar chest shown was made in Wilson County, Tennessee, in approximately 1870 by a local cabinetmaker and is a good example of a well-made sugar chest. The favorite wood was wild cherry with yellow poplar as a secondary wood although examples using walnut, yellow pine, and all poplar can be found. The top (N) is made with battens Part Description A Leg Sec Detail 4 B Side Apron J4 x 6% * 16 (inc. tenons) 2 C Batk Apron W x 6W x 22 tine, tenons) 2 D Lower Drawer Support J<« x 2 x 21'; {inc. tenons) ! E Upper Drawer Support * 2 X 22V4 (inc. dovetail) I F Drawer Guide l-:/16* I« 115W I G Side W i I7V5i 17W 2 H Front 7.x 17'/)* 24 I I Buck '/. x i?1,-! * 23'A 1 (M) and edge molding (0 & P) as shown. The battens serve to stiffen the top. Note the top has three mortises on each end. Only the middle one is glued, allowing the rest of the top to expand and contract with changes in humidity. Other details are the small maple diamond inlays (W & X) at the locks and the cockbeading around the drawer edges (V) and around the chest and frame joint (W). The inlays are made from 3/16 in. thick stock. A sharp chisel is used to cut a 3/16 in. deep mortise to receive the inlays. The keyhole is cut with a keyhole saw and small round file. Traditional drawer construction is used with a solid beveled panel bottom. The drawer dovetails repeat the fine pointed stopped -Bill of Materials-All Dimensions Actual - dovetails of the upper chest. Simple turned knobs complete the drawer. Making the dovetails in the traditional manner is very time consuming and difficult due to the number of pins along the four sides of a box this high. The answer is to develop a jig that wili speed up the job, add accuracy, and still maintain the fine dimensions of the original dovetails. Such a jig can be developed using a router and a standard Vi in. dovetail bit. Usually the router is used in a jig to cut both the pins and tails. But with this jig, the router cuts only the pins, and the tails must be cut by hand. In this type of stopped dovetail joint, the pins are 75 per cent of the work. The jig consists of a template made of 3/16 in. thick laminated phenolic. Phenolic is an excellent material for a woodworking jig because it is tough, smooth, and machines well with carbide tipped woodworking equipment. I obtain phenolic sheet material from a local plastic supply house which stocks it in various thicknesses and sheet sizes for use as electrical insulating material. Plexiglas® can also be used, just keep in mind that it will tend to heat and stick to the router bit, which can cause uneven cutting. Periodically, you'll need to stop and clean the bit with a sharp knife or single-edge razor blade. After securing the material, cut it to size. The template can be any length. 1 chose 18 in. because this is sufficient to make all dovetails for the chest in one setup. Larger templates could be made for larger cases. A 6 in. width gives enough room to clamp the template to the workpiece and also provides overall rigidity. This template is made to use a standard Black and Decker Vi in. carbide dovetail router bit; other bits could be used, but check their dimensions. The idea is to guide the router with the template and rout out the waste between the pins and form the pins at the same time. Our chest has pins '/a in. high on IV* in. centers so the fingers of the template should be spaced on IV* in, centers and made of a width such that the pins come almost to a point at a Vi in. depth. Using the router bit with a 7/16 in. outside diameter bushing guide in the router, the finger width comes out to be '/»in. In order to make the fingers more rigid they are made to tie into the template at both ends. Therefore, the template becomes a series of rectangular Sue No. Kcq d Pan Description Size No. Rcq'd Part Description S:/: J Bottom •/. x lb'/< X 22>/i 1 K Cleat See Detail 14 L Chest Cockhead See Detail As Rcq'd M Batten V, x 2'/. x 18'/i 2 N Top '/, x 18% x2l>/, (inc. tenons) 1 0 From A: Side Molding See Detail As Rcq'd P Back Molding Sec Detail 1 0 Drawer Front 1 x 5'/i x 20 1 R Draw er Side 'ilS'/.I IS'o Drawer Back Draw er Bol torn Drawer Knob Drawer Cock bead Chest Inlay Drawer Inlay Hinge Chest Lock '/, x 5V« x 20 Vi * 15 x W W See Detail See Detail See Detail Not Shown Constantine No. 7.1A5 Nu. Rcq'd 1 1 2 As Reij'd 1 1 2 1 ZZ Drawer Lock |


