Woodworker's Journal 1983-7-4, страница 30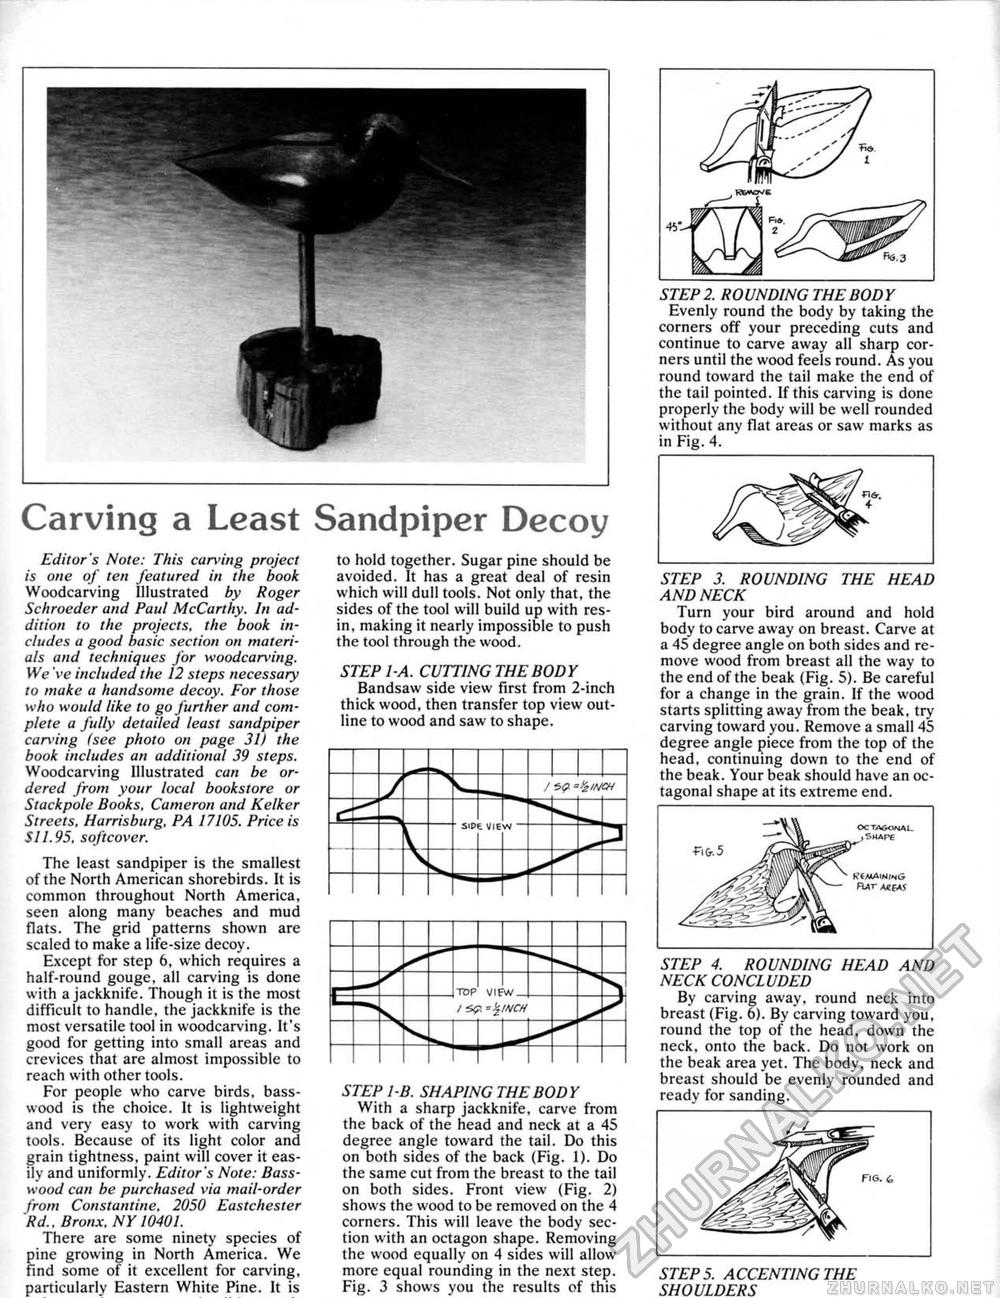
Carving a Least Sandpiper Decoy Editor's Note: This carving project is one of ten featured in the book Woodcarving Illustrated by Roger Schroeder and Paul McCarthy. In addition to (he projects, the book includes a good basic section on materials and techniques for woodcarving. We've included the 12 steps necessary to make a handsome decoy. For those who would like to go further and complete a fully detailed least sandpiper carving (see photo on page 31) the book includes an additional 39 steps. Woodcarving Illustrated can be ordered from your local bookstore or Stackpole Books. Cameron and Kelker Streets, Harrisburg. PA 17105. Price is SI 1.95, soft cover. The least sandpiper is the smallest of the North American shorebirds. U is common throughout North America, seen along many beaches and mud flats. The grid patterns shown are scaled to make a life-size decoy. Except for step 6, which requires a half-round gouge, all carving is done with a jackknife. Though it is the most difficult to handle, the jackknife is the most versatile tool in woodcarving. It's good for getting into small areas and crevices that are almost impossible to reach with other tools. For people who carve birds, bass-wood is ihe choice. It is lightweight and very easy to work with carving tools. Because of its light color and grain tightness, paint will cover it easily and uniformly. Editor's Note: Bass-wood can be purchased via mail-order from Constuntine, 2050 Eastchester Rd.. Bronx. NY 10401. There are some ninety species of pine growing in North America. We find some of it excellent for carving, particularly Eastern White Pine. It is to hold together. Sugar pine should be avoided. It has a great deal of resin which will dull tools. Not only that, the sides of the tool will build up with resin , making it nearly impossible to push the tool through the wood. STEP l'A. CUTTING WE BODY Bandsaw side view first from 2-inch thick wood, then transfer top view outline to wood and saw to shape.
STEP 1-B. SHAPING THE BOD Y With a sharp jackknife, carve from the back of the head and neck at a 45 degree angle toward the tail. Do this on both sides of the back (Fig. I). Do the same cut from the breast to the tail on both sides. Front view (Fig. 2) shows the wood to be removed on the 4 corners. This will leave the body section with an octagon shape. Removing the wood equally on 4 sides will allow more equal rounding in the next step. Fig. 3 shows you the results of this STEP 2. ROUNDING THE BODY Evenly round the body by taking the corners off your preceding cuts and continue to carve away all sharp corners until the wood feels round. As you round toward the tail make the end of the tail pointed. If this carving is done properly the body will be well rounded without any flat areas or saw marks as in Fig. 4. STEP 3. ROUNDING THE HEAD AND NECK Turn your bird around and hold body to carve away on breast. Carve at a 45 degree angle on both sides and remove wood from breast all the way to the end of the beak (Fig. 5). Be careful for a change in the grain. If the wood starts splitting away from the beak, try carving toward you. Remove a small 45 degree angle piece from the top of the head, continuing down to the end of the beak. Your beak should have an octagonal shape at its extreme end. STEP 4. ROUNDING HEAD AND NECK CONCLUDED By carving away, round neck into breast (Fig. 6). By carving toward you, round the top of the head, down'the neck, onto the back. Do not work on the beak area yet. The body, neck and breast should be evenly rounded and ready for sanding. STEPS. ACCENTING THE SHOULDERS |
||||||||||||||||||||||||||||||||||||||||||||||||||||||||||||||||||||||||||||||||||||||||||||||||||||||||||||||||||||||||||||||||||||||||||||||


