Woodworker's Journal 1983-7-4, страница 28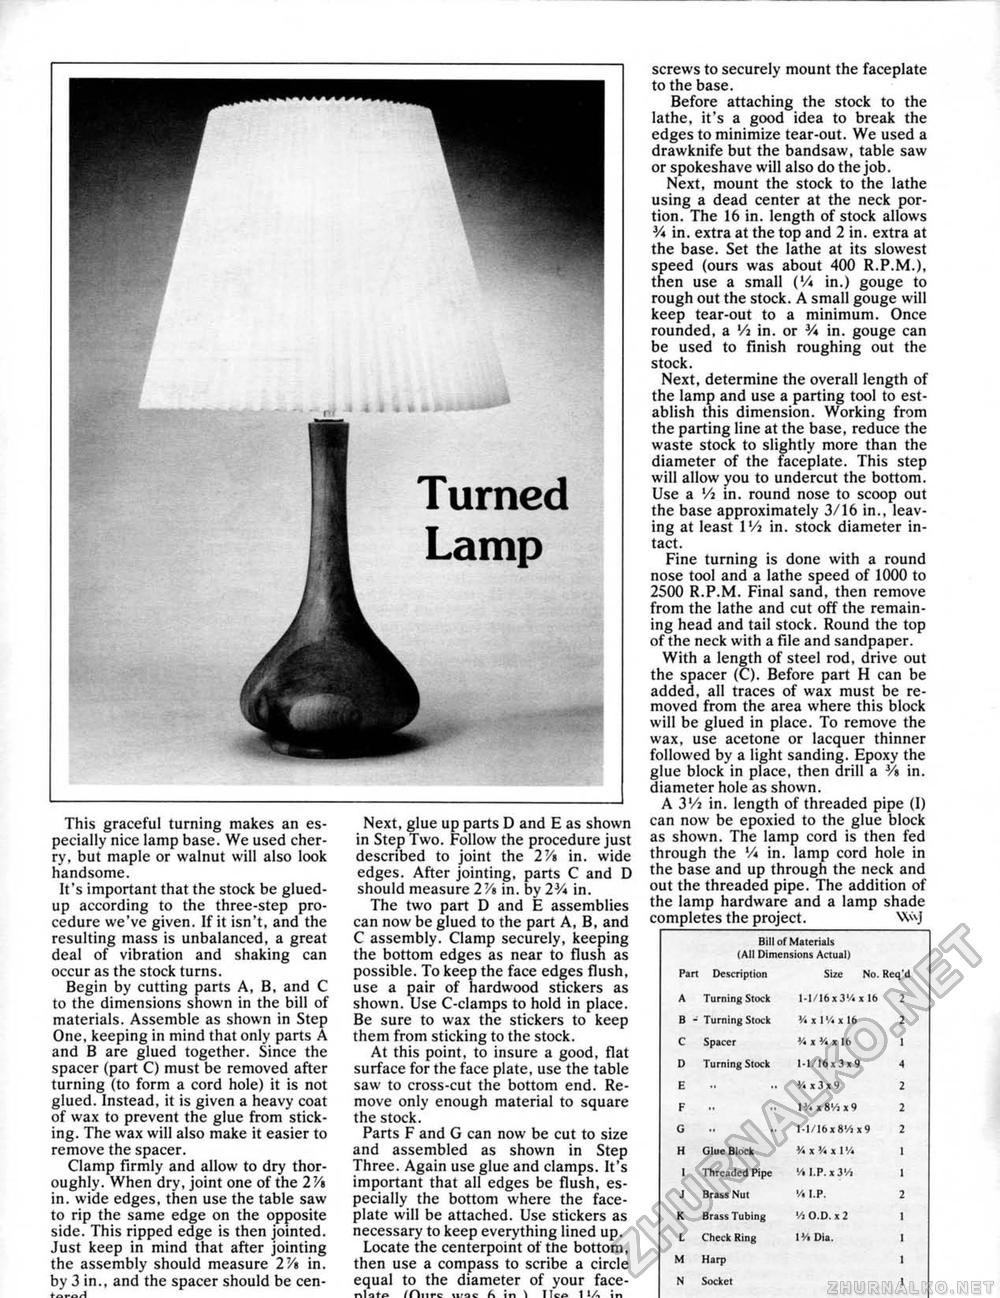
This graceful turning makes an especially nice lamp base. We used cherry, but maple or walnut will also look handsome. it's important that the stock be glued-up according to the three-step procedure we've given. If it isn't, and the resulting mass is unbalanced, a great deal of vibration and shaking can occur as the stock turns. Begin by cutting parts A, B, and C to the dimensions shown in the bill of materials. Assemble as shown in Step One, keeping in mind that only parts A and B are glued together. Since the spacer (part C) must be removed after turning {to form a cord hole) it is not glued. Instead, it is given a heavy coat of wax to prevent the glue from sticking. The wax will also make it easier to remove the spacer. Clamp firmly and allow to dry thoroughly. When dry, joint one of the 2 V» in. wide edges, then use the table saw to rip the same edge on the opposite side. This ripped edge is then jointed. Just keep in mind that 3fter jointing the assembly should measure 2V» in. by 3 in., and the spacer should be cen- fot-u^ Next, glue up parts D and E as shown in Step Two. Follow the procedure just described to joint the 2V% in. wide edges. After jointing, parts C and D should measure 2V» in. by 2>A in. The two part D and E assemblies can now be glued to the part A, B, and C assembly. Clamp securely, keeping the bottom edges as near to flush as possible. To keep the face edges flush, use a pair of hardwood stickers as shown. Use C-clamps to hold in place. Be sure to wax the stickers to keep them from sticking to the stock. At this point, to insure a good, flat surface for the face piate, use the table saw to cross-cut the bottom end. Remove only enough material to square the stock. Parts F and G can now be cut to size and assembled as shown in Step Three. Again use glue and clamps. It's important that all edges be flush, especially the bottom where the faceplate will be attached. Use stickers as necessary to keep everything lined up. Locate the centerpoint of the bottom, then use a compass to scribe a circle equal to the diameter of your face- fOnrc u>ac f\ in i lTc*s It/, in screws to securely mount the faceplate to the base. Before attaching the stock to the lathe, it's a good idea to break the edges to minimize tear-out. We used a drawknife but the bandsaw, table saw or spokeshave will also do the job. Next, mount the stock to the lathe using a dead center at the neck portion. The 16 in. length of stock allows 3/« in, extra at the top and 2 in. extra at the base. Set the lathe at its slowest speed (ours was about 400 R.P.M.), then use a small ('/« in.) gouge to rough out the stock. A small gouge will keep tear-out to a minimum. Once rounded, a Va in. or 3A in. gouge can be used to finish roughing out the stock. Next, determine the overall length of the lamp and use a parting tool to establish this dimension. Working from the parting line at the base, reduce the waste stock to slightly more than the diameter of the faceplate. This step will allow you to undercut the bottom. Use a Vi in, round nose to scoop out the base approximately 3/16 in., leaving at least IVj in. stock diameter intact. Fine turning is done with a round nose tool and a lathe speed of 1000 to 2500 R.P.M. Final sand, then remove from the lathe and cut off the remaining head and tail stock. Round the top of the neck with a file and sandpaper. With a length of steel rod, drive out the spacer (C), Before part H can be added, all traces of wax must be removed from the area where this block will be glued in place. To remove the wax, use acetone or lacquer thinner followed by a light sanding. Epoxy the glue block in place, then drill a V* in. diameter hole as shown. A 3'/1 in. length of threaded pipe (1) can now be epoxied to the glue block as shown. The lamp cord is then fed through the Vi in. lamp cord hole in the base and up through the neck and out the threaded pipe. The addition of the lamp hardware and a lamp shade completes the project. Bill of Materials (All Dimensions Actual) Part Description Size Ne. Keq'd Bill of Materials (All Dimensions Actual) Part Description Size Ne. Keq'd
|


