Woodworker's Journal 1983-7-4, страница 38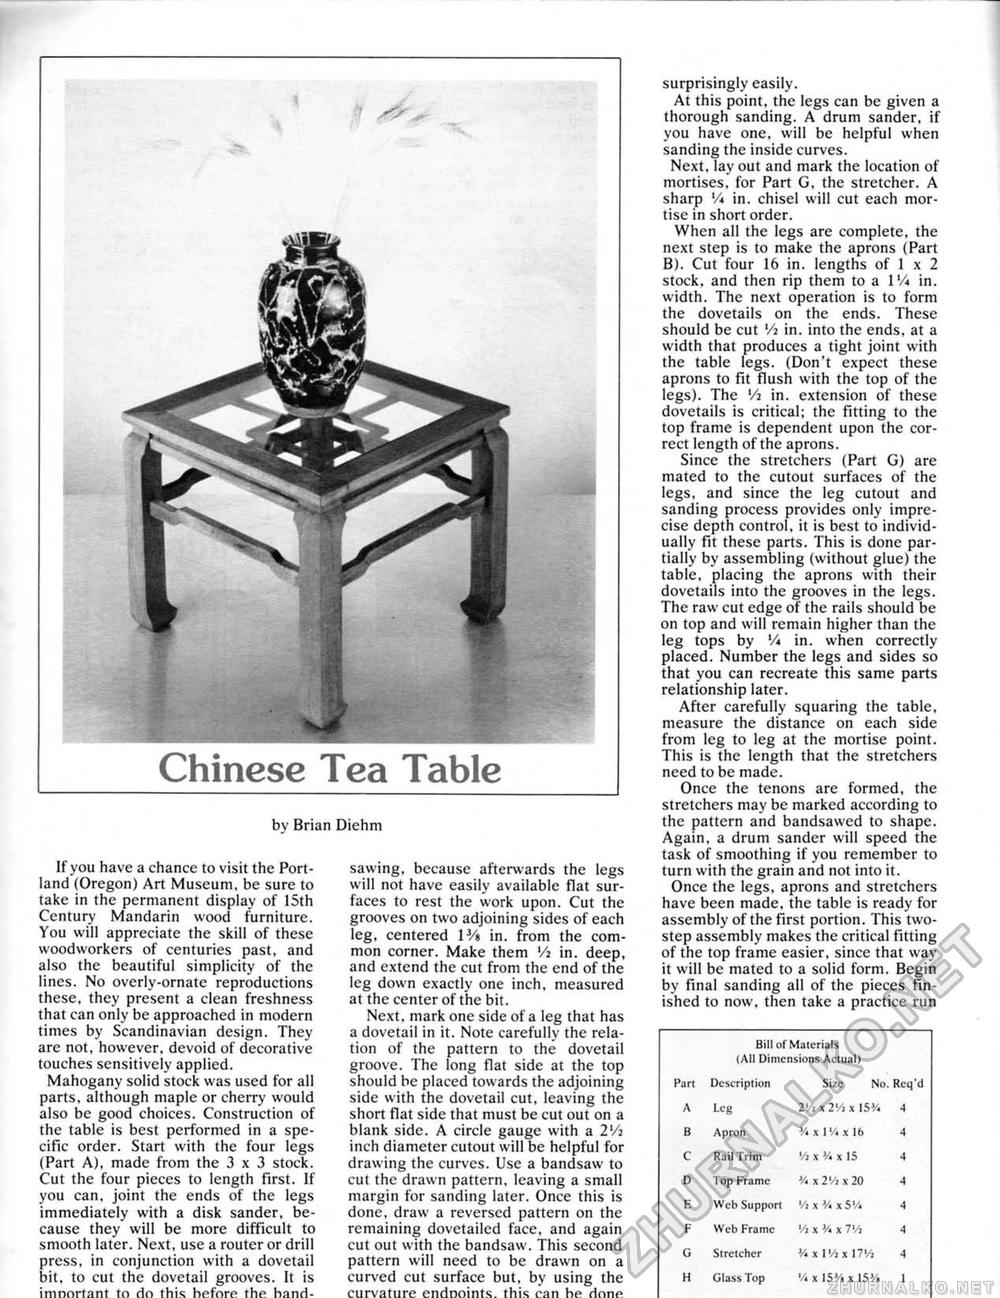
Chinese Tea Table by Brian Diehni If you have a chance to visit the Portland (Oregon) Art Museum, be sure to take in the permanent display of 15th Century Mandarin wood furniture. You will appreciate the skill of these woodworkers of centuries past, and also the beautiful simplicity of the lines. No overly-ornate reproductions these, they present a clean freshness that can only be approached in modern times by Scandinavian design. They arc not. however, devoid of decorative touches sensitively applied. Mahogany solid stock was used for all parts, although maple or cherry would also be good choices. Construction of the table is best performed in a specific order. Start with the four legs (Part A), made from the 3 x 3 stock. Cut the four pieces to length first. If you can, joint the ends of the legs immediately with a disk sander, because they will be more difficult to smooth later. Next, use a router or drill press, in conjunction with a dovetail bit, to cut the dovetail grooves. It is irnnortant to do this before the hand- sawing, because afterwards the legs will not have easily available Hat surfaces to rest the work upon. Cut the grooves on two adjoining sides of each leg. centered 1V» in. from the common corner. Make them '/i in. deep, and extend the cut from the end of the leg down exactly one inch, measured at the center of the bit. Next, mark one side of a leg that has a dovetail in it. Note carefully the relation of the pattern to the dovetail groove. The long fiat side at the top should be placed towards the adjoining side with the dovetail cut, leaving the short Tat side that must be cut out on a blank side, A circle gauge with a 21/: inch diameter cutout will be helpful for drawing the curves. Use a bandsaw to cut the drawn pattern, leaving a small margin for sanding later. Once this is done, draw a reversed pattern on the remaining dovetailed face, and again cut out with the bandsaw. This second pattern will need to be drawn on a curved cut surface but, by using the curvature endnoints. this can he done surprisingly easily. At this point, the legs can be given a thorough sanding, A drum sander, if you have one, will be helpful when sanding the inside curves. Next, lay out and mark the location of mortises, for Part G, the stretcher. A sharp V* in. chisel will cut each mortise in short order. When all the legs are complete, the next step is to make the aprons (Part B). Cut four 16 in. lengths of 1 x 2 stock, and then rip them to a IV* in. width. The next operation is to form the dovetails on the ends, These should be cut V: in. into the ends, at a width that produces a tight joint with the table legs, (Don't expect these aprons to fit flush with the top of the legs). The Vi in. extension of these dovetails is critical; the fitting to the top frame is dependent upon the correct length of the aprons. Since the stretchers (Part G) are mated to the cutout surfaces of the legs, and since the leg cutout and sanding process provides only imprecise depth control, it is best to individually fit these parts. This is done partially by assembling (without glue) the table, placing the aprons with their dovetails into the grooves in the legs. The raw cut edge of the rails should be on top and will remain higher than the leg tops by V* in. when correctly placed. Number the legs and sides so that you can recreate this same parts relationship later. After carefully squaring the table, measure the distance on each side from leg to leg at the mortise point. This is the length that the stretchers need to be made. Once the tenons are formed, the stretchers may be marked according to the pattern and bandsawed to shape. Again, a drum sander will speed the task of smoothing if you remember to turn with the grain and not into it. Once the legs, aprons and stretchers have been made, the table is ready for assembly of the first portion. This two-step assembly makes the critical fitting of the top frame easier, since that way it will be mated to a solid form. Begin by final sanding all of the pieces finished to now. then take a practice run Bill of Materials (All Dimensions Actual) Bill of Materials (All Dimensions Actual)
|
||||||||||||||||||||||||||||||||||||


