Woodworker's Journal 1983-7-4, страница 41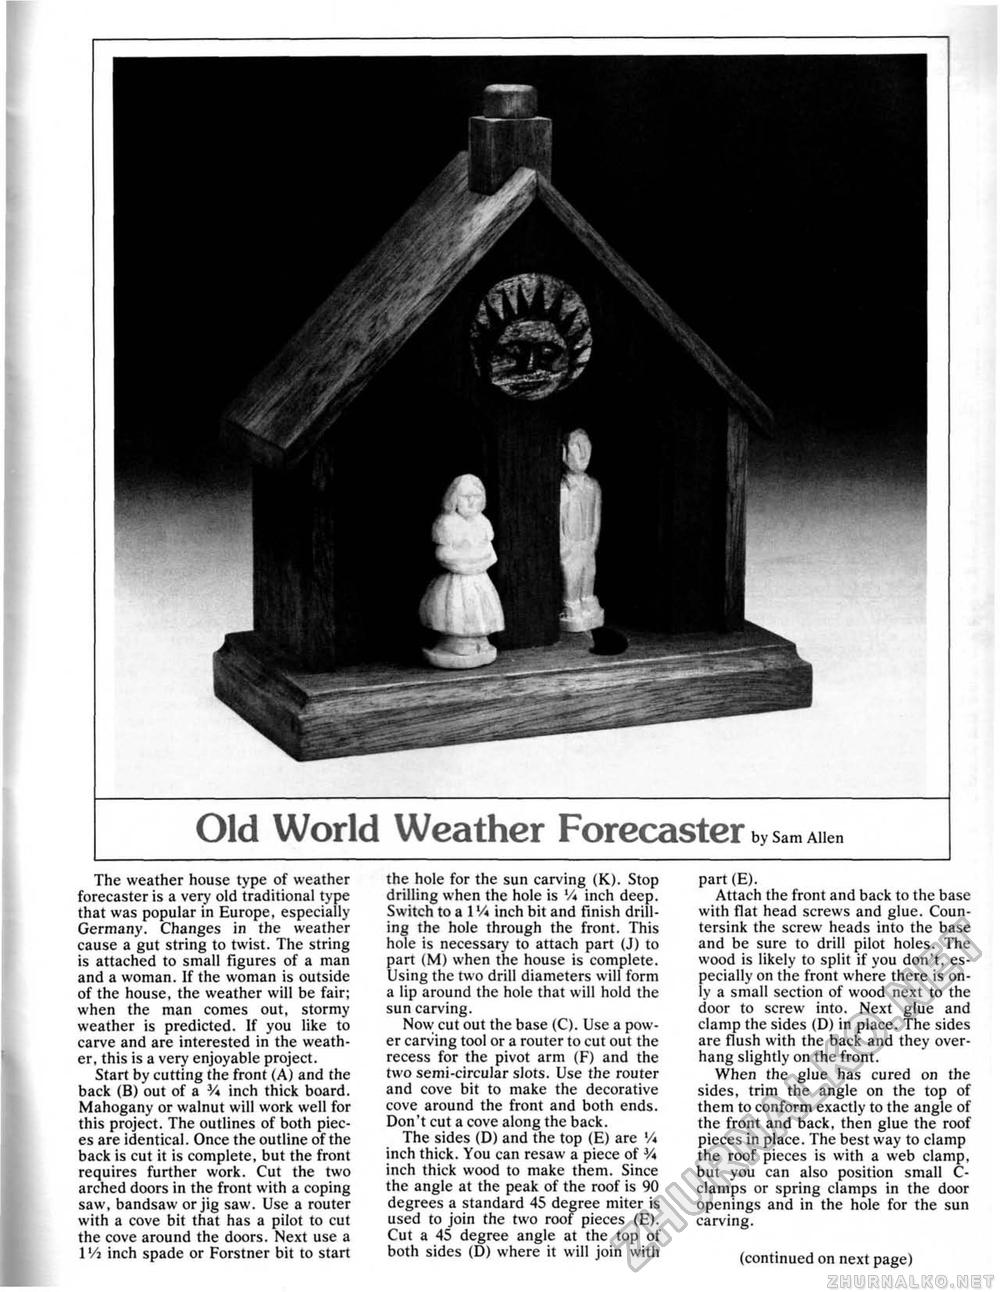
Old World Weather Forecaster by Sam AllenThe weather house type of weather forecaster is a very oid traditional type that was popular in Europe, especially Germany. Changes in the weather cause a gut string to twist. The string is attached to small figures of a man and a woman. If the woman is outside of the house, the weather will be fair; when the man comes out, stormy weather is predicted. If you like to carve and are interested in the weather, this is a very enjoyable project. Stan by cutting the front (A) and the back (B) out of a Y* inch thick board. Mahogany or walnut will work well for this project. The outlines of both pieces are identical. Once the outline of the back is cut it is complete, but the front requires further work. Cut the two arched doors in the front with a coping saw, bandsaw or jig saw. Use a router with a cove bit that has a pilot to cut the cove around the doors. Next use a 1 Vj inch spade or Forstner bit to start the hole for the sun carving (K). Stop drilling when the hole is % inch deep. Switch to a 1'/«inch bit and finish drilling the hole through the front. This hole is necessary to attach part (J) to part (M) when the house is complete. Using the two drill diameters wili form a lip around the hole that will hold the sun carving. Now; cut out the base (C). Use a power carving tool or a router to cut out the recess for the pivot arm (F) and the two semi-circular slots. Use the router and cove bit to make the decorative cove around the front and both ends. Don't cut a cove along the back. The sides (D) and the top (E) are V* inch thick. You can resaw a piece of V* inch thick wood to make them. Since the angle at the peak of the roof is 90 degrees a standard 45 degree miter is used to join the two roof pieces (E). Cut a 45 degree angle at the top of both sides (D) where it will join with part (E). Attach the front and back to the base with flat head screws and glue. Countersink the screw heads into the base and be sure to drill pilot holes. The wood is likely to split if you don't, especially on the front where there is only a small section of wood next to the door to screw into. Next glue and clamp the sides (D) in place. The sides are flush with the back and they overhang slightly on the front. When the glue has cured on the sides, trim the angle on the top of them to conform exactly to the angle of the front and back, then glue the roof pieces in place. The best way to clamp the roof pieces is with a web clamp, but you can also position small C-clamps or spring clamps in the door openings and in the hole for the sun carving. (continued on next page) |


