Woodworker's Journal 1983-7-6, страница 31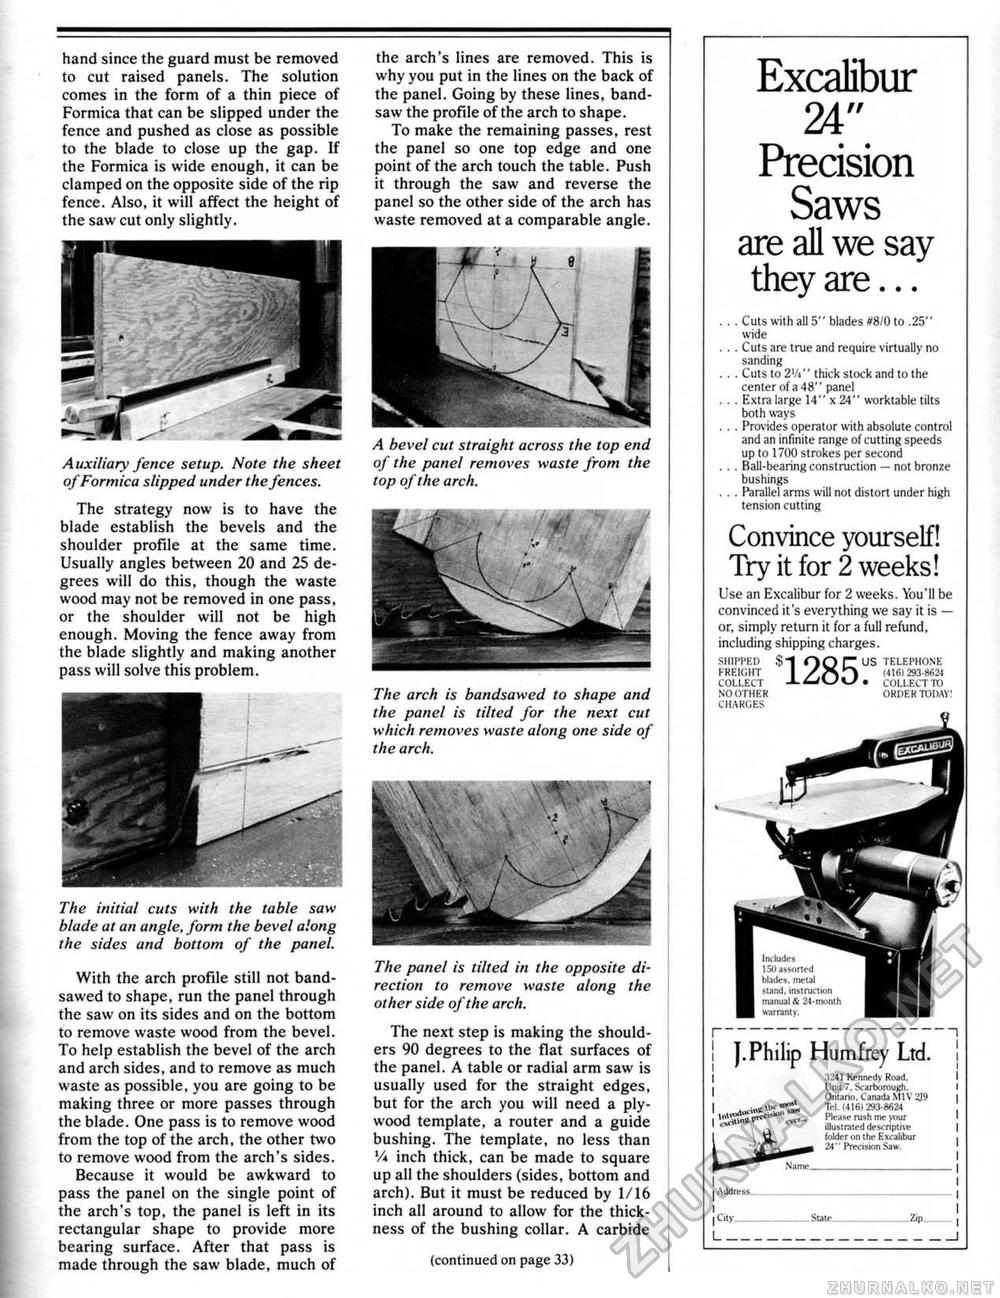
hand since the guard must be removed to cut raised panels. The solution comes in the form of a thin piece of Formica that can be slipped under the fence and pushed as close as possible to the blade to close up the gap. If the Formica is wide enough, it can be clamped on the opposite side of the rip fence. Also, it will affect the height of the saw cut only slightly. Auxiliary fence setup. Note the sheet of Formica slipped under the fences. The strategy now is to have the blade establish the bevels and the shoulder profile at the same time. Usually angles between 20 and 25 degrees will do this, though the waste wood may not be removed in one pass, or the shoulder will not be high enough. Moving the fence away from the blade slightly and making another pass will solve this problem. The initial cuts with the table saw blade at an angle, form the bevel along the sides and bottom of the panel. With the arch profile still not band-sawed to shape, run the panel through the saw on its sides and on the bottom to remove waste wood from the bevel. To help establish the bevel of the arch and arch sides, and to remove as much waste as possible, you are going to be making three or more passes through the blade. One pass is to remove wood from the top of the arch, the other two to remove wood from the arch's sides. Because it would be awkward to pass the panel on the single point of the arch's top, the panel is left in its rectangular shape to provide more bearing surface. After that pass is made through the saw blade, much of the arch's lines are removed. This is why you put in the lines on the back of the panel. Going by these lines, band-saw the profile of the arch to shape. To make the remaining passes, rest the panel so one top edge and one point of the arch touch the table. Push it through the saw and reverse the panel so the other side of the arch has waste removed at a comparable angle., A bevel cut straight across the top end of the pane! removes waste from the top of the arch. The arch is bandsawed to shape and the panel is tilted for the next cut which removes waste along one side of the arch. The panel is tilted in the opposite direction to remove waste along the other side of the arch. The next step is making the shoulders 90 degrees to the flat surfaces of the panel. A table or radial arm saw is usually used for the straight edges, but for the arch you will need a plywood template, a router and a guide bushing. The template, no less than Vi inch thick, can be made to square up all the shoulders (sides, bottom and arch). But it must be reduced by 1/16 inch all around to allow for the thickness of the bushing collar, A carbide (continued on page 33) Excalibur 24" Precision Saws are all we say they are... . . . Cuts with all 5" blades #8/0 to .25" wide . . . Cuts are true and require virtually no sanding . . . Cuts to 2Vi" thick stock and lo the center of a 48" panel . . . Extra large 14" * 24" worktable tilts both ways ... Provides operator with absolute control and an infinite range of cutting speeds up to 17(10 strokes per second . . . Ball-bearing construction — not bronze bushings . . . Parallel arms will not distort under high tension cutting Convince yourself! Try it for 2 weeks! Use an Excalibur for 2 weeks. You'll be convinced it's even.1 thing we say it is — or, simply return it for a full refund, including shipping charges. SHIPPED $"1 OO C US TELEPHONE FREIGHT I /JS1^ t41(i) 293M2* COLLECT • COLLECT TO NO OTHER OR OEM TODAY! CHARGES J.Philip Humfrey Ltd. ;tai Kctmsdy Road. Unit 7. Scarborough. Oraarvi, Canada M1V 39 Tel. <416129^8624 Please rush me ■ u: ilhj&t rated desenptive toldcr on the Exrahbur 34" PrrdsKm Sau\ I Vide--', | City 1__ . Slate _ Zip. |


