Woodworker's Journal 1983-7-6, страница 30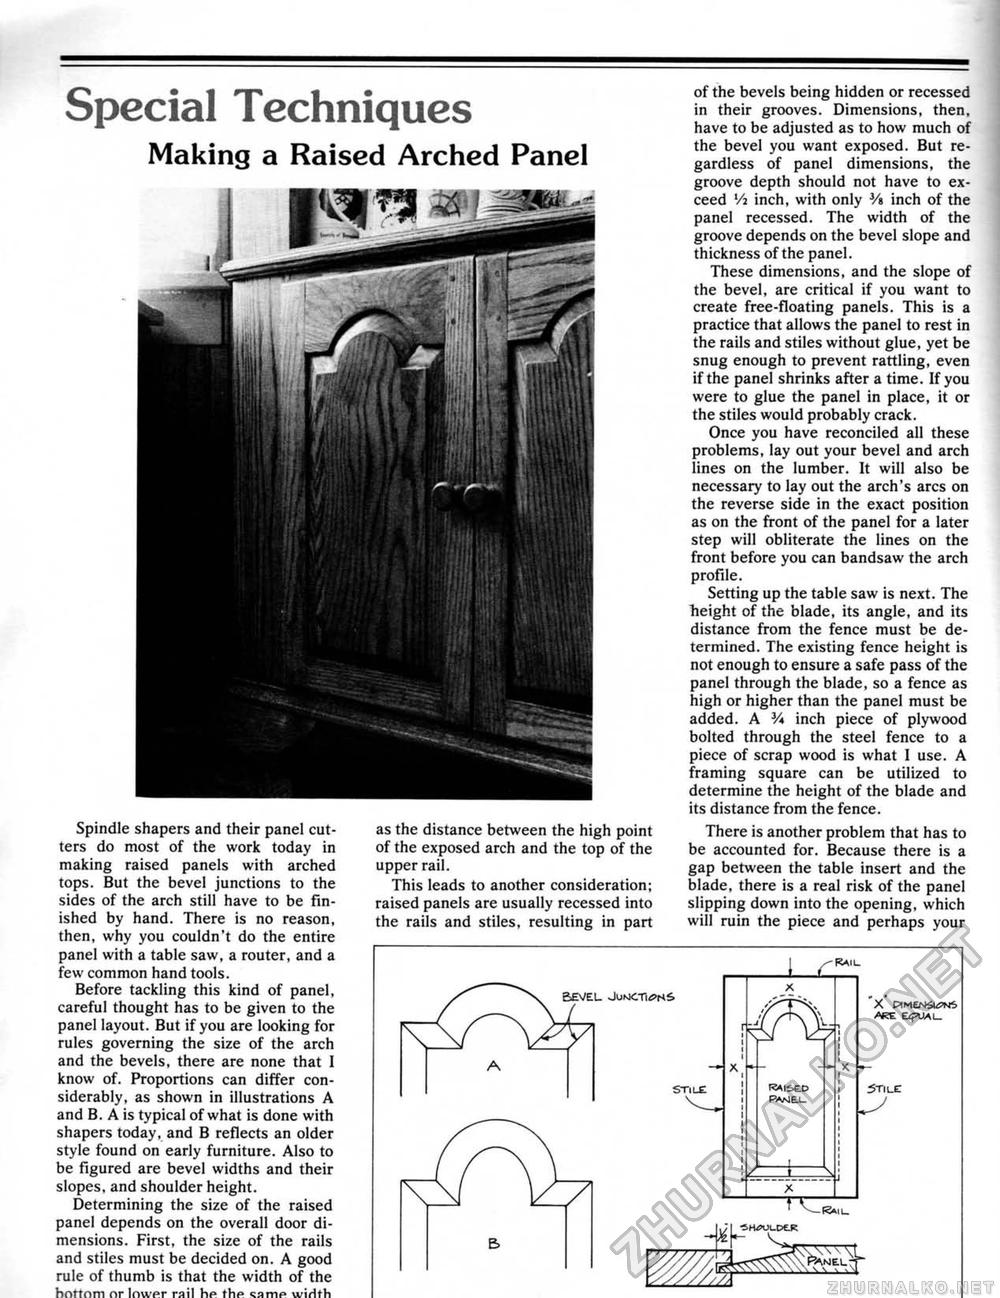
Special TechniquesSpindle shapers and their panel cutters do most of the work today in making raised panels with arched tops. But the bevel junctions to the sides of the arch still have to be finished by hand. There is no reason, then, why you couldn't do the entire panel with a table saw, a router, and a few common hand tools. Before tackling this kind of panel, careful thought has to be given to the panel layout. But if you are looking for rules governing the size of the arch and the bevels, there are none that I know of. Proportions can differ considerably, as shown in illustrations A and B. A is typical of what is done with shapers today, and B reflects an older style found on early furniture. Also to be figured are bevel widths and their slopes, and shoulder height. Determining the size of the raised panel depends on the overall door dimensions. First, the size of the rails and stiles must be decided on. A good rule of thumb is that the width of the hortnm or lower rail he the <;amp wirith as the distance between the high point of the exposed arch and the top of the upper rail. This leads to another consideration; raised panels are usually recessed into the rails and stiles, resulting in part of the beveis being hidden or recessed in their grooves. Dimensions, then, have to be adjusted as to how much of the bevel you want exposed. But regardless of panel dimensions, the groove depth should not have to exceed '/a inch, with only Vi inch of the panel recessed. The width of the groove depends on the bevel slope and thickness of the panel. These dimensions, and the slope of the bevel, are critical if you want to create free-floating panels. This is a practice that allows the panel to rest in the rails and stiles without glue, yet be snug enough to prevent rattling, even if the panel shrinks after a time. If you were to glue the panel in place, it or the stiles would probably crack. Once you have reconciled all these problems, lay out your bevel and arch lines on the lumber. It will also be necessary to lay out the arch's arcs on the reverse side in the exact position as on the front of the panel for a later step will obliterate the lines on the front before you can bandsaw the arch profile. Setting up the table saw is next. The height of the blade, its angle, and its distance from the fence must be determined. The existing fence height is not enough to ensure a safe pass of the panel through the blade, so a fence as high or higher than the panel must be added. A V* inch piece of plywood bolted through the steel fence to a piece of scrap wood is what I use. A framing square can be utilized to determine the height of the blade and its distance from the fence. There is another problem that has to be accounted for. Because there is a gap between the table insert and the blade, there is a real risk of the panel slipping down into the opening, which will ruin the piece and perhaps your BEVEL JUNCT1<?H£. STILE j-C Rah. TXT X CTME/StStSJNS. 5T1LE U' I®ML ■SHfjuuCJEj; Making a Raised Arched Panel |


