Woodworker's Journal 1983-7-6, страница 40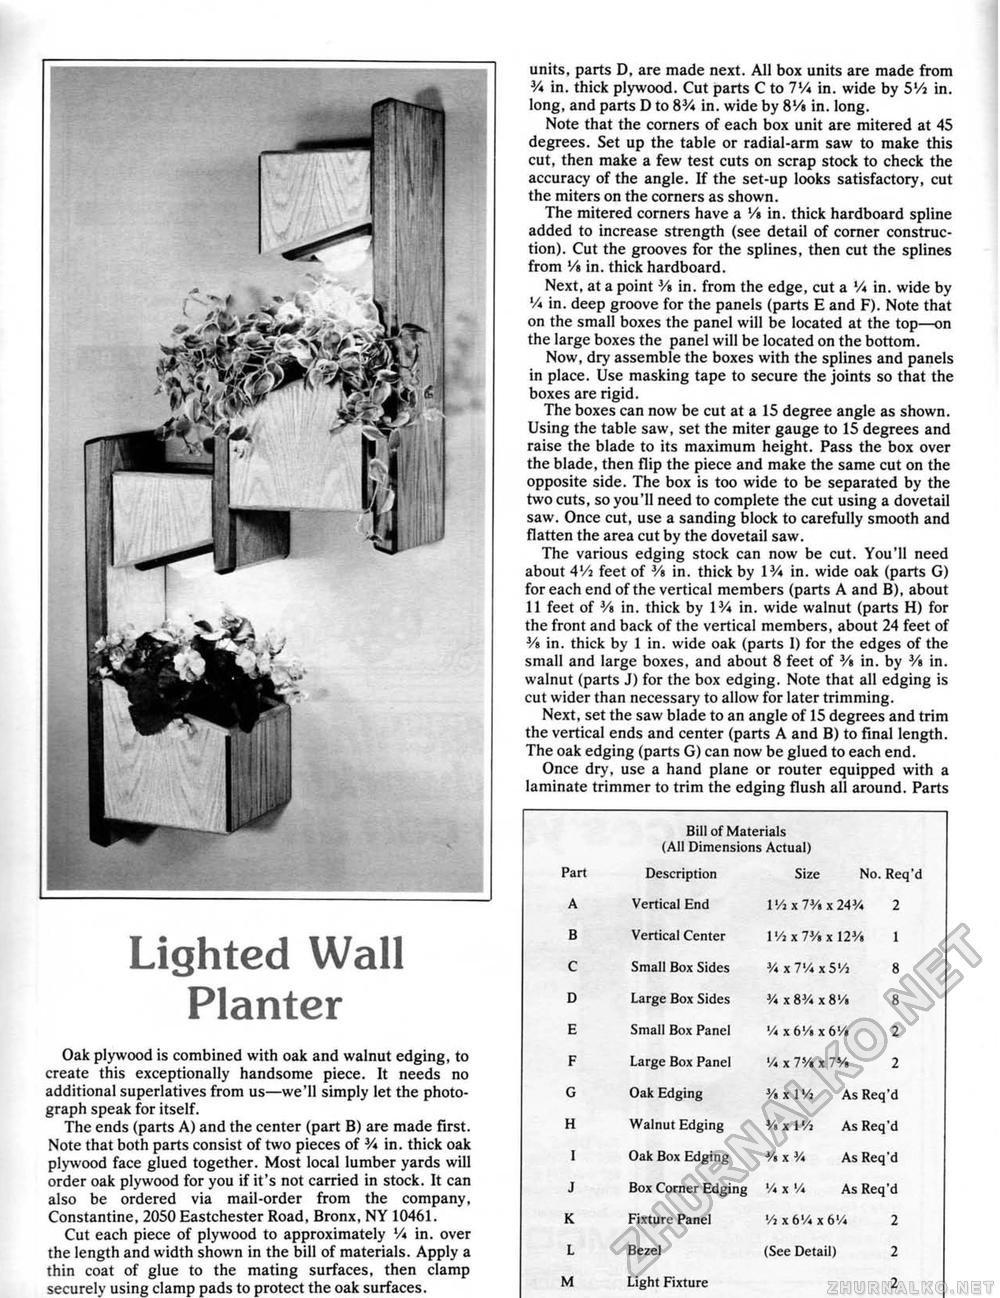
Lighted Wall PlanterOak plywood is combined with oak and walnut edging, to create this exceptionally handsome piece. It needs no additional superlatives from us—we'll simply let the photograph speak for itself. The ends (parts A) and the center (part B) are made first. Note that both parts consist of two pieces of V* in. thick oak plywood face glued together. Most local lumber yards will order oak plywood for you if it's not carried in stock. It can also be ordered via mail-order from the company, Constantine, 2050 Eastchester Road. Bronx, NY 10461 ■ Cut each piece of plywood to approximately V* in. over the length and width shown in the bill of materials. Apply a thin coat of glue to the mating surfaces, then clamp securely using clamp pads to protect the oak surfaces. units, parts D, are made next. All box units are made from 3A in. thick plywood. Cut parts C to IV* in. wide by 5Vi in, long, and parts D to 83A in. wide by 8l/« in. long. Note that the corners of each box unit are mitered at 45 degrees. Set up the table or radial-arm saw to make this cut, then make a few test cuts on scrap stock to check the accuracy of the angle. If the set-up looks satisfactory, cut the miters on the corners as shown. The mitered corners have a */» in. thick hardboard spline added to increase strength (see detail of corner construction). Cut the grooves for the splines, then cut the splines from lA in. thick hardboard. Next, at a point Vt in. from the edge, cut a V* in. wide by in, deep groove for the panels (parts E and F). Note that on the small boxes the panel will be located at the top—on the large boxes the panel will be located on the bottom. Now, dry assemble the boxes with the splines and panels in place. Use masking tape to secure the joints so that the boxes are rigid. The boxes can now be cut at a 15 degree angle as shown. Using the table saw, set the miter gauge to 15 degrees and raise the blade to its maximum height. Pass the box over the blade, then flip the piece and make the same cut on the opposite side. The box is too wide to be separated by the two cuts, so you'll need to complete the cut using a dovetail saw. Once cut, use a sanding block to carefully smooth and flatten the area cut by the dovetail saw. The various edging stock can now be cut. You'll need about 4'/i feet of V% in. thick by l3A in. wide oak (parts G) for each end of the vertical members (parts A and B), about 11 feet of % in. thick by VA in. wide walnut (parts H) for the front and back of the vertical members, about 24 feet of Vs in. thick by 1 in. wide oak (parts 1) for the edges of the small and large boxes, and about 8 feet of 3/» in. by V» in. walnut (parts J) for the box edging. Note that all edging is cut wider than necessary to allow for later trimming. Next, set the saw blade to an angle of 15 degrees and trim the vertical ends and center (parts A and B) to final length. The oak edging (parts G) can now be glued to each end. Once dry, use a hand plane or router equipped with a laminate trimmer to trim the edging flush all around. Parts Bill of Materials (All Dimensions Actual)
|
||||||||||||||||||||||||||||||||||||||||||||||||||||||||


