Woodworker's Journal 1983-7-6, страница 55
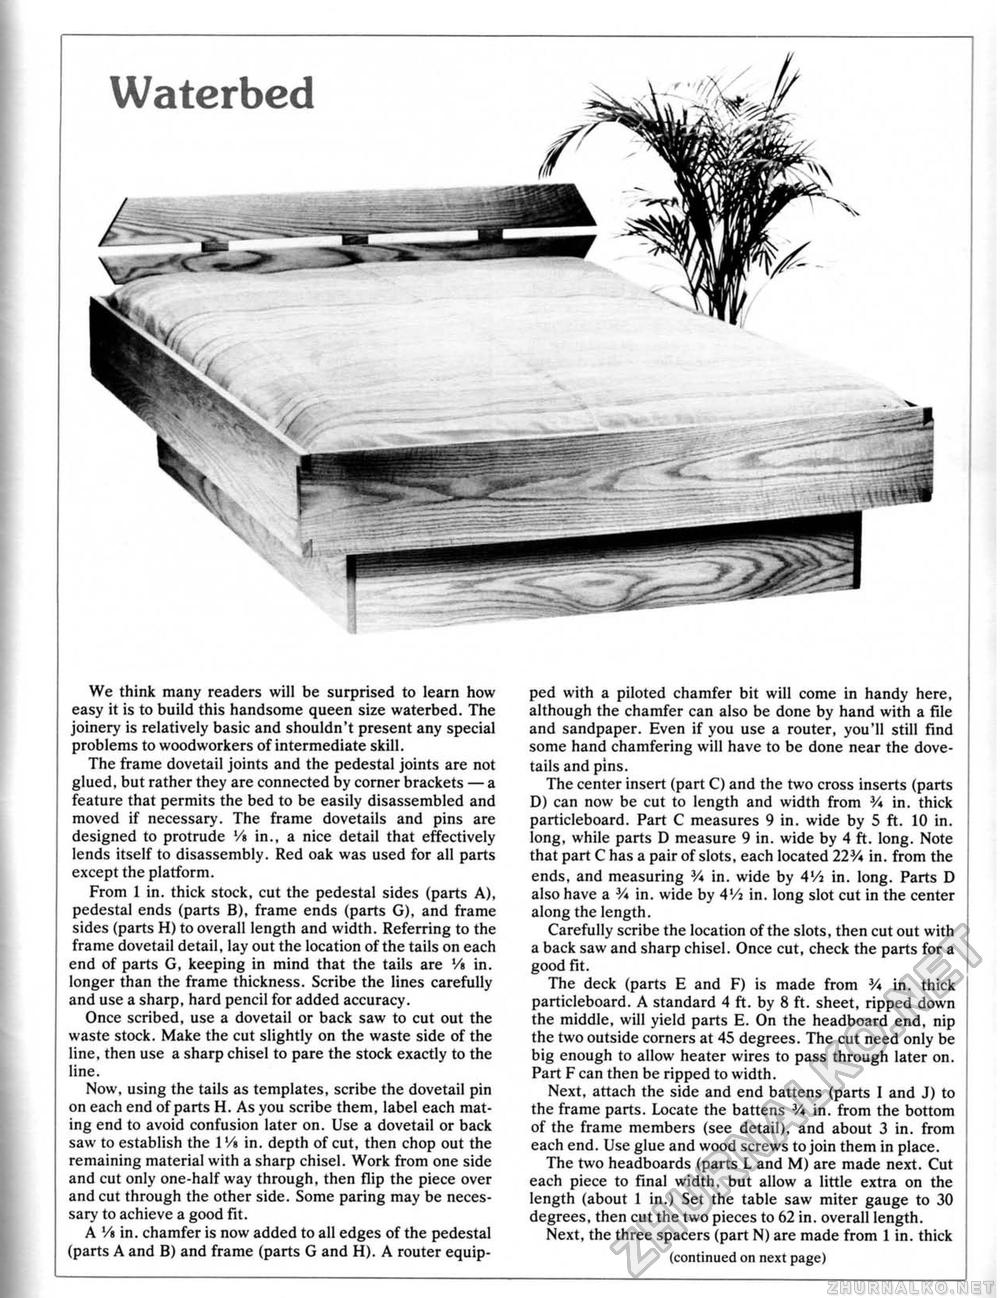
We think many readers will be surprised to (earn how easy it is to build this handsome queen size waterbed. The joinery is relatively basic and shouldn't present any special problems to woodworkers of intermediate skill. The frame dovetail joints and the pedestal joints are not glued, but rather they are connected by corner brackets — a feature that permits the bed to be easily disassembled and moved if necessary. The frame dovetails and pins are designed to protrude '/» in., a nice detail that effectively lends itself to disassembly. Red oak was used for all parts except the platform. From 1 in. thick stock, cut the pedestal sides (parts A), pedestal ends (parts B), frame ends (parts G), and frame sides (parts H) to overall length and width. Referring to the frame dovetail detail, lay out the location of the tails on each end of parts G, keeping in mind that the tails are Vt in. longer than the frame thickness. Scribe the lines carefully and use a sharp, hard pencil for added accuracy. Once scribed, use a dovetail or back saw to cut out the waste stock. Make the cut slightly on the waste side of the line, then use a sharp chisel to pare the stock exactly to the line. Now, using the tails as templates, scribe the dovetail pin on each end of parts H. As you scribe them, label each mating end to avoid confusion later on. Use a dovetail or back saw to establish the 1 V» in, depth of cut, then chop out the remaining material with a sharp chisel. Work from one side and cut only one-half way through, then flip the piece over and cut through the other side. Some paring may be necessary to achieve a good fit. A '/»in. chamfer is now added to all edges of the pedestal (parts A and B) and frame (parts G and H). A router equip ped with a piloted chamfer bit will come in handy here, although the chamfer can also be done by hand with a file and sandpaper. Even if you use a router, you'll still find some hand chamfering will have to be done near the dovetails and pins. The center insert (part C) and the two cross inserts (parts D) can now be cut to length and width from }A in. thick particleboard. Part C measures 9 in. wide by 5 ft. 10 in. long, while parts D measure 9 in. wide by 4 ft. long. Note that part C has a pair of slots, each located 223/i in. from the ends, and measuring V* in. wide by AVi in. long. Parts D also have a 3A in. wide by 4'/i in. long slot cut in the center along the length. Carefully scribe the location of the slots, then cut out with a back saw and sharp chisel. Once cut, check the parts for a good fit. The deck (parts E and F) is made from V* in. thick particleboard. A standard 4 ft. by 8 ft. sheet, ripped down the middle, will yield parts E. On the headboard end, nip the two outside corners at 45 degrees. The cut need only be big enough to allow heater wires to pass through later on. Part F can then be ripped to width. Next, attach the side and end battens (parts I and J) to the frame parts. Locate the battens % in. from the bottom of the frame members (see detail), and about 3 in. from each end. Use glue and wood screws to join them in place. The two headboards (parts L and M) are made next. Cut each piece to final width, but allow a little extra on the length (about 1 in.) Set the table saw miter gauge to 30 degrees, then cut the two pieces to 62 in. overall length. Next, the three spacers (part N) are made from 1 in. thick (continued on next page) |


