Woodworker's Journal 1984-8-2, страница 32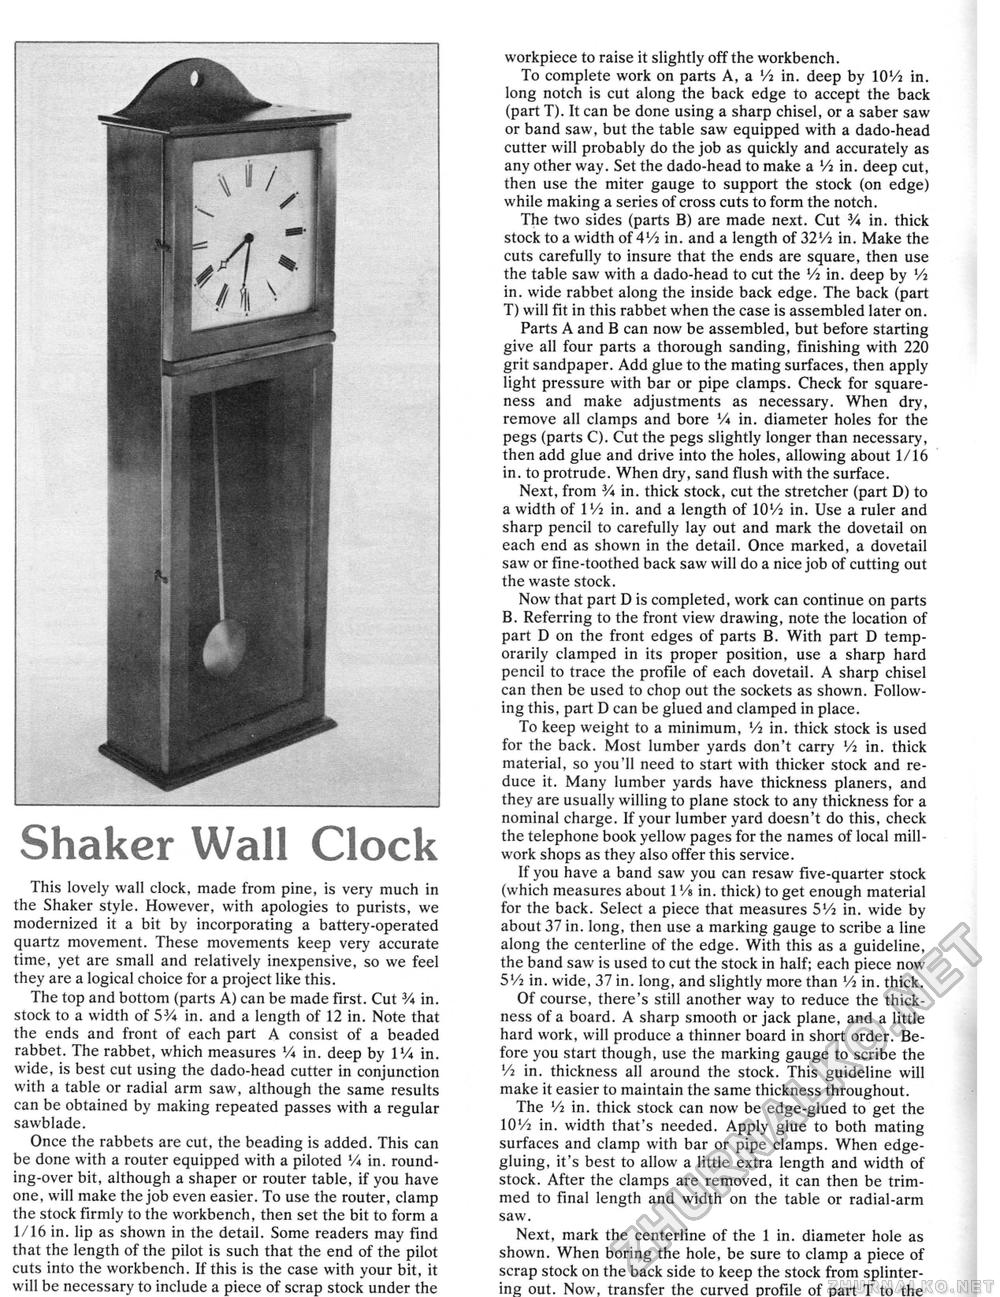
Shaker Wall Clock This lovely wall clock, made from pine, is very much in the Shaker style. However, with apologies to purists, we modernized it a bit by incorporating a battery-operated quartz movement. These movements keep very accurate time, yet are small and relatively inexpensive, so we feel they are a logical choice for a project like this. The top and bottom (parts A) can be made first. Cut 3A in. stock to a width of 5V* in. and a length of 12 in. Note that the ends and front of each part A consist of a beaded rabbet. The rabbet, which measures Vi in. deep by VA in. wide, is best cut using the dado-head cutter in conjunction with a table or radial arm saw, although the same results can be obtained by making repeated passes with a regular sawblade. Once the rabbets are cut, the beading is added. This can be done with a router equipped with a piloted V* in. round-ing-over bit, although a shaper or router table, if you have one, will make the job even easier. To use the router, clamp the stock firmly to the workbench, then set the bit to form a 1/16 in. lip as shown in the detail. Some readers may find that the length of the pilot is such that the end of the pilot cuts into the workbench. If this is the case with your bit, it will be necessary to include a piece of scrap stock under the workpiece to raise it slightly off the workbench. To complete work on parts A, a Vi in. deep by IOV2 in. long notch is cut along the back edge to accept the back (part T). It can be done using a sharp chisel, or a saber saw or band saw, but the table saw equipped with a dado-head cutter will probably do the job as quickly and accurately as any other way. Set the dado-head to make a Vi in. deep cut, then use the miter gauge to support the stock (on edge) while making a series of cross cuts to form the notch. The two sides (parts B) are made next. Cut V* in. thick stock to a width of 4lA in. and a length of 32*/i in. Make the cuts carefully to insure that the ends are square, then use the table saw with a dado-head to cut the Vi in. deep by Vi in. wide rabbet along the inside back edge. The back (part T) will fit in this rabbet when the case is assembled later on. Parts A and B can now be assembled, but before starting give all four parts a thorough sanding, finishing with 220 grit sandpaper. Add glue to the mating surfaces, then apply light pressure with bar or pipe clamps. Check for squareness and make adjustments as necessary. When dry, remove all clamps and bore Vi in. diameter holes for the pegs (parts C). Cut the pegs slightly longer than necessary, then add glue and drive into the holes, allowing about 1/16 in. to protrude. When dry, sand flush with the surface. Next, from V* in. thick stock, cut the stretcher (part D) to a width of IV2 in. and a length of IOV2 in. Use a ruler and sharp pencil to carefully lay out and mark the dovetail on each end as shown in the detail. Once marked, a dovetail saw or fine-toothed back saw will do a nice job of cutting out the waste stock. Now that part D is completed, work can continue on parts B. Referring to the front view drawing, note the location of part D on the front edges of parts B. With part D temporarily clamped in its proper position, use a sharp hard pencil to trace the profile of each dovetail. A sharp chisel can then be used to chop out the sockets as shown. Following this, part D can be glued and clamped in place. To keep weight to a minimum, Vi in. thick stock is used for the back. Most lumber yards don't carry Vi in. thick material, so you'll need to start with thicker stock and reduce it. Many lumber yards have thickness planers, and they are usually willing to plane stock to any thickness for a nominal charge. If your lumber yard doesn't do this, check the telephone book yellow pages for the names of local mill-work shops as they also offer this service. If you have a band saw you can resaw five-quarter stock (which measures about VA in. thick) to get enough material for the back. Select a piece that measures 5Vi in. wide by about 37 in. long, then use a marking gauge to scribe a line along the centerline of the edge. With this as a guideline, the band saw is used to cut the stock in half; each piece now 5W in, wide, 37 in. long, and slightly more than Vi in. thick. Of course, there's still another way to reduce the thickness of a board. A sharp smooth or jack plane, and a little hard work, will produce a thinner board in short order. Before you start though, use the marking gauge to scribe the V2 in, thickness all around the stock. This guideline will make it easier to maintain the same thickness throughout. The Vi in. thick stock can now be edge-glued to get the IOV2 in. width that's needed. Apply glue to both mating surfaces and clamp with bar or pipe clamps. When edge-gluing, it's best to allow a little extra length and width of stock. After the clamps are removed, it can then be trimmed to final length and width on the table or radial-arm saw. Next, mark the centerline of the 1 in. diameter hole as shown. When boring the hole, be sure to clamp a piece of scrap stock on the back side to keep the stock from splintering out. Now, transfer the curved profile of oart T to the |


