Woodworker's Journal 1984-8-2, страница 35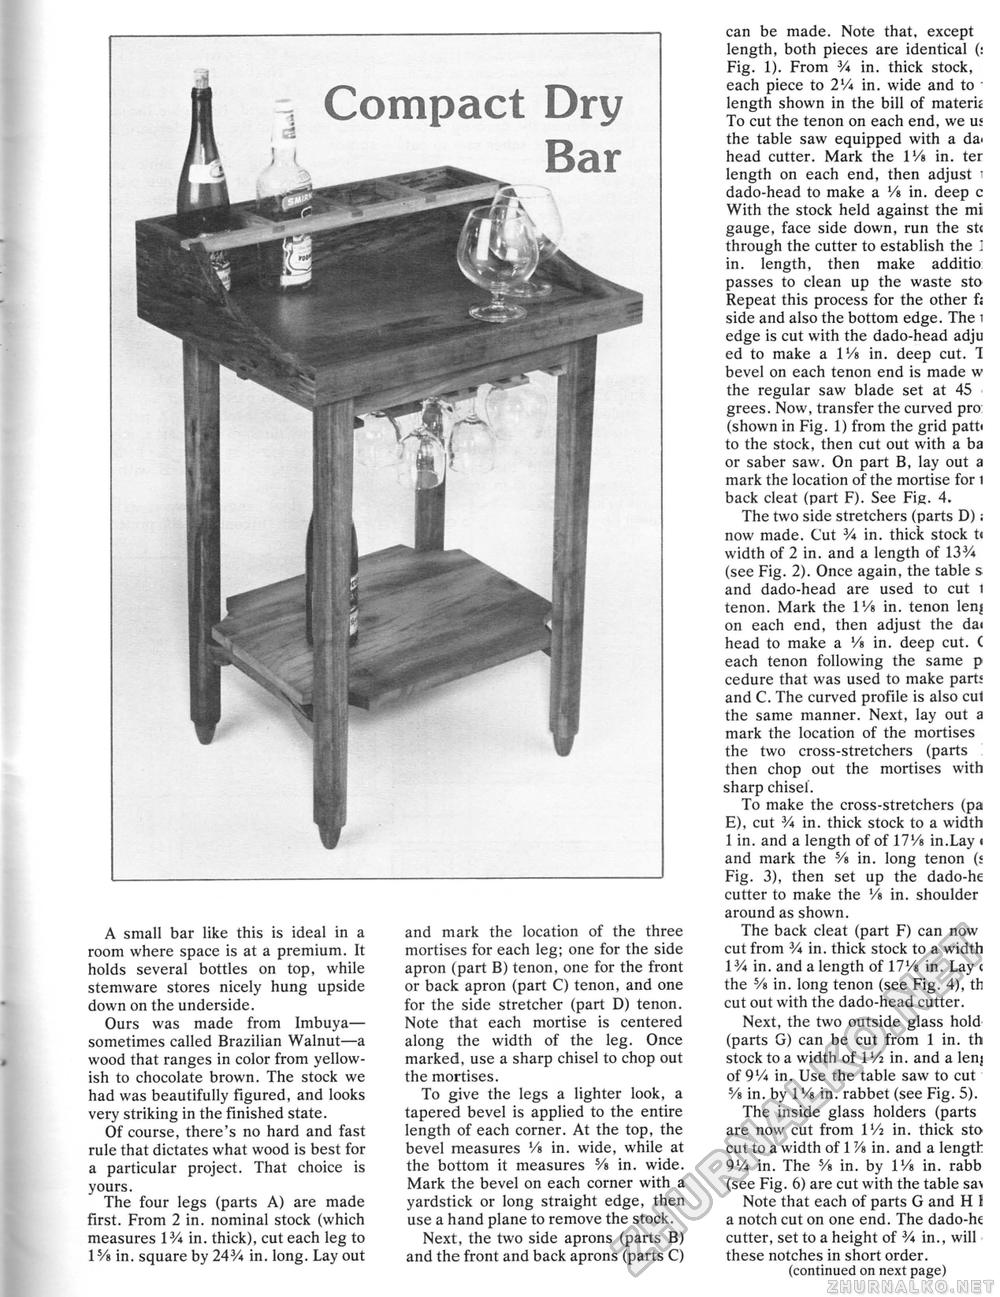
, Compact Dry Bar A small bar like this is ideal in a room where space is at a premium. It holds several bottles on top, while stemware stores nicely hung upside down on the underside. Ours was made from Imbuya— sometimes called Brazilian Walnut—a wood that ranges in color from yellowish to chocolate brown. The stock we had was beautifully figured, and looks very striking in the finished state. Of course, there's no hard and fast rule that dictates what wood is best for a particular project. That choice is yours. The four legs (parts A) are made first. From 2 in. nominal stock (which measures 13/i in. thick), cut each leg to 1 Va in. square by 24 V* in. long. Lay out and mark the location of the three mortises for each leg; one for the side apron (part B) tenon, one for the front or back apron (part C) tenon, and one for the side stretcher (part D) tenon. Note that each mortise is centered along the width of the leg. Once marked, use a sharp chisel to chop out the mortises. To give the legs a lighter look, a tapered bevel is applied to the entire length of each corner. At the top, the bevel measures '/e in. wide, while at the bottom it measures Yb in. wide. Mark the bevel on each corner with a yardstick or long straight edge, then use a hand plane to remove the stock. Next, the two side aprons (parts B) and the front and back aprons (parts C) can be made. Note that, except length, both pieces are identical (; Fig. 1), From 3A in, thick stock, each piece to 2Vi in. wide and to ■ length shown in the bill of materh To cut the tenon on each end, we us the table saw equipped with a da> head cutter. Mark the lVa in. ter length on each end, then adjust " dado-head to make a Vs in. deep c With the stock held against the mi gauge, face side down, run the st< through the cutter to establish the ; in. length, then make additio passes to clean up the waste sto Repeat this process for the other f; side and also the bottom edge. The i edge is cut with the dado-head adju ed to make a VA in. deep cut. 1 bevel on each tenon end is made w the regular saw blade set at 45 grees. Now, transfer the curved pro (shown in Fig. 1) from the grid patti to the stock, then cut out with a ba or saber saw. On part B, lay out a mark the location of the mortise for i back cleat (part F). See Fig. 4. The two side stretchers (parts D); now made. Cut % in, thick stock ti width of 2 in. and a length of 13% (see Fig. 2). Once again, the table s and dado-head are used to cut 1 tenon. Mark the l'/s in. tenon lenj on each end, then adjust the dai head to make a Vi in. deep cut. C each tenon following the same p cedure that was used to make part: and C. The curved profile is also cul the same manner. Next, lay out a mark the location of the mortises the two cross-stretchers (parts then chop out the mortises with sharp chisel. To make the cross-stretchers (pa E), cut V* in. thick stock to a width 1 in. and a length of of 17Vs in.Lay ■ and mark the 5A in. long tenon (s Fig. 3), then set up the dado-he cutter to make the Vi in. shoulder around as shown. The back cleat (part F) can now cut from 3A in. thick stock to a width 1V* in. and a length of 17Vi in. Lay c the SA in. long tenon (see Fig. 4), th cut out with the dado-head cutter. Next, the two outside glass hold {parts G) can be cut from 1 in. th stock to a width of 1 Vi in. and a lenj of 9Vi in. Use the table saw to cut Ye in. by 1 Vs in, rabbet (see Fig. 5). The inside glass holders (parts are now cut from 1 Vi in. thick sto cut to a width of VA in. and a length 9% in. The Ys in. by VA in. rabb {see Fig. 6) are cut with the table sa^ Note that each of parts G and H I a notch cut on one end. The dado-h« cutter, set to a height of V* in., will these notches in short order. {continued on next page) |


