Woodworker's Journal 1984-8-3, страница 13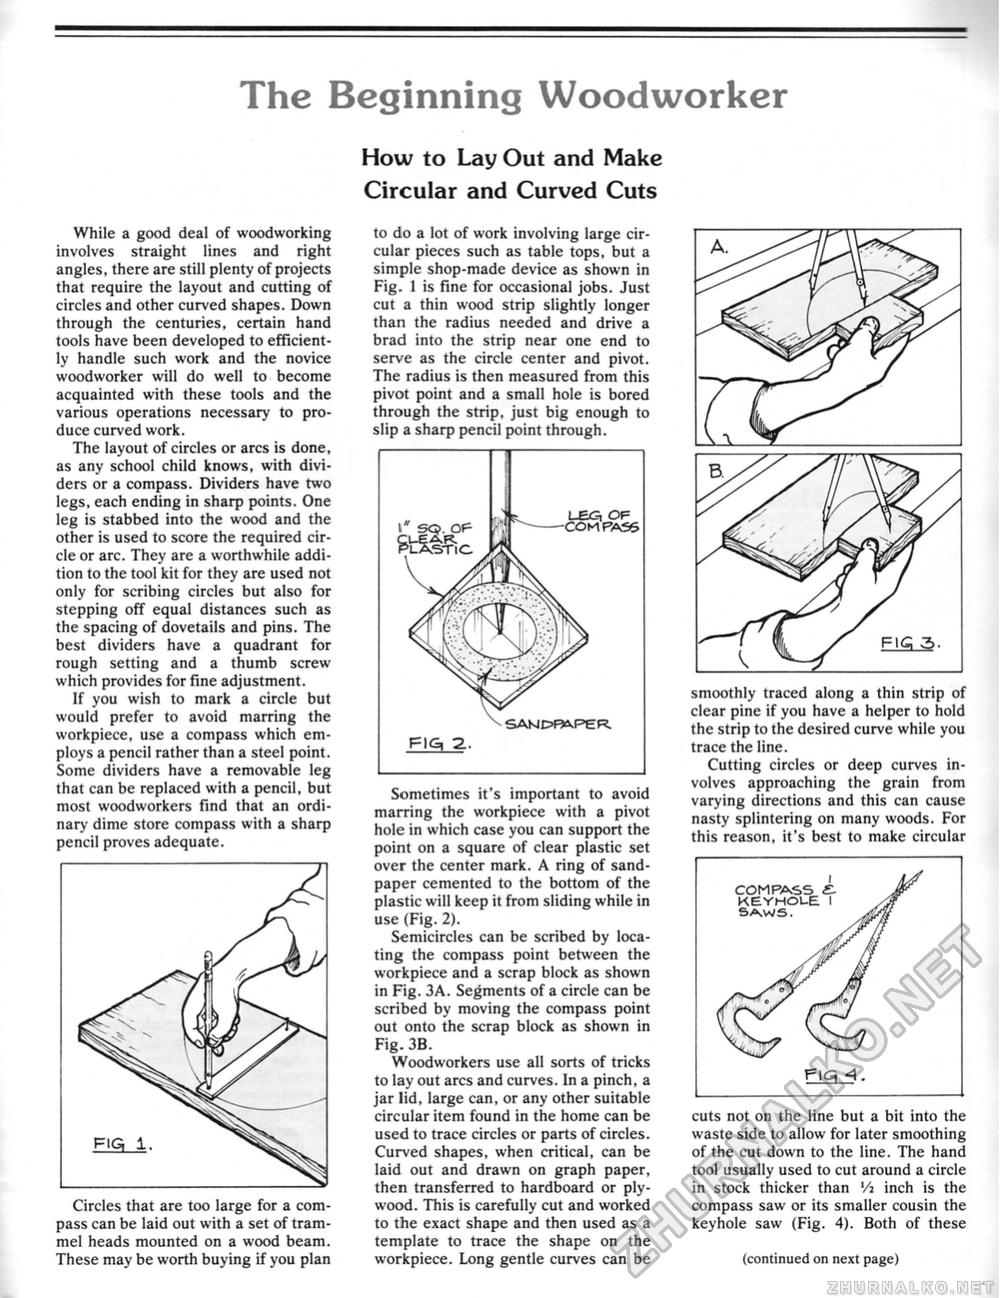
The Beginning Woodworker While a good deal of woodworking involves straight lines and right angles, there are still plenty of projects that require the layout and cutting of circles and other curved shapes. Down through the centuries, certain hand tools have been developed to efficiently handle such work and the novice woodworker will do well to become acquainted with these tools and the various operations necessary to produce curved work. The layout of circles or arcs is done, as any school child knows, with dividers or a compass. Dividers have two legs, each ending in sharp points. One leg is stabbed into the wood and the other is used to score the required circle or arc. They are a worthwhile addition to the tool kit for they are used not only for scribing circles but also for stepping off equal distances such as the spacing of dovetails and pins. The best dividers have a quadrant for rough setting and a thumb screw which provides for fine adjustment. If you wish to mark a circle but would prefer to avoid marring the workpiece, use a compass which employs a pencil rather than a steel point. Some dividers have a removable leg that can be replaced with a pencil, but most woodworkers find that an ordinary dime store compass with a sharp pencil proves adequate. Circles that are too large for a compass can be laid out with a set of trammel heads mounted on a wood beam. These may be worth buying if you plan How to Lay Out and Make Circular and Curved Cuts to do a lot of work involving large circular pieces such as table tops, but a simple shop-made device as shown in Fig. 1 is fine for occasional jobs. Just cut a thin wood strip slightly longer than the radius needed and drive a brad into the strip near one end to serve as the circle center and pivot. The radius is then measured from this pivot point and a small hole is bored through the strip, just big enough to slip a sharp pencil point through.
Sometimes it's important to avoid marring the workpiece with a pivot hole in which case you can support the point on a square of clear plastic set over the center mark. A ring of sandpaper cemented to the bottom of the plastic will keep it from sliding while in use (Fig. 2). Semicircles can be scribed by locating the compass point between the workpiece and a scrap block as shown in Fig. 3A. Segments of a circle can be scribed by moving the compass point out onto the scrap block as shown in Fig. 3B. Woodworkers use all sorts of tricks to lay out arcs and curves. In a pinch, a jar lid, large can, or any other suitable circular item found in the home can be used to trace circles or parts of circles. Curved shapes, when critical, can be laid out and drawn on graph paper, then transferred to hardboard or plywood. This is carefully cut and worked to the exact shape and then used as a template to trace the shape on the workpiece. Long gentle curves can be smoothly traced along a thin strip of clear pine if you have a helper to hold the strip to the desired curve while you trace the line. Cutting circles or deep curves involves approaching the grain from varying directions and this can cause nasty splintering on many woods. For this reason, it's best to make circular cuts not on the line but a bit into the waste side to allow for later smoothing of the cut down to the line. The hand tool usually used to cut around a circle in stock thicker than '/a inch is the compass saw or its smaller cousin the keyhole saw (Fig. 4). Both of these (continued on next page) |


