Woodworker's Journal 1984-8-4, страница 24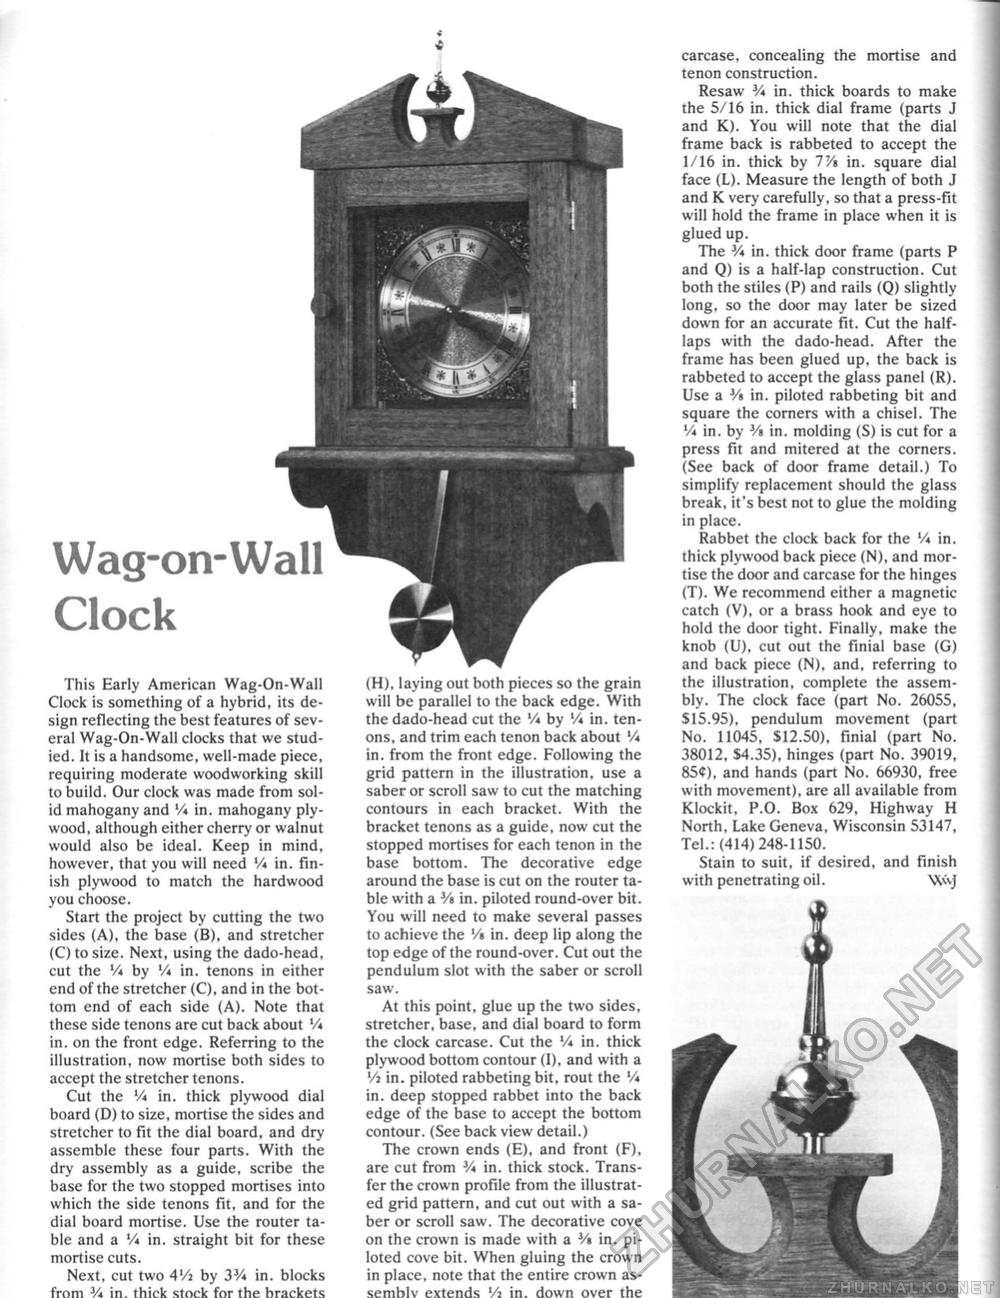
t i Wag-on-Wall Clock This Early American Wag-On-Wall Clock is something of a hybrid, its design reflecting the best features of several Wag-On-Wall clocks that we studied, It is a handsome, well-made piece, requiring moderate woodworking skill to build. Our clock was made from solid mahogany and V* in. mahogany plywood, although either cherry or walnut would also be ideal. Keep in mind, however, that you will need V* in. finish plywood to match the hardwood you choose. Start the project by cutting the two sides (A), the base (B), and stretcher (C) to size. Next, using the dado-head, cut the Vi by % in. tenons in either end of the stretcher (C), and in the bottom end of each side (A). Note that these side tenons are cut back about '/« in. on the front edge. Referring to the illustration, now mortise both sides to accept the stretcher tenons. Cut the '/* in, thick plywood dial board (D) to size, mortise the sides and stretcher to fit the dial board, and dry assemble these four parts. With the dry assembly as a guide, scribe the base for the two stopped mortises into which the side tenons fit, and for the dial board mortise. Use the router table and a Vi in. straight bit for these mortise cuts. Next, cut two 41/j by 3V* in. blocks from 3/i in. thick stock for the brackets (H), laying out both pieces so the grain will be parallel to the back edge. With the dado-head cut the V* by V* in. tenons, and trim each tenon back about '/* in. from the front edge. Following the grid pattern in the illustration, use a saber or scroll saw to cut the matching contours in each bracket. With the bracket tenons as a guide, now cut the stopped mortises for each tenon in the base bottom. The decorative edge around the base is cut on the router table with a 3/« in. piloted round-over bit. You will need to make several passes to achieve the '/i in. deep lip along the top edge of the round-over. Cut out the pendulum slot with the saber or scroll saw. At this point, glue up the two sides, stretcher, base, and dial board to form the clock carcase. Cut the '/« in. thick plywood bottom contour (I), and with a Vi in. piloted rabbeting bit, rout the V* in. deep stopped rabbet into the back edge of the base to accept the bottom contour. (See back view detail.) The crown ends (E), and front (F), are cut from V* in. thick stock. Transfer the crown profile from the illustrated grid pattern, and cut out with a saber or scroll saw. The decorative cove on the crown is made with a J/» in. piloted cove bit. When gluing the crown in place, note that the entire crown assembly extends Vi in. down over the carcase, concealing the mortise and tenon construction. Resaw Va in. thick boards to make the 5/16 in. thick dial frame (parts J and K). You will note that the dial frame back is rabbeted to accept the 1/16 in. thick by 7Vt in. square dial face (L). Measure the length of both J and K very carefully, so that a press-fit will hold the frame in place when it is glued up. The V* in. thick door frame (parts P and Q) is a half-lap construction. Cut both the stiles (P) and rails (Q) slightly long, so the door may later be sized down for an accurate fit. Cut the half-laps with the dado-head. After the frame has been glued up, the back is rabbeted to accept the glass panel (R). Use a 3/> in. piloted rabbeting bit and square the corners with a chisel. The '/* in. by 3/i in. molding (S) is cut for a press fit and mitered at the corners. (See back of door frame detail.) To simplify replacement should the glass break, it's best not to glue the molding in place. Rabbet the clock back for the Vi in. thick plywood back piece (N), and mortise the door and carcase for the hinges (T). We recommend either a magnetic catch (V). or a brass hook and eye to hold the door tight. Finally, make the knob (U)t cut out the finial base (G) and back piece (N), and, referring to the illustration, complete the assembly. The clock face (part No. 26055, S15.95), pendulum movement (part No. 11045, $12.50), finial (part No. 38012, S4.35), hinges (part No. 39019, 85$), and hands (part No. 66930, free with movement), are all available from Klockit, P.O. Box 629, Highway H North, Lake Geneva, Wisconsin 53147, Tel.: (414) 248-1150. Stain to suit, if desired, and finish with penetrating oil. WvJ |


