Woodworker's Journal 1984-8-4, страница 46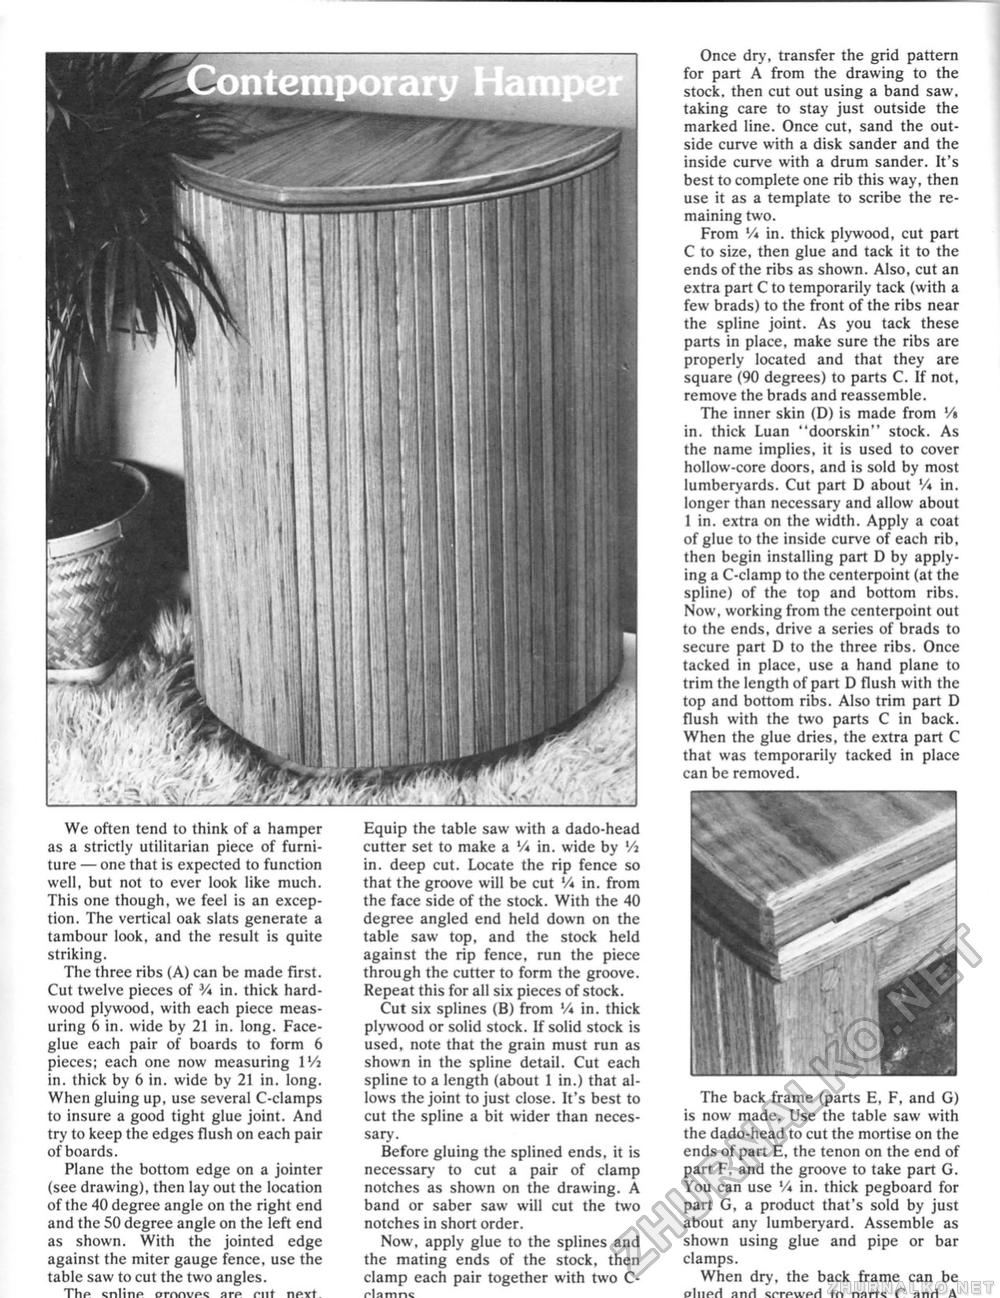
We often tend to think of a hamper as a strictly utilitarian piece of furniture — one that is expected to function well, but not to ever look like much. This one though, we feel is an exception. The vertical oak slats generate a tambour look, and the result is quite striking. The three ribs (A) can be made first. Cut twelve pieces of V* in. thick hardwood plywood, with each piece measuring 6 in. wide by 21 in. long. Face-glue each pair of boards to form 6 pieces; each one now measuring 1 Vi in. thick by 6 in. wide by 21 in. long. When gluing up, use several C-clamps to insure a good tight glue joint. And try to keep the edges flush on each pair of boards. Plane the bottom edge on a jointer (see drawing), then lay out the location of the 40 degree angle on the right end and the 50 degree angle on the left end as shown. With the jointed edge against the miter gauge fence, use the table saw to cut the two angles. Thf Qnlirif1 ornnvrx; are ent nevt Equip the table saw with a dado-head cutter set to make a '/< in. wide by Vi in. deep cut. Locate the rip fence so that the groove will be cut V* in. from the face side of the stock. With the 40 degree angled end held down on the table saw top, and the stock held against the rip fence, run the piece through the cutter to form the groove. Repeat this for all six pieces of stock. Cut six splines (B) from V* in. thick ply wood or solid stock. If solid stock is used, note that the grain must run as shown in the spline detail. Cut each spline to a length (about 1 in.) that allows the joint to just close. It's best to cut the spline a bit wider than necessary. Before gluing the splined ends, it is necessary to cut a pair of clamp notches as shown on the drawing. A band or saber saw will cut the two notches in short order. Now, apply glue to the splines and the mating ends of the stock, then clamp each pair together with two C- Hamnc Once dry, transfer the grid pattern for part A from the drawing to the stock, then cut out using a band saw, taking care to stay just outside the marked line. Once cut, sand the outside curve with a disk sander and the inside curve with a drum sander. It's best to complete one rib this way, then use it as a template to scribe the remaining two. From V* in. thick plywood, cut part C to size, then glue and tack it to the ends of the ribs as shown. Also, cut an extra part C to temporarily tack (with a few brads) to the front of the ribs near the spline joint. As you tack these parts in place, make sure the ribs are properly located and that they are square (90 degrees) to parts C. If not, remove the brads and reassemble. The inner skin (D) is made from 'A in. thick Luan "doorskin" stock. As the name implies, it is used to cover hollow-core doors, and is sold by most lumberyards. Cut part D about '/« in. longer than necessary and allow about 1 in. extra on the width. Apply a coat of glue to the inside curve of each rib, then begin installing part D by applying a C-clamp to the centerpoint (at the spline) of the top and bottom ribs. Now, working from the centerpoint out to the ends, drive a series of brads to secure part D to the three ribs. Once tacked in place, use a hand plane to trim the length of part D flush with the top and bottom ribs. Also trim part D flush with the two parts C in back. When the glue dries, the extra part C that was temporarily tacked in place can be removed. The back frame (parts E, F, and G) is now made. Use the table saw with the dado-head to cut the mortise on the ends of part E, the tenon on the end of part F, and the groove to take part G, You can use 'A in. thick pegboard for part G, a product that's sold by just about any lumberyard. Assemble as shown using glue and pipe or bar clamps. When dry, the back frame can be olneri anH srrewprl tn nan* C rinii A |


