Woodworker's Journal 1984-8-6, страница 40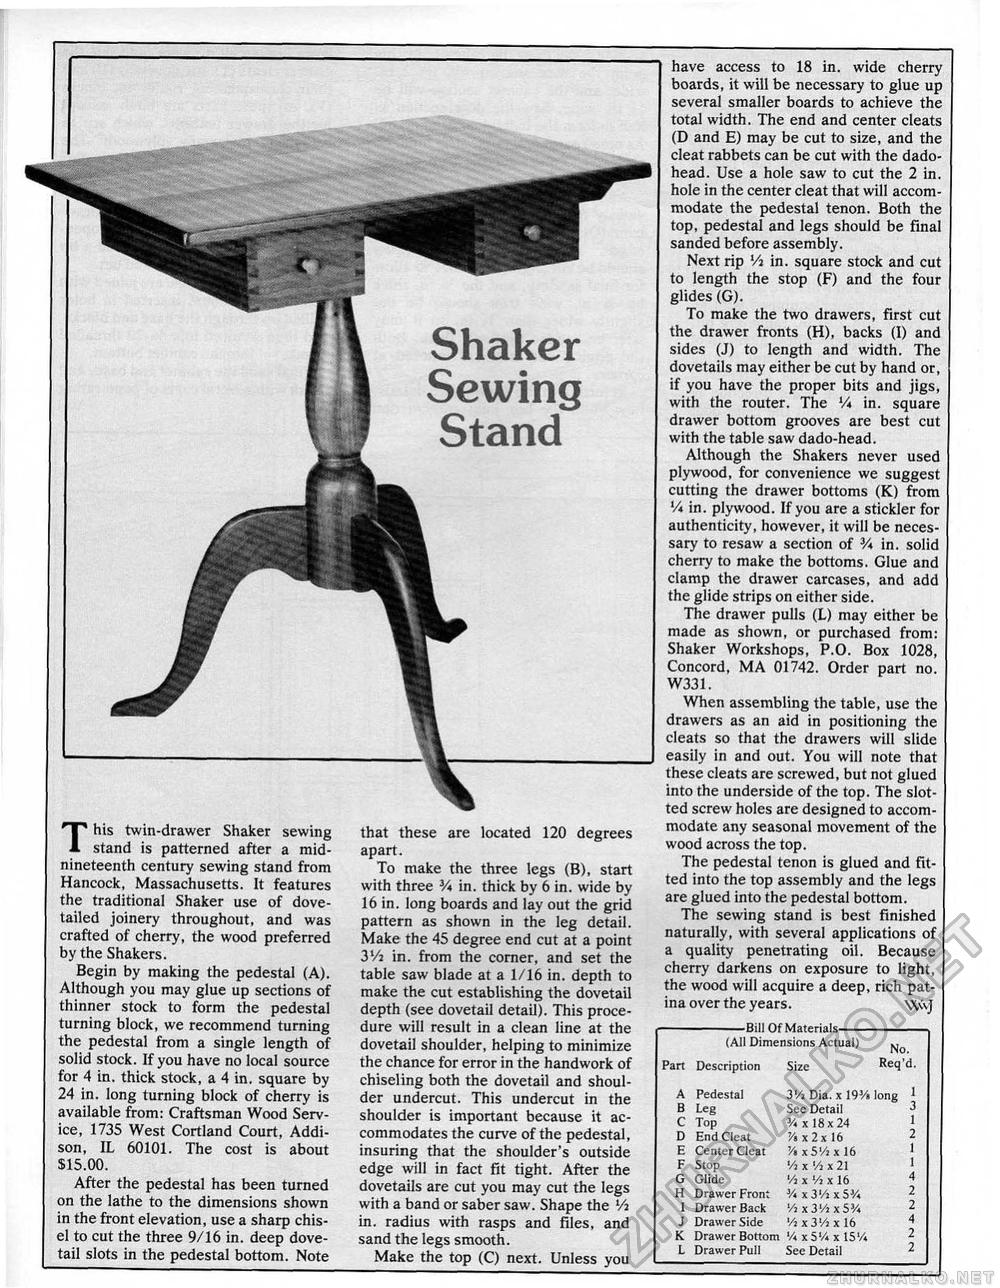
Shaker Sewing Stand This twin-drawer Shaker sewing stand is patterned after a mid-nineteenth century sewing stand from Hancock, Massachusetts. It features the traditional Shaker use of dovetailed joinery throughout, and was crafted of cherry, the wood preferred by the Shakers. Begin by making the pedestal (A). Although you may glue up sections of thinner stock to form the pedestal turning block, we recommend turning the pedestal from a single length of solid stock. If you have no local source for 4 in. thick stock, a 4 in. square by 24 in. long turning block of cherry is available from: Craftsman Wood Service, 1735 West Cortland Court, Addison, IL 60101. The cost is about $15.00. After the pedestal has been turned on the lathe to the dimensions shown in the front elevation, use a sharp chisel to cut the three 9/16 in. deep dovetail slots in the pedestal bottom. Note that these are located 120 degrees apart. To make the three legs (B), start with three 3A in. thick by 6 in. wide by 16 in. long boards and lay out the grid pattern as shown in the leg detail. Make the 45 degree end cut at a point 3Vj in. from the corner, and set the table saw blade at a 1/16 in. depth to make the cut establishing the dovetail depth (see dovetail detail). This procedure will result in a clean line at the dovetail shoulder, helping to minimize the chance for error in the handwork of chiseling both the dovetail and shoulder undercut. This undercut in the shoulder is important because it accommodates the curve of the pedestal, insuring that the shoulder's outside edge will in fact fit tight. After the dovetails are cut you may cut the legs with a band or saber saw. Shape the Vi in. radius with rasps and files, and sand the legs smooth. Make the top (C) next. Unless you have access to 18 in, wide cherry boards, it will be necessary to glue up several smaller boards to achieve the total width. The end and center cleats (D and E) may be cut to size, and the cleat rabbets can be cut with the dado-head. Use a hole saw to cut the 2 in. hole in the center cleat that will accommodate the pedestal tenon. Both the top, pedestal and legs should be final sanded before assembly. Next rip Vi in. square stock and cut to length the stop (F) and the four glides (G). To make the two drawers, first cut the drawer fronts (H), backs (1) and sides (J) to length and width. The dovetails may either be cut by hand or, if you have the proper bits and jigs, with the router. The V* in. square drawer bottom grooves are best cut with the table saw dado-head. Although the Shakers never used plywood, for convenience we suggest cutting the drawer bottoms (K) from V* in. plywood. If you are a stickler for authenticity, however, it will be necessary to resaw a section of 3/t in. solid cherry to make the bottoms. Glue and clamp the drawer carcases, and add the glide strips on either side. The drawer pulls (L) may either be made as shown, or purchased from: Shaker Workshops, P.O. Box 1028, Concord, MA 01742. Order part no. W331. When assembling the table, use the drawers as an aid in positioning the cleats so that the drawers will slide easily in and out. You will note that these cleats are screwed, but not glued into the underside of the top. The slotted screw holes are designed to accommodate any seasonal movement of the wood across the top. The pedestal tenon is glued and fitted into the top assembly and the legs are glued into the pedestal bottom. The sewing stand is best finished naturally, with several applications of a quality penetrating oil. Because cherry darkens on exposure to light, the wood will acquire a deep, rich patina over the years. WvJ -Bill Of Materials- (All Dimensions Actual) N -Bill Of Materials- (All Dimensions Actual) N
|
|||||||||||||||||||||||||||||||||||||||


