Woodworker's Journal 1984-8-6, страница 52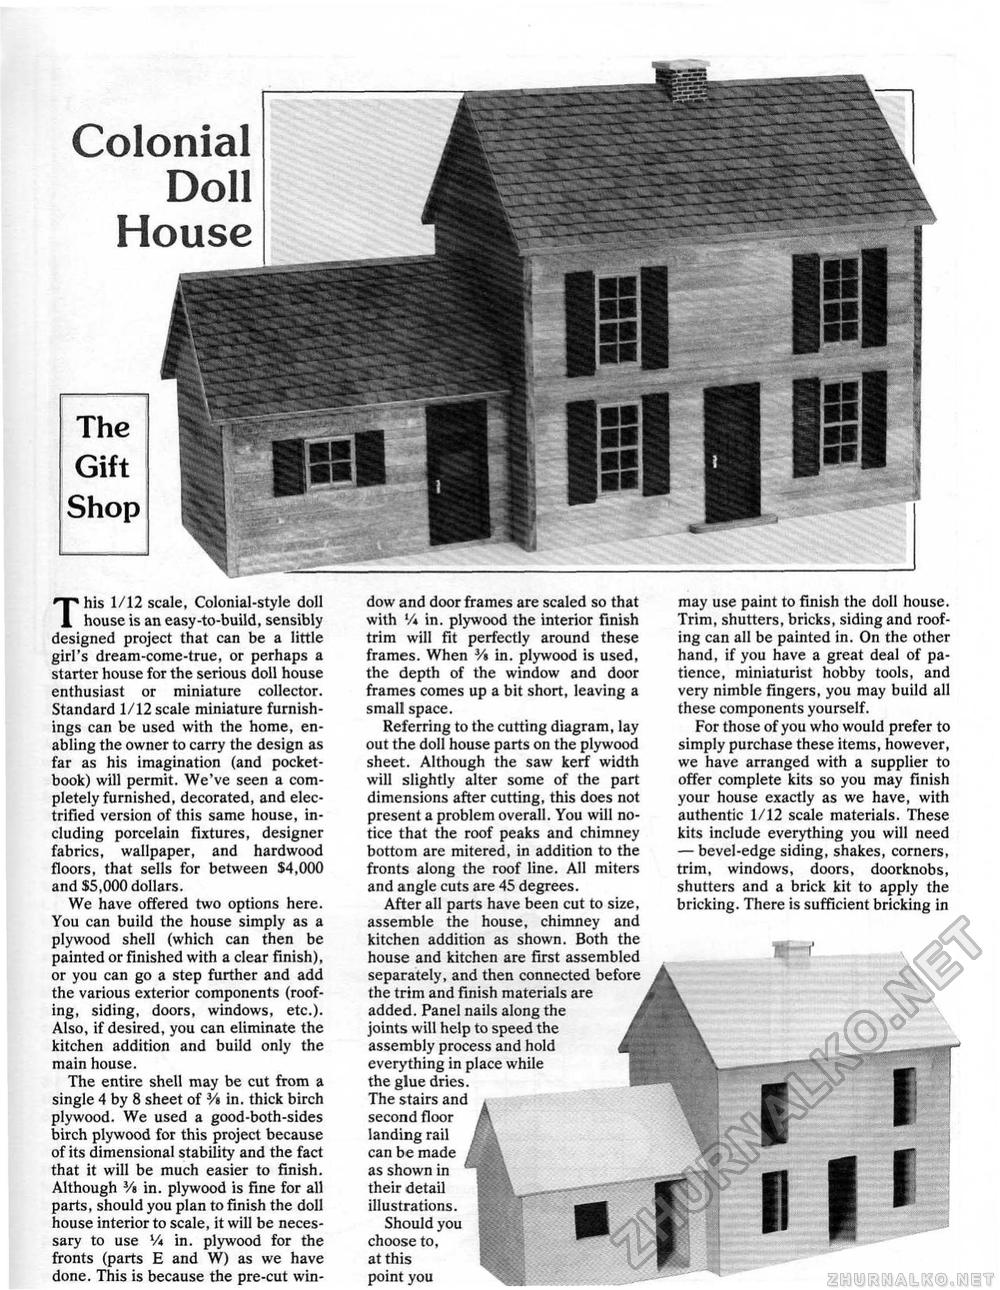
Colonial Doll House This 1/12 scale, Colonial-style doll house is an easy-to-build, sensibly designed project that can be a little girl's dream-come-true, or perhaps a starter house for the serious doll house enthusiast or miniature collector. Standard 1/12 scale miniature furnishings can be used with the home, enabling the owner to carry the design as far as his imagination (and pocket-book) will permit. We've seen a completely furnished, decorated, and electrified version of this same house, including porcelain fixtures, designer fabrics, wallpaper, and hardwood floors, that sells for between $4,000 and 35,000 dollars. We have offered two options here. You can build the house simply as a plywood shell (which can then be painted or finished with a clear finish), or you can go a step further and add the various exterior components (roofing, siding, doors, windows, etc.). Also, if desired, you can eliminate the kitchen addition and build only the main house. The entire shell may be cut from a single 4 by 8 sheet of Vt in. thick birch plywood. We used a good-both-sides birch plywood for this project because of its dimensional stability and the fact that it will be much easier to finish. Although Vt in. plywood is fine for all parts, should you plan to finish the doll house interior to scale, it will be necessary to use Vi in. plywood for the fronts (parts E and W) as we have done. This is because the pre-cut win dow and door frames are scaled so that with V* in. plywood the interior finish trim will fit perfectly around these frames. When Vt in. plywood is used, the depth of the window and door frames comes up a bit short, leaving a smal! space. Referring to the cutting diagram, lay out the doll house parts on the plywood sheet. Although the saw kerf width will slightly alter some of the part dimensions after cutting, this does not present a problem overall. You will notice that the roof peaks and chimney bottom are mitered, in addition to the fronts along the roof line. All miters and angle cuts are 45 degrees. After all parts have been cut to size, assemble the house, chimney and kitchen addition as shown. Both the house and kitchen are first assembled separately, and then connected before the trim and finish materials are added. Panel nails along the joints will help to speed the assembly process and hold everything in place while the glue dries. The stairs and second floor landing rail can be made as shown in their detail illustrations. Should you choose to, at this point you may use paint to finish the doll house. Trim, shutters, bricks, siding and roofing can all be painted in. On the other hand, if you have a great deal of patience, miniaturist hobby tools, and very nimble fingers, you may build all these components yourself. For those of you who would prefer to simply purchase these items, however, we have arranged with a supplier to offer complete kits so you may finish your house exactly as we have, with authentic 1/12 scale materials, These kits include everything you will need — bevel-edge siding, shakes, comers, trim, windows, doors, doorknobs, shutters and a brick kit to apply the bricking. There is sufficient bricking in I B 1 |


