Woodworker's Journal 1992-16-5, страница 18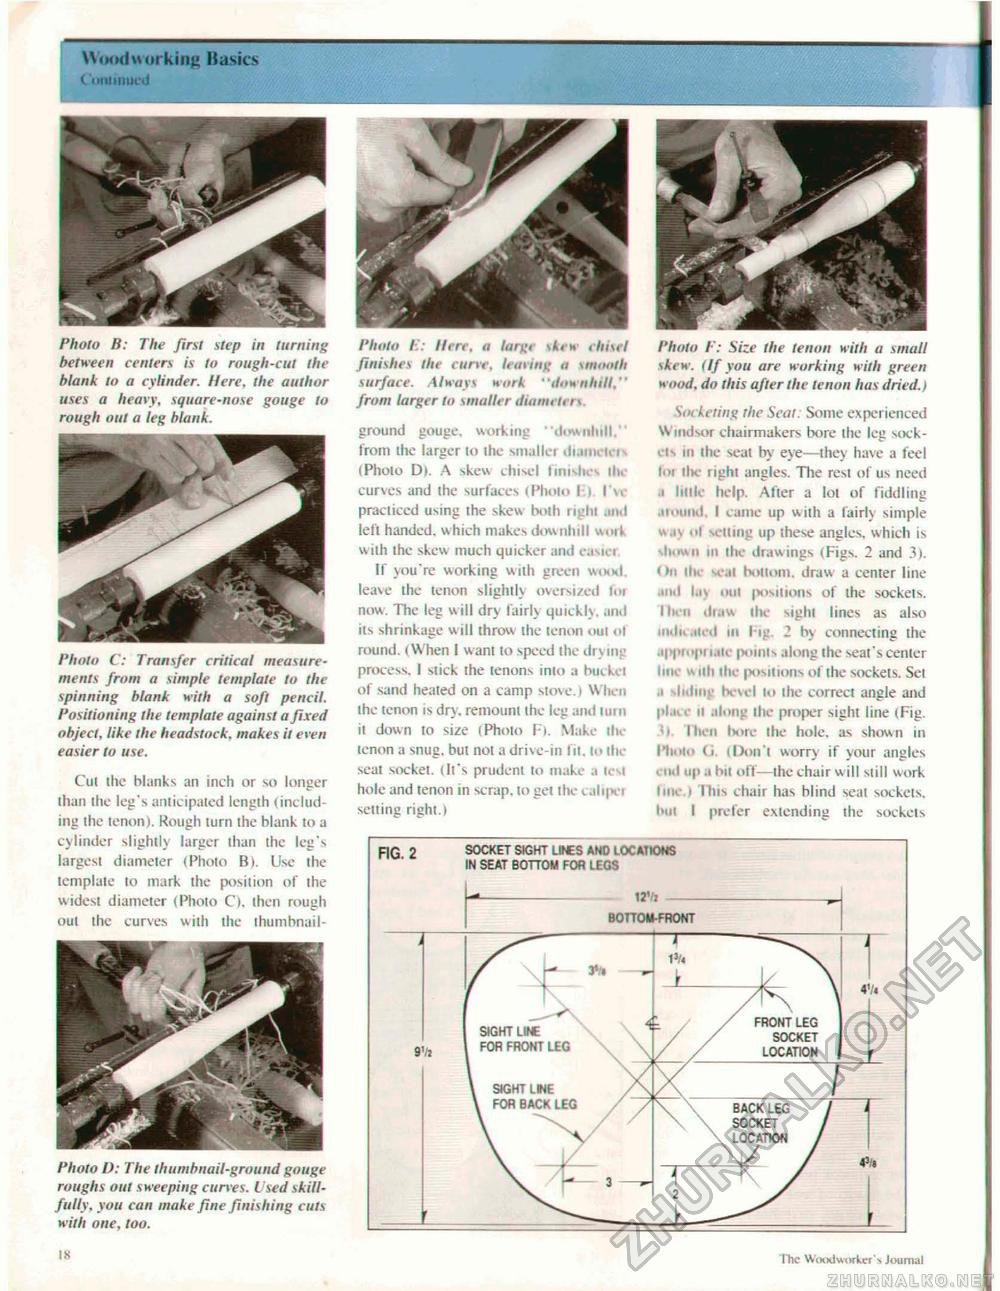
Woodworking Musics C'unitniietJ Photo B: The first step in turning between centers is to rough-cut Ihe blank to a cylinder. Here, the author uses a heavy, square-nose gouge to rough out a leg blank. Photo C: Transfer critical measurements from a simple template to the spinning blank with a soft pencil. Positioning the template against a fixed object, like the headstock. makes it even easier to use. Cul the blanks an inch or so longer than the leg's anticipated length (including the tenon). Rough turn the blank to a cylinder slightly larger than the leg's largest diameter (Photo B). Use the template to mark the position of the widest diameter (Photo C). then rough out the curves with the thumbnail- Photo L): The thumbnail-ground gouge roughs out sweeping curves. L sed skillfully, you can make fine finishing cuts with one, too. Photo I:: Here, a large skew chisel finishes the curve, leaving a smooth surface. Always work "downhill." from larger to smaller diameters. ground gouge, working "downhill." from the larger to the smaller diaim-u-is (Photo D). A skew chisel finishes ih> curves and the surfaces (Photo I t I'u practiced using the skew both right and left handed, which makes downhill woil w ith the skew much quicker and casiei If you're working with green wood, leave the tenon slightly oversi/ed toi now. The leg will dry fairly quickly, and ils shrinkage will throw the tenon out of round. (When 1 w ant to speed the drying process. I stick the tenons into a bucket of sand heated on a camp stove.) When the tenon is dry. remount the leg and turn it down to size fPhoto F). Make the tenon a snug, but not a drive-in l it. to the seat socket. (It's prudent to make a lesi hole and tenon in scrap, to get the cahpci setting right.) I'hoto /•'; Size the tenon with a small skew. (If you are working with green wood, do this after the tenon has dried.) Socketing rlie Seat: Some experienced W mdsor chairmakers bore the leg sockets in the seat by eye—they have a feel lot ihe right angles. The rest of us need i little help. After a lot of fiddling around, I came up with a fairly simple was o| selling up these angles, which is U.i" n in the draw ings (Figs. 2 and 3). On ilu seal hollom. draw a center line ■ ltd lay otii positions of the sockets. Mien draw the sight lines as also mdi< iiiil in Hg. 2 by connecting the .■l<|iii.|>ii,iu jxiinis along the seat's center line * nh the positions of the sockets. Set i h lin iwel to ihe correct angle and plai e n along ihe proper sight line (Fig. ■■' Mien bore the hole, as shown in Mioto (i (Don't worry if your angles end up a bit off—the chair will still work line i Mus chair has blind seat sockets, but I prefer extending the sockets IK The Woodworker's Journal |


