Woodworker's Journal 1993-17-3, страница 31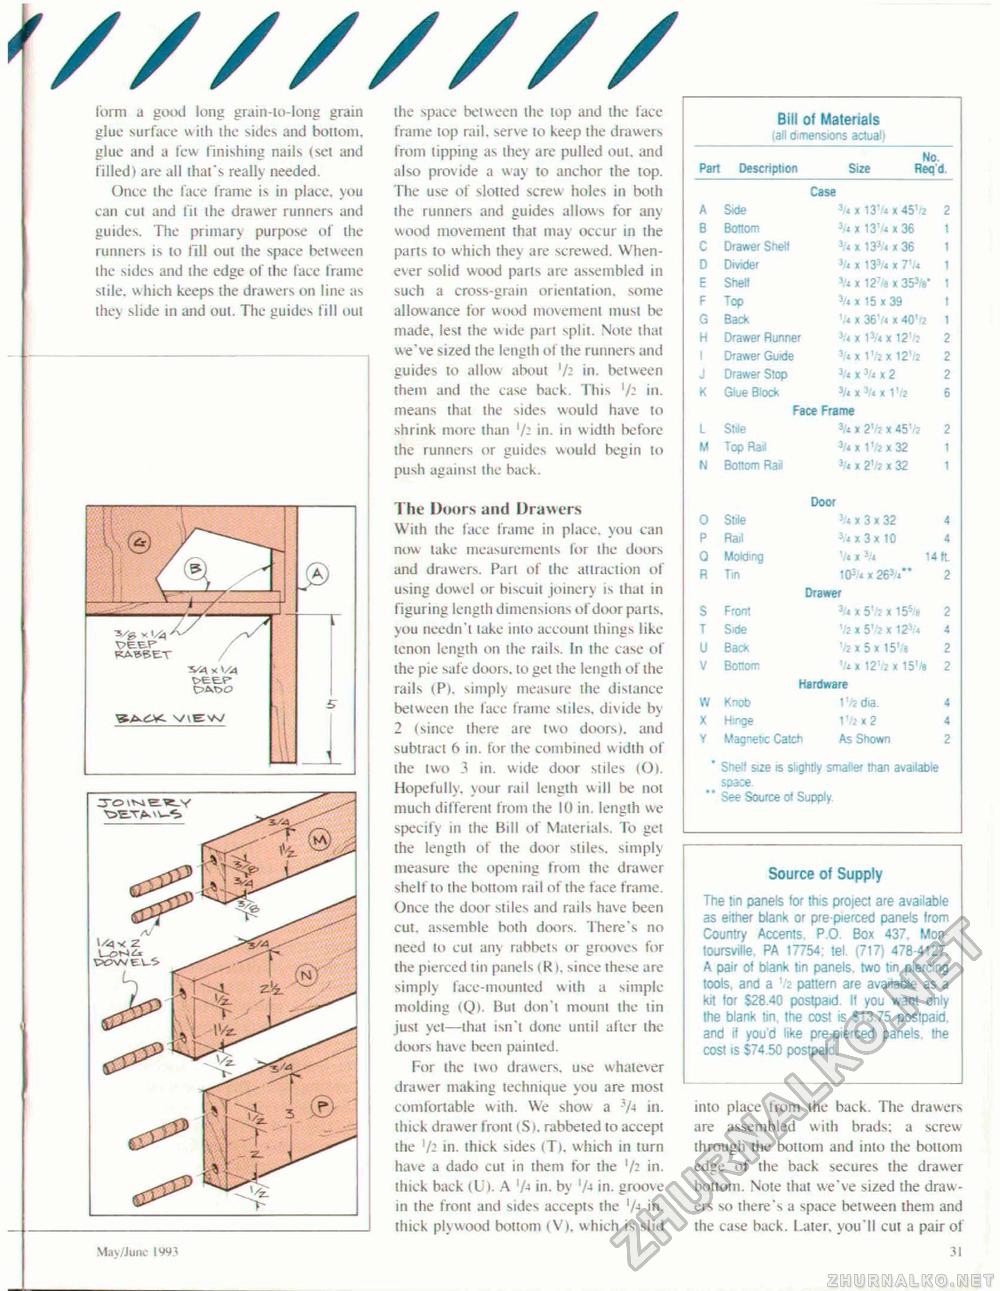
f//////// form a good long grain-lo-iong grain glue surface wiih the skies and bottom, glue and a few finishing nails (set and filled) are all that's really needed. Once the face frame is in place, you can cut and fit ihe drawer runners and guides. The primary purpose of the runners is 10 fill out the space between ihe sides and ihe edge of the face frame stile, which keeps the drawers on line as they slide in and oui. The guides fill out the space between the top and the face frame lop rail, serve to keep the drawers from lipping as ihey are pulled out. and also provide a way to anchor the top. The use of slotted screw holes in both the runners and guides allows for any wood movement that may occur in the parts to which they are screwed. Whenever solid wood parts are assembled in such a cross-grain orientation, some allowance for wood movement must be made, lest ihe wide pari spin. Note that we've sized the length of the runners and guides to allow about '/J in. between them and the case back. This '/- in. means thai the sides would have to shrink more than in. in w idth before ihe runners or guides would begin lo push against ihe back. The Doors and Drawers With the face frame in place, you can now lake measurements for the doors and drawers. Pari of ihe attraction of using dowel or biscuit joinery is lhal in figuring length dimensions of door parts, you needn't lake into account tilings like tenon length on the rails. In the case of ihe pie safe doors. 10 get the length of the rails (Pi, simply measure the distance between ihe face frame stiles, divide by 2 (since there are two doors), and subtraci 6 in. for the combined w idth of ihe two 3 in. wide door stiles (O). Hopefully, your rail length will be not much different from the 10 in. length we specify in the Bill of Materials. To get the length of ihe door stiles, simply measure ihe opening from the drawer shelf to the bottom rail of the face frame. Once the door stiles and rails have been cul, assemble both doors. There's no need to cut any rabbets or grooves for the pierced I in panels (R). since these are simply face-mounted with a simple molding (Q). But don't mount the tin just yet—lhal isn'i done until after the doors have been painted. For the two drawers, use whatever drawer making technique you are most comfortable with. We show a -V-t in. thick drawer front (S). rabbeted to accept the ]/i in. thick sides (T). which in turn have a dado cul in them tor the in. thick back (Ui. A 'A in. by '/a in. groove in the front and sides accepts the 1/a in. thick plywood bottom (V). which is slid
Source of Supply The tin panels for this project are available as either blank or pre-pierced panels Irom Country Accents, P.O. Bo* 437. Mon-toursville. PA 17754: tel. (717) 478-4127. A pair of blank (in panels, two tin piercing loots, and a Vs pattern are available as a kit for $28.40 postpaid. If you want only the blank lin, the cost is $13.75 postpaid, and if you'd like pre-pierced panels, the cost is $74 50 postpaid May/June IV93 inio place from the back. The drawers are assembled with brads; a screw through the bollom and into ihe bottom edge of the back secures the drawer bottom. Note ihat we've sized the drawers so there's a space between them and the case back. Later, you'll cut a pair of 31 |
||||||||||||||||||||||||||||||||||||||||||||||||||||||||||||||||||||||||||||||||||||||||||||||||||||||||||||||||||||||||||||||||||||||||||||||||||||


