Woodworker's Journal 1993-17-3, страница 29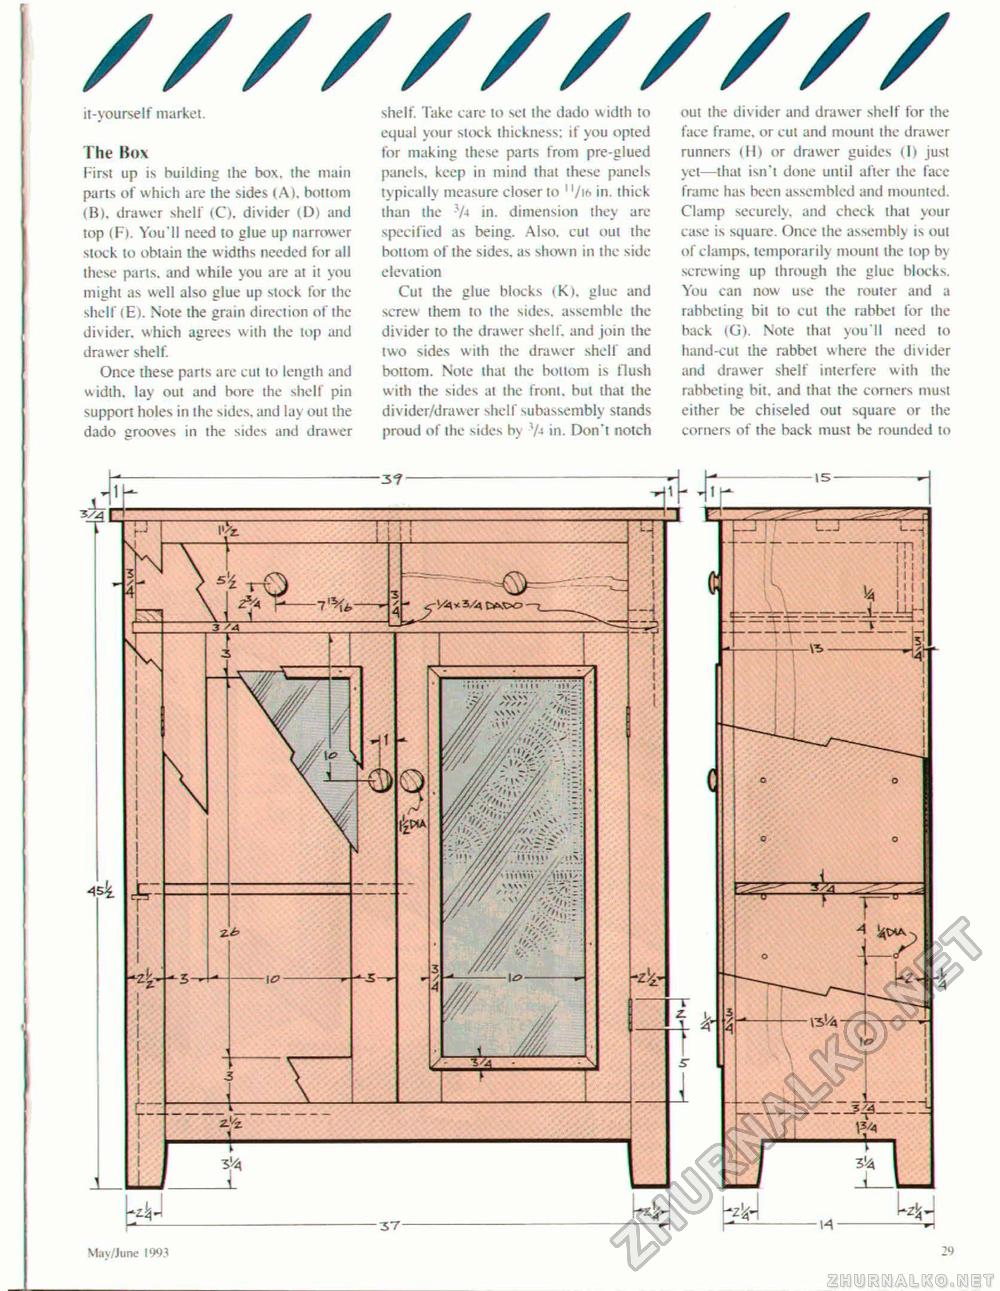
ir-yourseif market. The liox First up is building the box. the main parts of which are the sides (A), bottom <B). drawer shell (C). divider <D) and top (F). You'll need to glue up narrower stock to obtain the w idths needed for all these parts, and while you are at it you might as well also glue up stock for the shell' (E). Note the grain direction of the divider, which agrees with the top and drawer shelf. Once these parts are cut to length and width. lay out and bore the shelf pin support holes in the sides, and lay out the dado grooves in the sides and drawer shelf. Take care to set the dado w idth to equal your stock thickness: if you opted for making these parts from pre-glued panels, keep in mind that these panels typically measure closer 10 M/it> in. thick than the '/■• in. dimension they arc specified as being. Also, cut out the bottom of the sides, as show n in the side elevation Cut the glue blocks lK>. glue and screw litem 10 the sides, assemble ihe divider to the drawer shelf, and join ihe two sides with the drawer shelf and bottom. Note that the boiiom is flush with the sides at the front, bul lhat the divider/drawer shelf subassembly stands proud of the sides hy ty* in. Don't notch out the divider and drawer shelf for the face frame, or cut and mount the drawer runners (H) or drawer guides <I> just yet—lhal isn't done until alter the face frame has been assembled and mounted. Clamp securely, and check lhal your case is square. Once the assembly is oui of clamps, temporarily mount the top by screwing up ihrough the glue blocks. You can now use the router and a rabbeting bil to cut the rabbet for Ihe back (G). Note that you'll need to hand-cut the rabbet where the divider and drawer shelf interfere with the rabbeting bit. and that the corners must either be chiseled our square or the corners of the back must be rounded lo Mav/June 1993 29 |


