Woodworker's Journal 1993-17-3, страница 49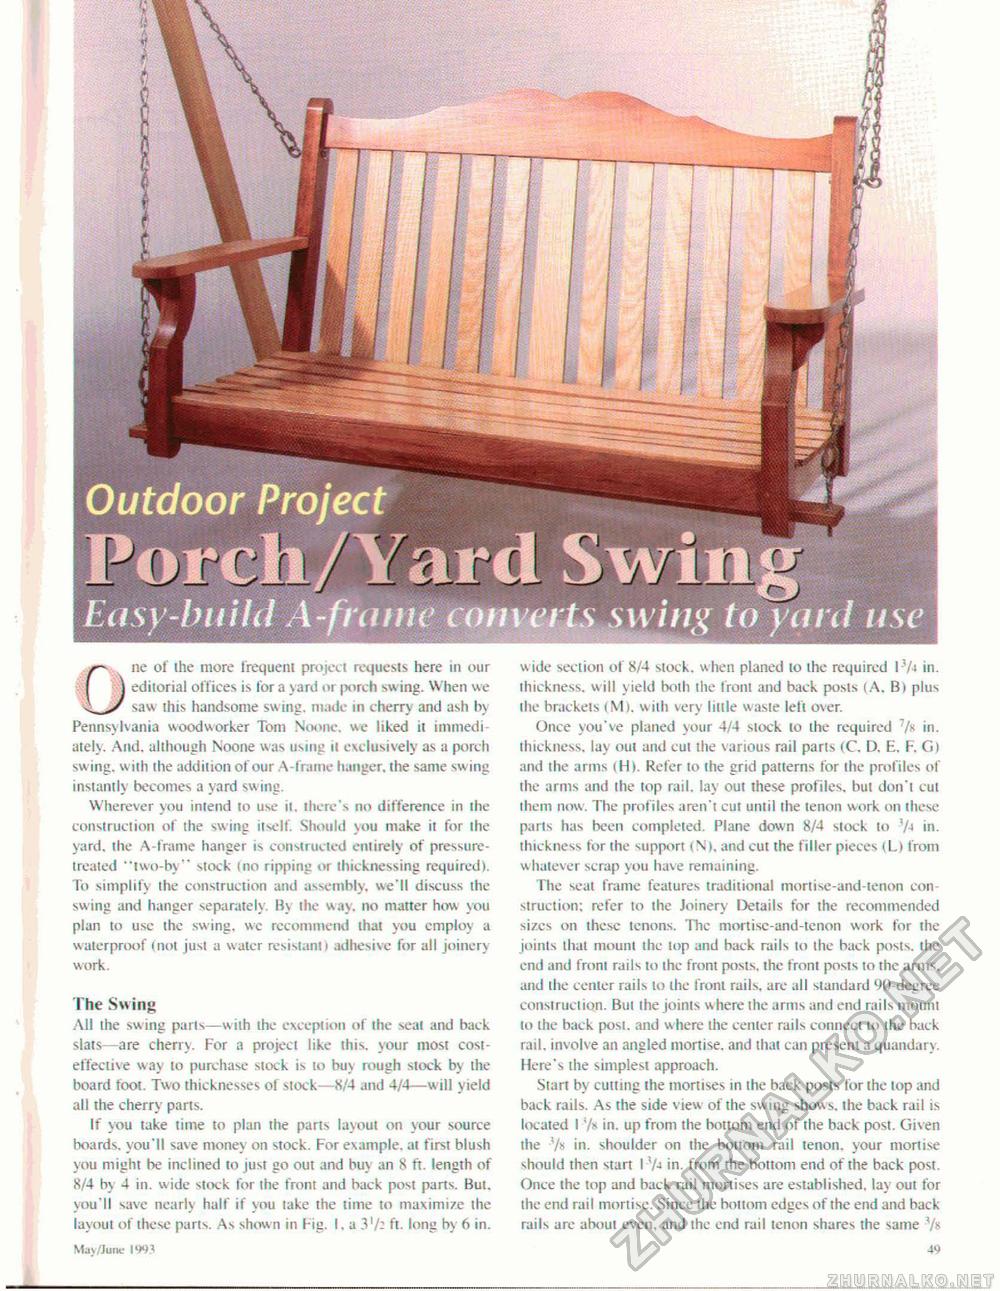
One of ihe more frequent projecl requests here in our editorial offices is for a yard or porch swing. When we saw this handsome swing, made in cherry and ash by Pennsylvania woodworker Tom N'oonc. we liked it immediately. And, although Noone was uxiiil' it exclusively as a porch sw ing, w ith the addition of our A-frame hanger, the same swing instantly becomes a yard swing. Wherever you intend to use it. there's no difference in the construction of ihe swing itself. Should you make it for the yard, the A-frame hanger is constructed entirely of pressure-treated "two-by" stock Ino ripping or thicknessing required!. To simplify the construction and assembly, we'll discuss the swing and hanger separately. By the way, no matter how you plan to use the swing, we recommend that you employ a waterproof (not jusl a water resistant) adhesive for all joinery work. The Swing All the swing parls—with the exception of the seat and back slats—are cherry. For a project like this, your most cost-effective way to purchase stock is to buy rough stock by the board toot. Two thicknesses of stock—8/4 and 4/4—will yield all the cherry parts. If you take time to plan the parts layout on your source boards, you'll save money on stock. For example, at first blush you might be inclined to just go out and buy an 8 ft. length of 8/4 by 4 in. wide stock for the front and back post parts. But, you'll save nearly half if you take the time to maximize the layout of these parts. As shown in Fig. I. a 3V- ft. long by (i in. May/June IW3 49 wide section of 8/4 slock, when planed lo the required 17i in. thickness, will yield both the front and back posts (A. B) plus the brackets (M). w ith very little waste left over. Once you've planed your 4/4 stock to the required 7/ts in. thickness, lay out and cut the various rati parts (C. D. E. F. G) and the arms (H). Refer to the grid patterns for ihe profiles of the arms and the top rail, lay out these profiles, but don't cut them now. The profiles aren't cut until the tenon work on these parls has been completed. Plane down 8/4 stock to 7-t in. thickness tor the support (\ I. and cut the filler pieces (L) from whatever scrap you have remaining. The seal frame features traditional mortise-and-tenon construction: refer to the Joinery Details for the recommended sizes on these tenons. 'Hie mortise-and-tenon work for the joints that mount the lop and back rails to the back posts, the end and front rails to the front posts, the front posts to the arms, and the center rails to the from rails, are all standard 90-degree construction. But ihe joints where the arms and end rails mount la ihe back post, and where the center rails connect to the back rail, involve an angled mortise, and that can present a quandary. Here's the simplest approach. Start by cutting the mortises in the back posts for the lop and back rails. As the side view of the swing shows, the back rail is located I 7* in. up from the bottom end of Ihe back post. Given the 7s in. shoulder on the bottom rail tenon, your mortise should then start I 7-» in. from the bottom end of the back post. Once the lop and back rail mortises are established, lay out for the end rail mortise. Since the boitom edges of the end and back rails are aboul even, and the end rail tenon shares the same -7« |


