Woodworker's Journal 1993-17-5, страница 42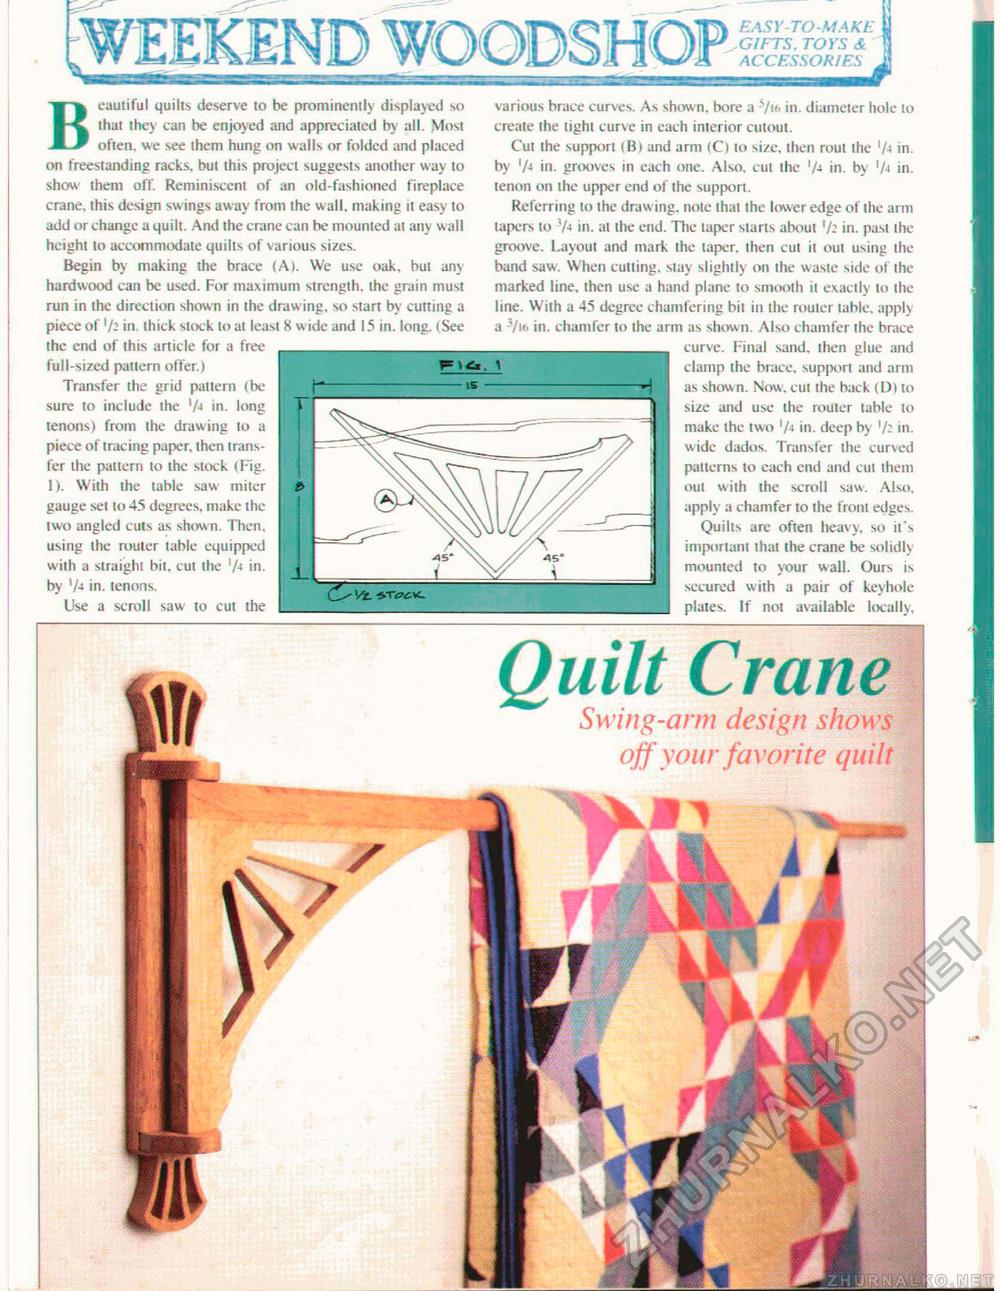
EASY-TO-MAKE .GIFTS. TOYS & ACCESSORIES Beautiful quilts deserve to be prominently displayed so that they can be enjoyed and appreciated by all. Most often, we see them hung on walls or folded and placed on freestanding racks, but this project suggests another way to show them off. Reminiscent of an old-fashioned fireplace crane, this design swings away from the wall, making it easy to add or change a quilt. And the crane can be mounted at any wall height lo accommodate quilts of various sizes. Begin by making the brace (A). We use oak. but any hardwood can be used. For maximum strength, the grain must run in the direction shown in the drawing, so start by cutting a piece ofin. thick slock lo at least X wide and 15 in, long. iSee the end of this article for a free full-sized pattern offer.) Transfer the grid pattern (be sure to include the 'A in. long tenons) from the drawing to a piece of tracing paper, then transfer the pattern lo the stock (Fig. 1). With the lable saw miter gauge set lo 45 degrees, make the two angled cuts as shown. Then, using ihe router lable equipped with a straight bit. cut the '/+ in. by 'A in. tenons. Use a scroll saw to cut the various brace curves. As shown, bore a Vift in. diameter hole to create the tight curve in each interior cutout. Cut the support (B) and arm (Cl lo size, then rout the in. by 'A in. grooves in each one. Also, cut the in. by '/•» in. tenon on the upper end of the support. Referring lo the drawing, note that the lower edge of the arm tapers to 7-4 in. at the end. The taper starts about 7z in. past ihe groove. Layout and mark (he taper, then cut it out using the band saw. When cutting, stay slightly on the waste side of the marked line, then use a hand plane to smooth it exactly to the line. With a 45 degree chamfering bit in the router lable. applv a in. chamfer to the arm as shown. Also chamfer the brace curve. Final sand, then glue and clamp the brace, support and arm as shown. Now. cut the back (D) to size and use the router lable to make ihe two 7-t in. deep by in. wide dados. Transfer the curved patterns to each end and cut them oul with the scroll saw. Also, apply a chamfer to the front edges. Quilts are often heavy, so it's important that the crane be solidly mounted to your wall. Ours is secured with a pair of keyhole plaies. If not available locally. Quilt Crane Swing-arm design shows off your favorite quilt |


