Woodworker's Journal 1993-17-6, страница 54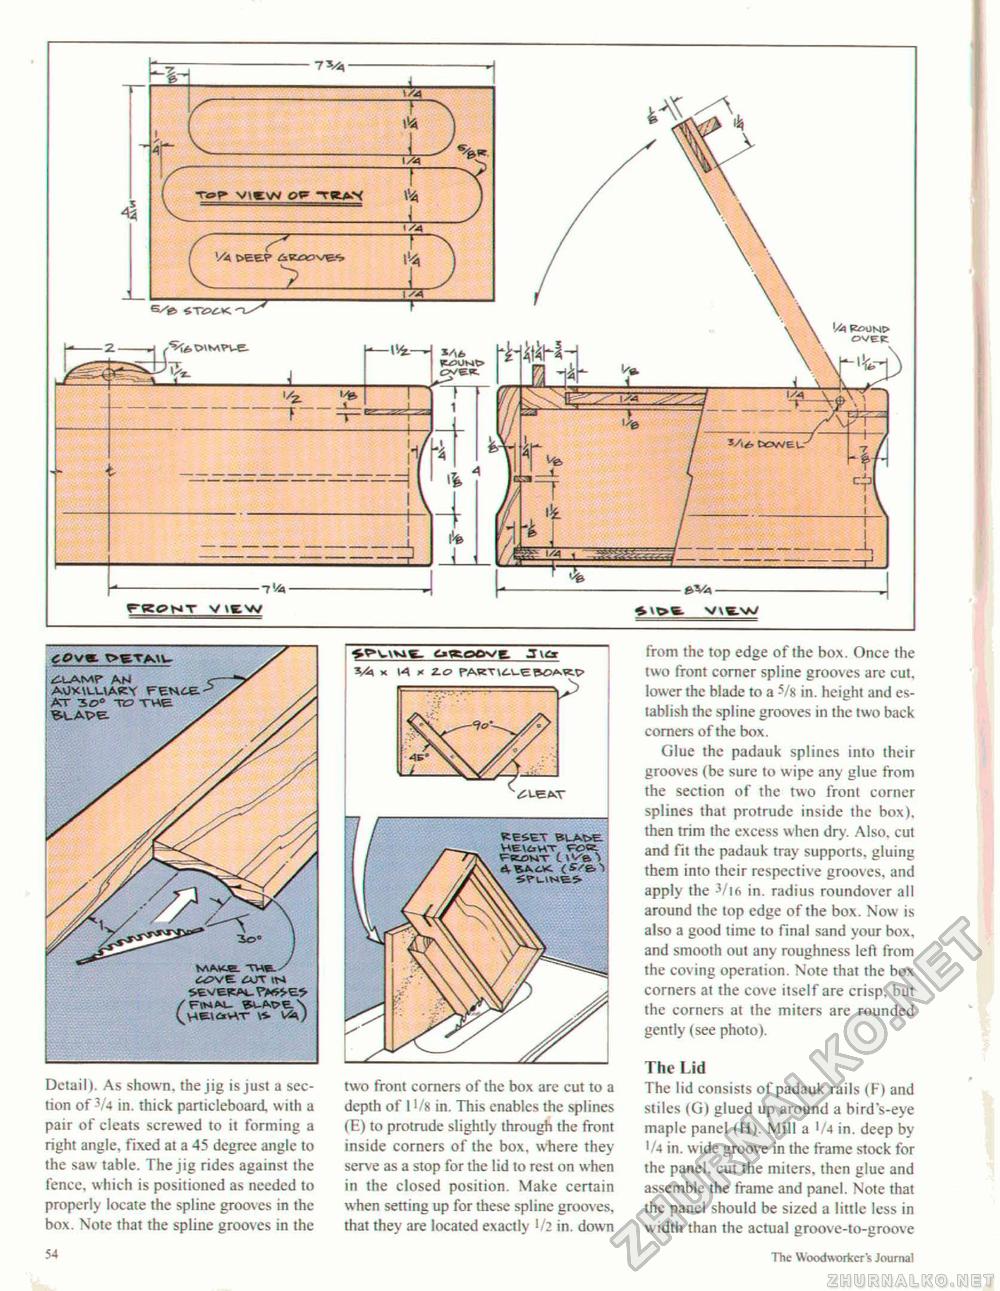
Detail). As shown, the jig is just a section of -/4 in. thick particleboard, with a pair of cleats screwed to it forming a right angle, fixed at a 45 degree angle to the saw table. The jig rides against the fence, which is positioned as needed to properly locate the spline grooves in the box. Note that the spline grooves in the two front corners of the box are cut to a depth of 1 >/s in. This enables the splines (E) to protrude slightly through the front inside corners of the box, where they serve as a stop for the lid to rest on when in the closed position. Make certain when setting up for these spline grooves, that they are located exactly '/2 in. down from the top edge of the box. Once the two front corner spline grooves arc cut. lower the blade to a 5/8 in. height and establish the spline grooves in the two back corners of the box. Glue the padauk splines into their grooves (be sure to wipe any glue from the section of the two front corner splines that protrude inside the box), then trim the excess when dry. Also, cut and fit the padauk tray supports, gluing them into their respective grooves, and apply the 3/i6 in. radius roundover all around the top edge of the box. Now is also a good time to final sand your box, and smooth out any roughness left from the coving operation. Note that the box corners at the cove itself are crisp, but the corners at the miters are rounded gently (see photo). The Lid The lid consists of padauk rails (F) and stiles (G) glued up around a bird's-eye maple panel (H). Mill a 1/4 in. deep by 1/4 in. wide groove in the frame stock for the panel, cut the miters, then glue and assemble the frame and panel. Note that the panel should be sized a little less in width than the actual groove-to-groove 7f> Tin.' Woodworker's Journal |


