Woodworker's Journal 1994-18-1, страница 18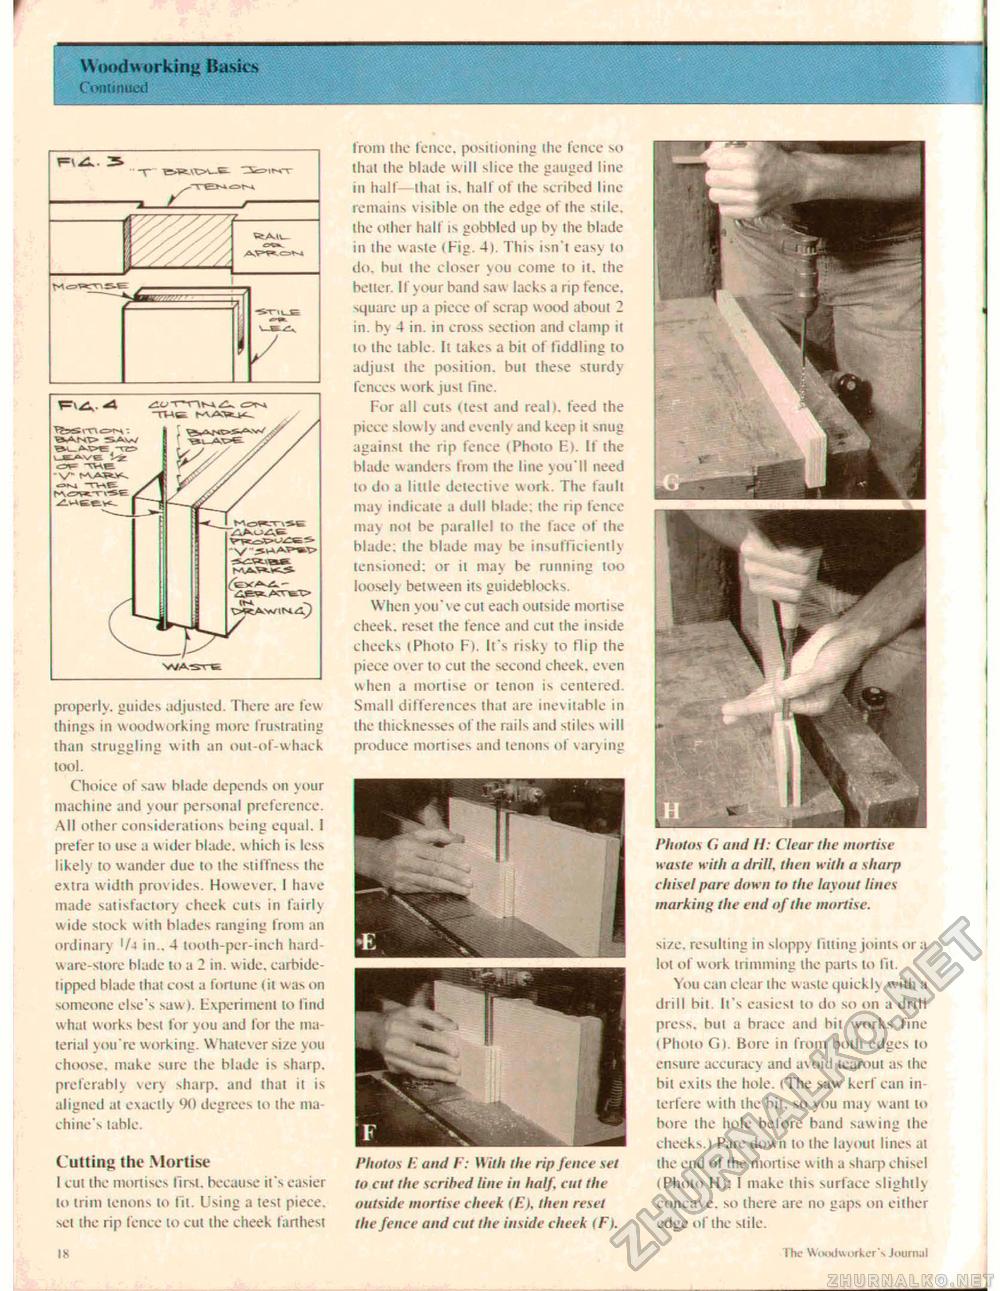
Woodworking Basics Continued from the fence, positioning the fence so that the blade will ^-lice the gauged line in half—that is. half of the scribed line remains visible on the edge of the side, the other half is gobbled up by the blade in the waste (Fig. 4). This isn't easy to do. but the closer you come to it. the better. If your band saw lacks a rip fence, square up a piece of scrap w ood about 2 in. by 4 in. in cross section and clamp it lo the table. It lakes a bit of fiddling to adjust ihe position, but these sturdy fences work just line. For all cms (test and reall. feed the piece slowly and evenly and keep it »nug against the rip fence (Pholo F>. If the blade wanders from the line you'll need lo do a little detective work. The fault may indicate a dull blade: ihe rip fence may not be parallel lo the face of ihe blade: ihe blade may be insufficiently tensioned: or it may be running too loosely between its guideblocks. When you've cui each outside mortise cheek, reset ihe fence and cut the inside checks (Photo F). It's risky to Hip the piece over to cut the second cheek, even when a mortise or tenon is centered. Small differences that are inevitable in the thicknesses of the rails and siiles w ill produce mortises and lenons of varying Photos E and F: With the rip fence set to cut the scribed line in half, cut the outside mortise cheek tE). then reset the fence and cut the inside cheek (F). Photos G and II: Clear the mortise waste with a drill, then with a sharp chisel pare down to the layout lines marking the end of the mortise. si/e. resulting in sloppy filling joints or a lot of work trimming the parts to fit. You can clear the w aste quickly with a drill bit. It's easiest lo do so on a drill press, hut a brace and hit works fine (Pholo Gt. Bore in from both edges to ensure accuracy and avoid learoui as ihe bit exits ihe hole. (The saw kerf can interfere with ihe bit. so you may warn to bore the hole before band sawing the cheeks.i Pare down to the layout lines at the end of the mortise w ith a sharp chisel i Photo I!>: I make this surface slightly concave, so there are no gaps on either edge of the sitle. The Woodworker's Journal properly, guides adjusted. There are few things in woodworking more frustrating than struggling with an oui-of-whack tool. Choice of saw blade depends on your machine and your personal preference. All other considerations being equal. I prefer to use a wider blade, which is less likely to wander due to the stillness the extra width prov ides. However. I have made satisfactory cheek cuts in fairly wide stock with blades ranging from an ordinary '/-i in., 4 tooth-per-inch hardware-store blade to a 2 in. w ide, carbide-tipped blade that cost a fortune I it was on someone else's saw ). Experiment to find w hai w orks best for y ou and for the material you're working. Whatever size you choose, make sure the blade is sharp, preferably very sharp, and that it is aligned al exactly 9(1 degrees lo the machine's lable. Cutting the Mortise I cut ihe mortises first, because it's easier to irim tenons to lit. Using a test piece, set ihe rip fence to cut the cheek farthest .">8 |


