Woodworker's Journal 1994-18-1, страница 32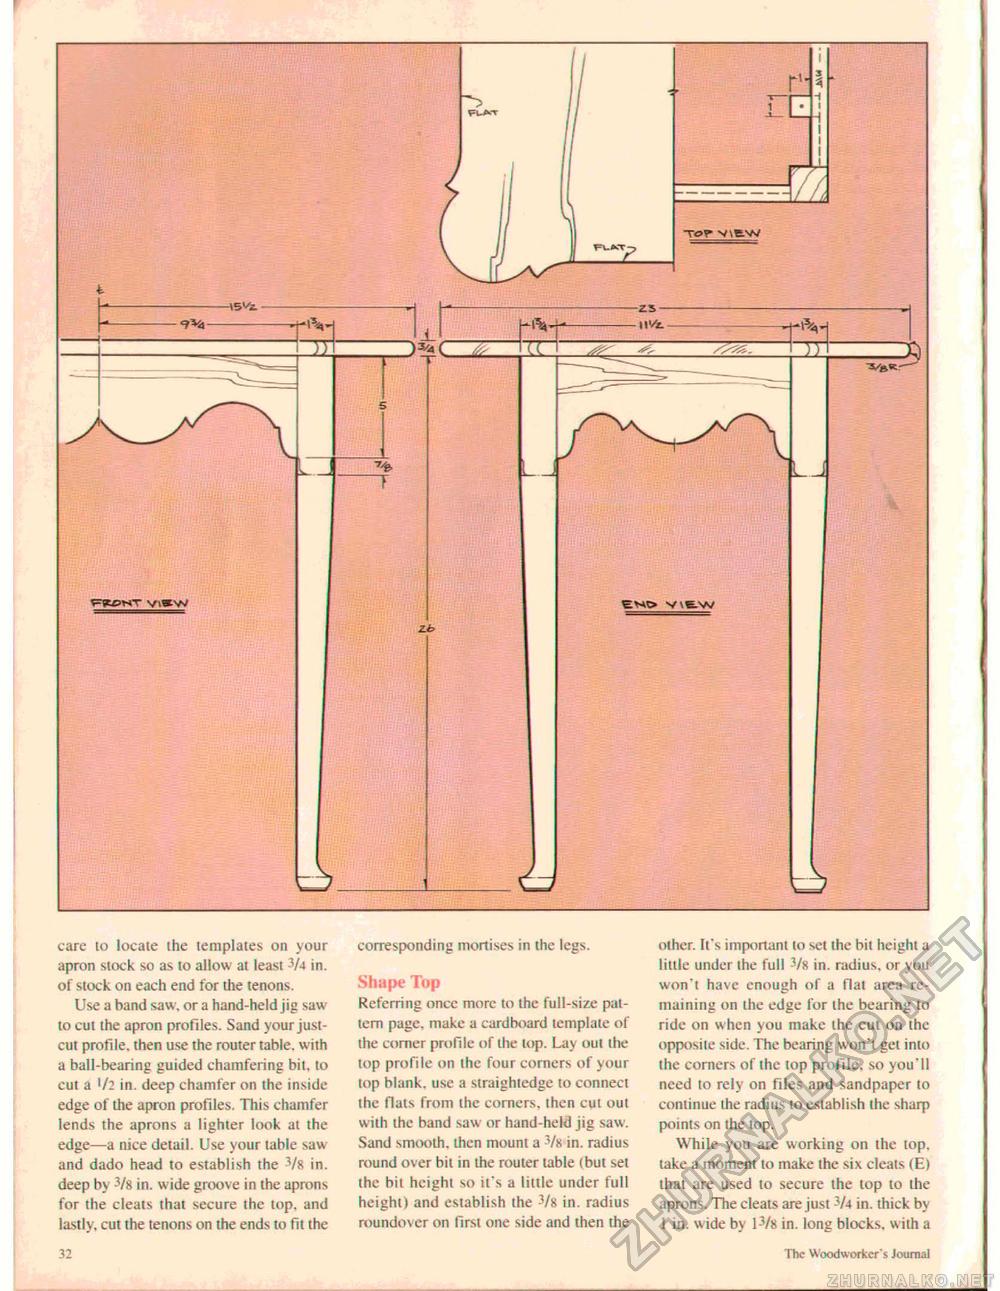
care 10 iocaie ihe templates on your apron slock so as to allow al least in. of stock on each end for the tenons. Use a band saw, or a hand-held jig saw to cul the apron profiles. Sand your just-cut profile, then use the router table, with a ball-bearing guided chamfering bit, to cut a '/2 in. deep chamfer on the inside edge of the apron profiles. This chamfer lends the aprons a lighter look at the edge—a nice detail. Use your table saw and dado head to establish the 3/8 in. deep by Vi in. wide groove in the aprons for the cleats that secure the top, and lastly, cut the tenons on the ends to fit the corresponding mortises in the legs. Shape Top Referring once more to the full-size pattern page, make a cardboard template of the comer profile of ihe top. Lay out ihe top profile on the four corners of your top blank, use a straightedge to connect the flats from ihe corners, then cut out with the band saw or hand-held jig saw. Sand smooth, ihen mount a in. radius round over bil in ihe router table (but set the bil height so it's a little under full height) and establish the in. radius roundov er on first one side and then die other, It's important lo set the bit height a little under ihe full 3/s in. radius, or you won't have enough of a flat area remaining on the edge for ihe bearing to ride on when you make the cul on the opposite side. The bearing won't get into the corners of the lop profile, so you'll need to rely on files and sandpaper 10 continue the radius to establish the sharp points on the top. While you are working on ihe top, take a moment to make ihe six cleats (E) that are used to secure the top to the aprons. The cleats are just V4 in. thick by 1 in. wide by lJ/8 in. long blocks, wilh a .">8 The Woodworker's Journal |


