Woodworker's Journal 1994-18-1, страница 56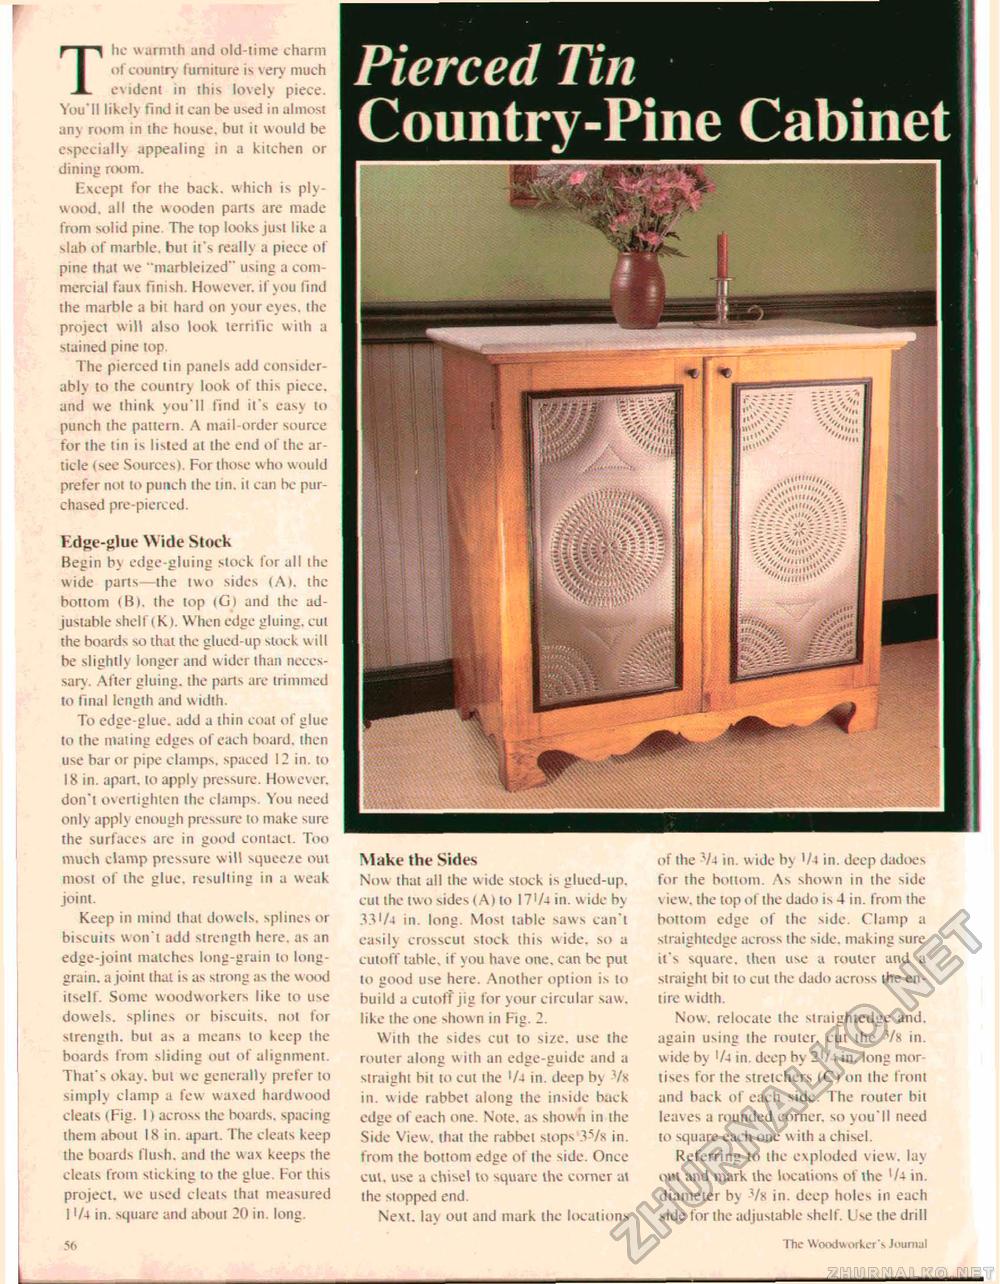
The warmth and old-lime charm of country l umiture is very much evident in this lovely piece. You'll likely find it can be used in almost ans room in the house, but it would be especially appealing in a kitchen or dining room. Except for the back, which is plywood. all the wooden parts are made from solid pine. The top looks just like a slab of marble, hut it's really a piece of pine that we "marbleized" using a commercial faux finish. However, if you find the marble a bit hard on your eyes, the project will also look terrific with a stained pine lop The pierced tin panels add considerably to the country look of this piece, and we think you'll find it's easv to punch the pattern. A mail-order source for the tin is listed at the end of the article (see Sources). For those who would prefer not lo punch the tin. it can be purchased pre-pierced. F.dge-glue W ide Stock Begin by edge-gluing slock for all the wide parts—the two sides (A), the bottom (B). the lop tGl and the adjustable shelfl K >. When edge gluing, cul the boards so thai the glued-up stock will be slightly longer and wider than necessary. After gluing, the parts are trimmed to final length and w idih. To edge-glue, add a thin coal of glue lo the mating edges of each board, then use bar or pipe clamps, spaced 12 in. to 18 in. apart, to apply pressure. However, don'l overtighten the clamps. You need only apply enough pressure to make sure the surfaces arc ill good contact. Too much clamp pressure will squeeze out most of ihe glue, resulting in a weak joint. Keep in mind thai dowels, splines or biscuits won't add sirengih here, as an edge-joint matches long-grain lo long-grain. a joint lhat is as strong as the wood itself. Some woodworkers like to use dowels, splines or biscuits, not for strength, but as a means to keep the boards from sliding out of alignment. That's okay, but we generally prefer lo simply clamp a few waxed hardwood cleats (Fig. I) across the hoards, spacing them about 18 in. apart. The cleats keep the boards flush, and the wax keeps the cleats from slicking to the glue. For this project, we used cleats that measured I V-t in. square and about 20 in. long. Make the Sides Now lhat all the wide stock is glued-up. cul the two sides (A) to 17'A in. wide bv 33'Aj in. long. Most table saws can't easilv crosscut stock this wide, so a cutoff table, if you have one, can be put to good use here. Another option is to build a cutoff jig for your circular saw. like the one shown in Fig. 2. With ihe sides cut lo size, use the router along vv nh an edge-guide and a straight bit to cut the 'A in. deep by -Vx in. wide rabbet along the inside back edge of each one. Note, as shown in the Side View, lhat the rabbet slops .Ws in. from the bottom edge of the side. Once cut, use a chisel to square the corner at the stopped end. Next, lav out and mark the locations of ihe V4 in. w ide by '/4 in. deep dadoes for the bottom. As shown in the side view, the top of the dado is 4 in. from the bottom edge of the side. Clamp a straightedge across the side, making sure it's square, then use a router and a straight bit to cut the dado across the entire width. Now, relocate ihe straightedge and. again using the router, cut the Vs in. wide by 74 in. deep by 2'/4 in. long mortises for the stretchers <C| on the from and back of each side. The router bit leaves a rounded corner, so you'll need to square each one with a chisel. Referring to the exploded view, lay out and mark ihe locations of the l/4 in. diameter by Vx in. deep holes in each side for the adjustable shelf. Use the drill 56 The W<K*iworl,er"s Journal Pierced Tin Country-Pine Cabinet V".....:>\i ............. ?fs5SP= = - xmmi. |


